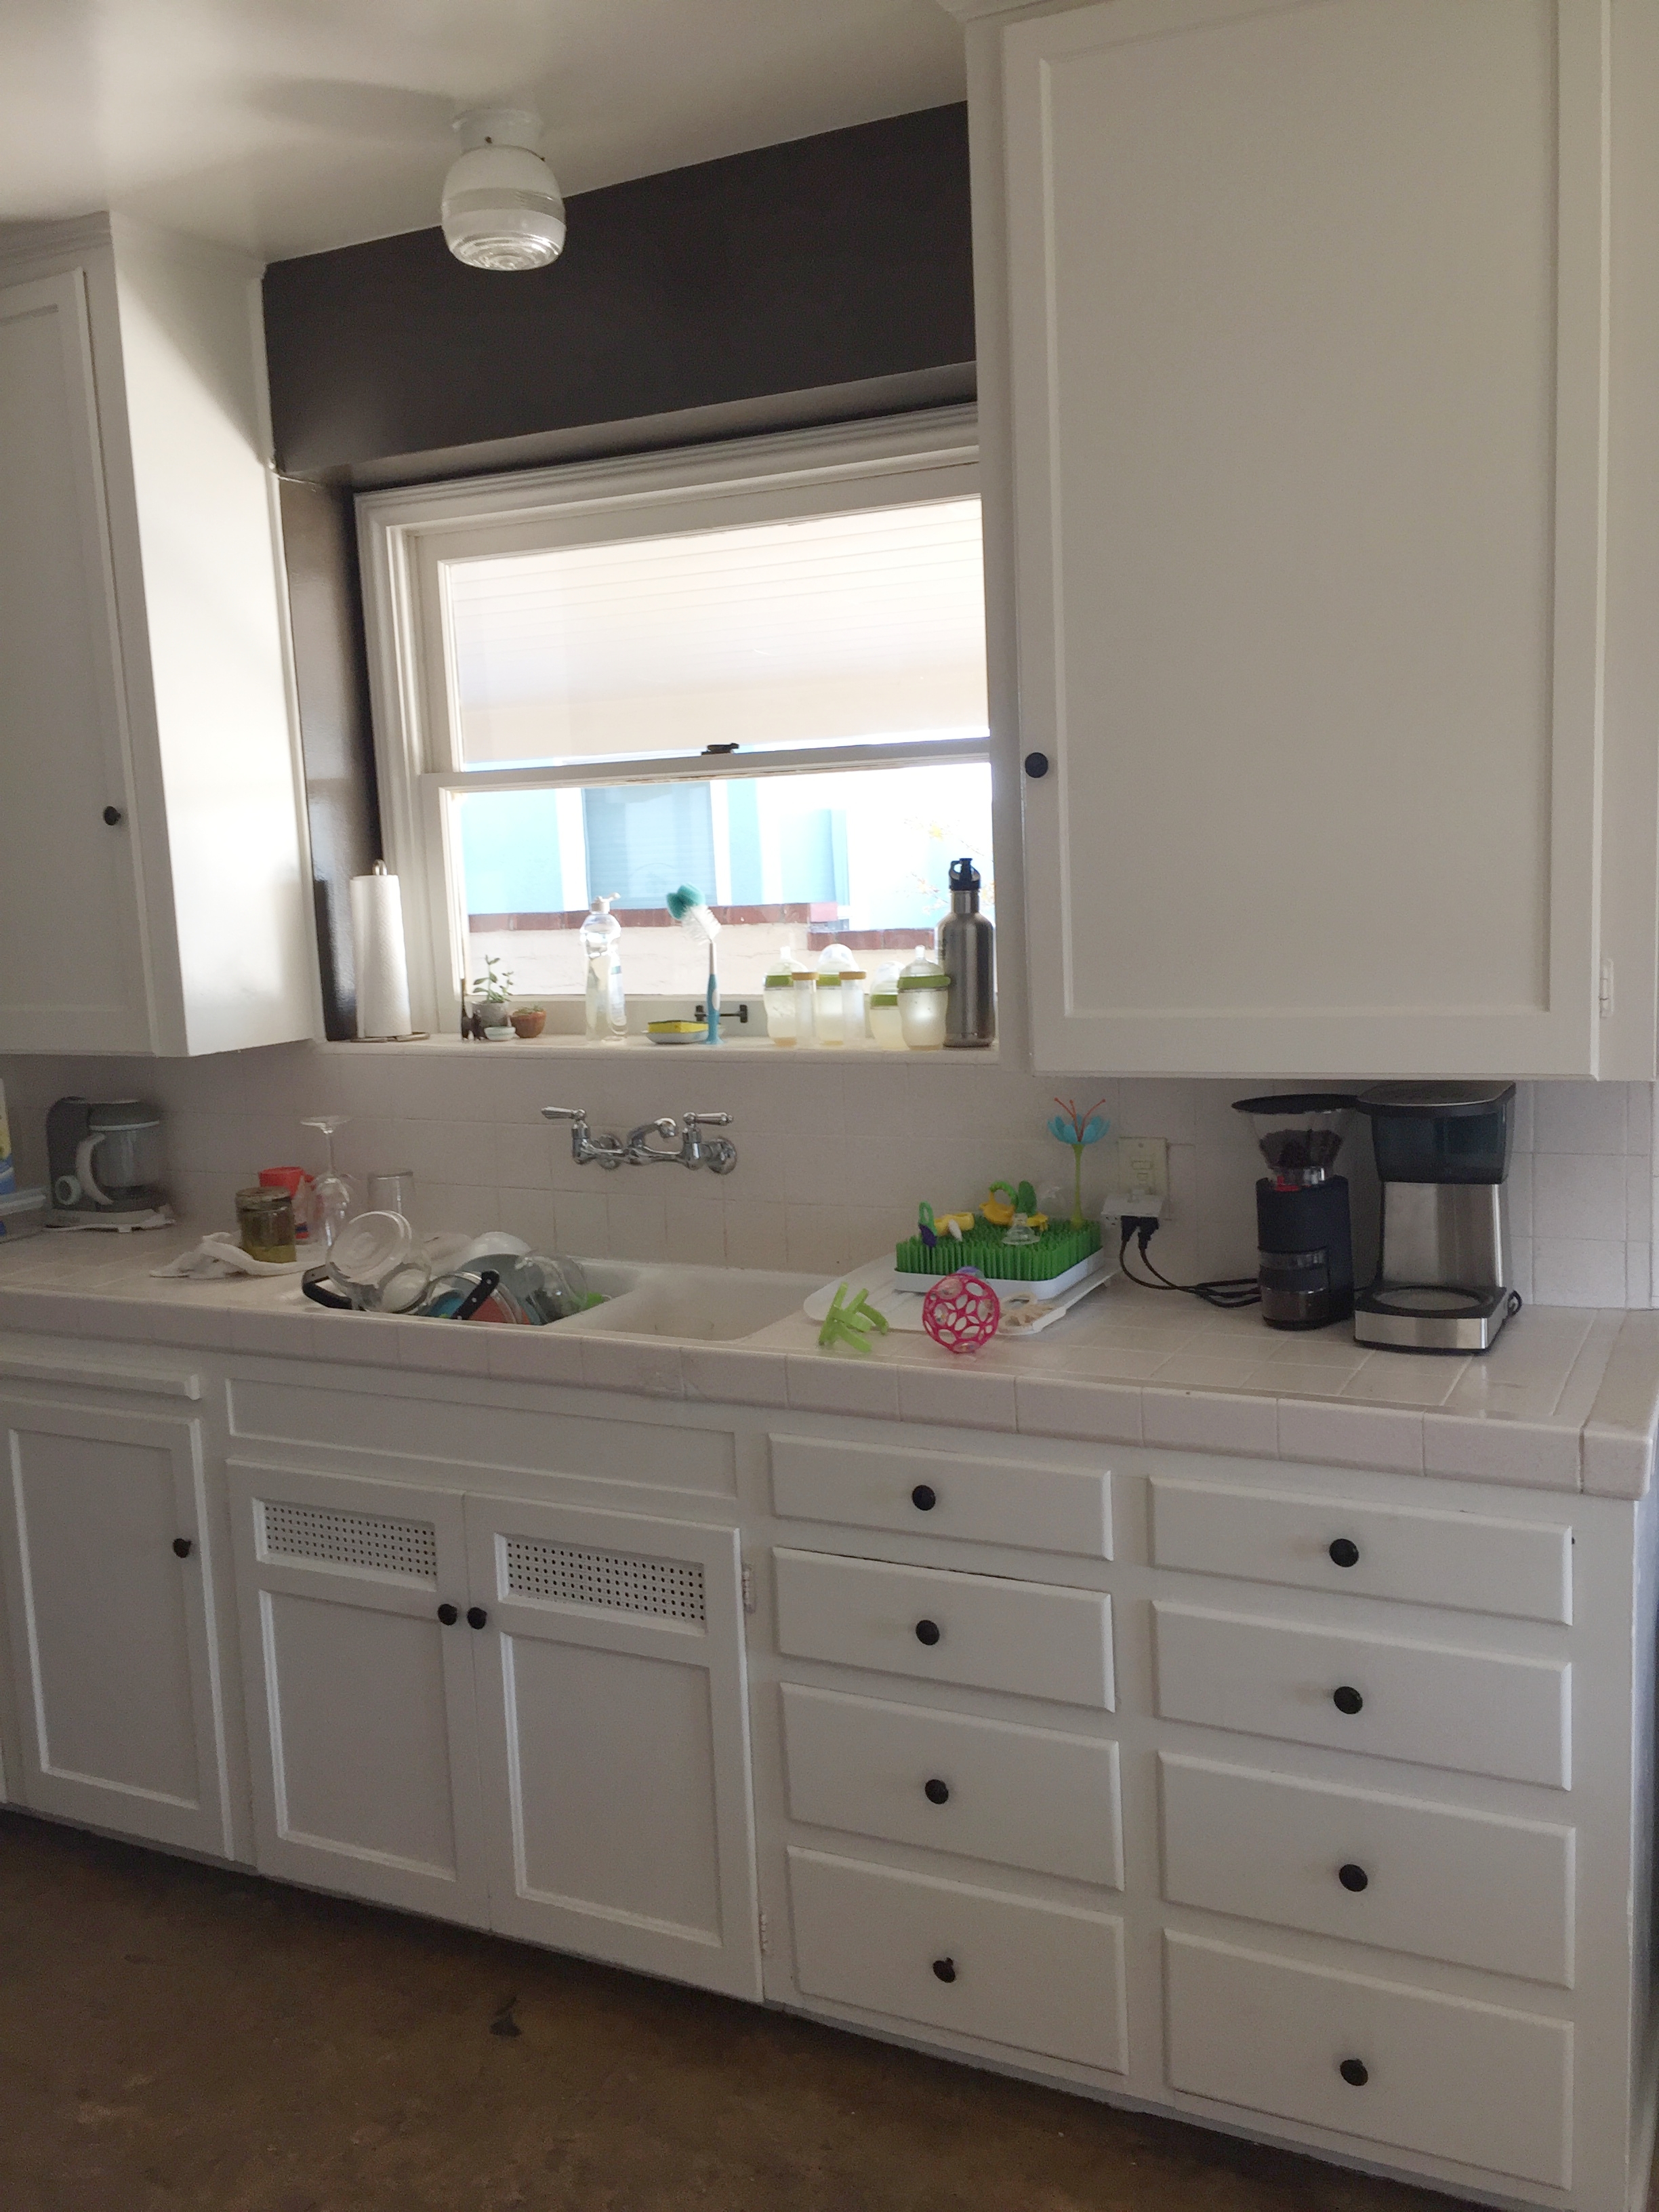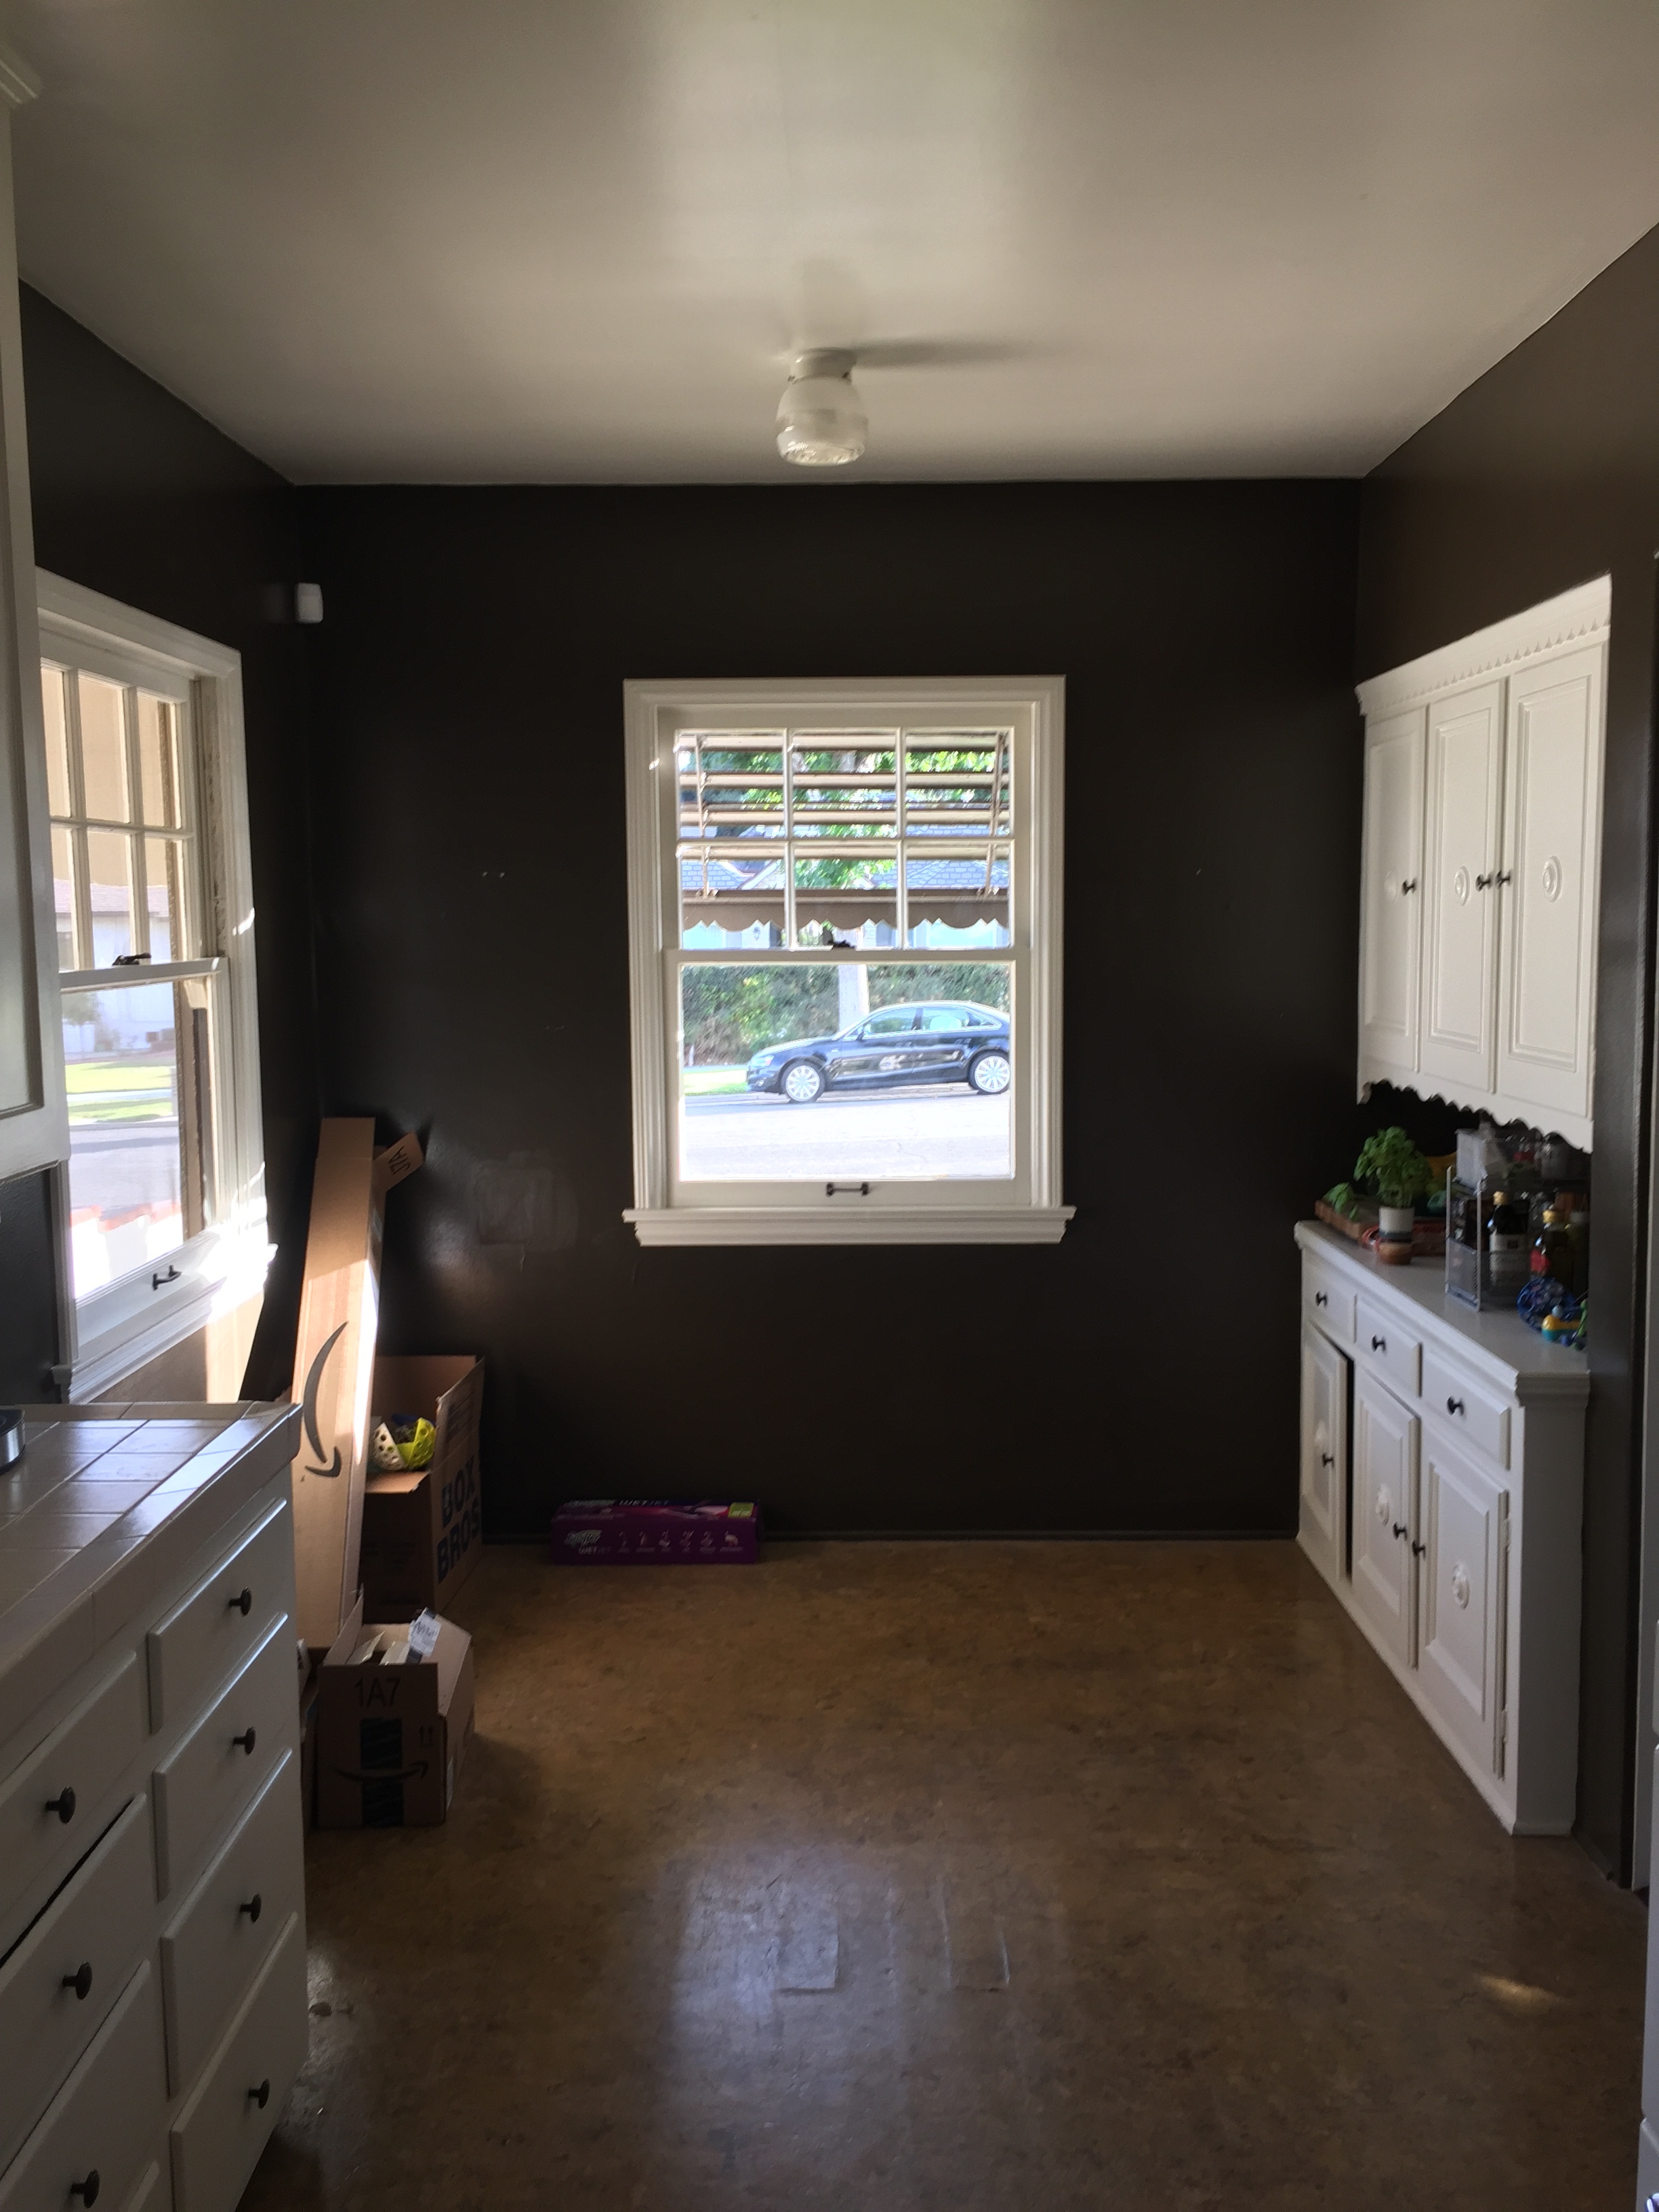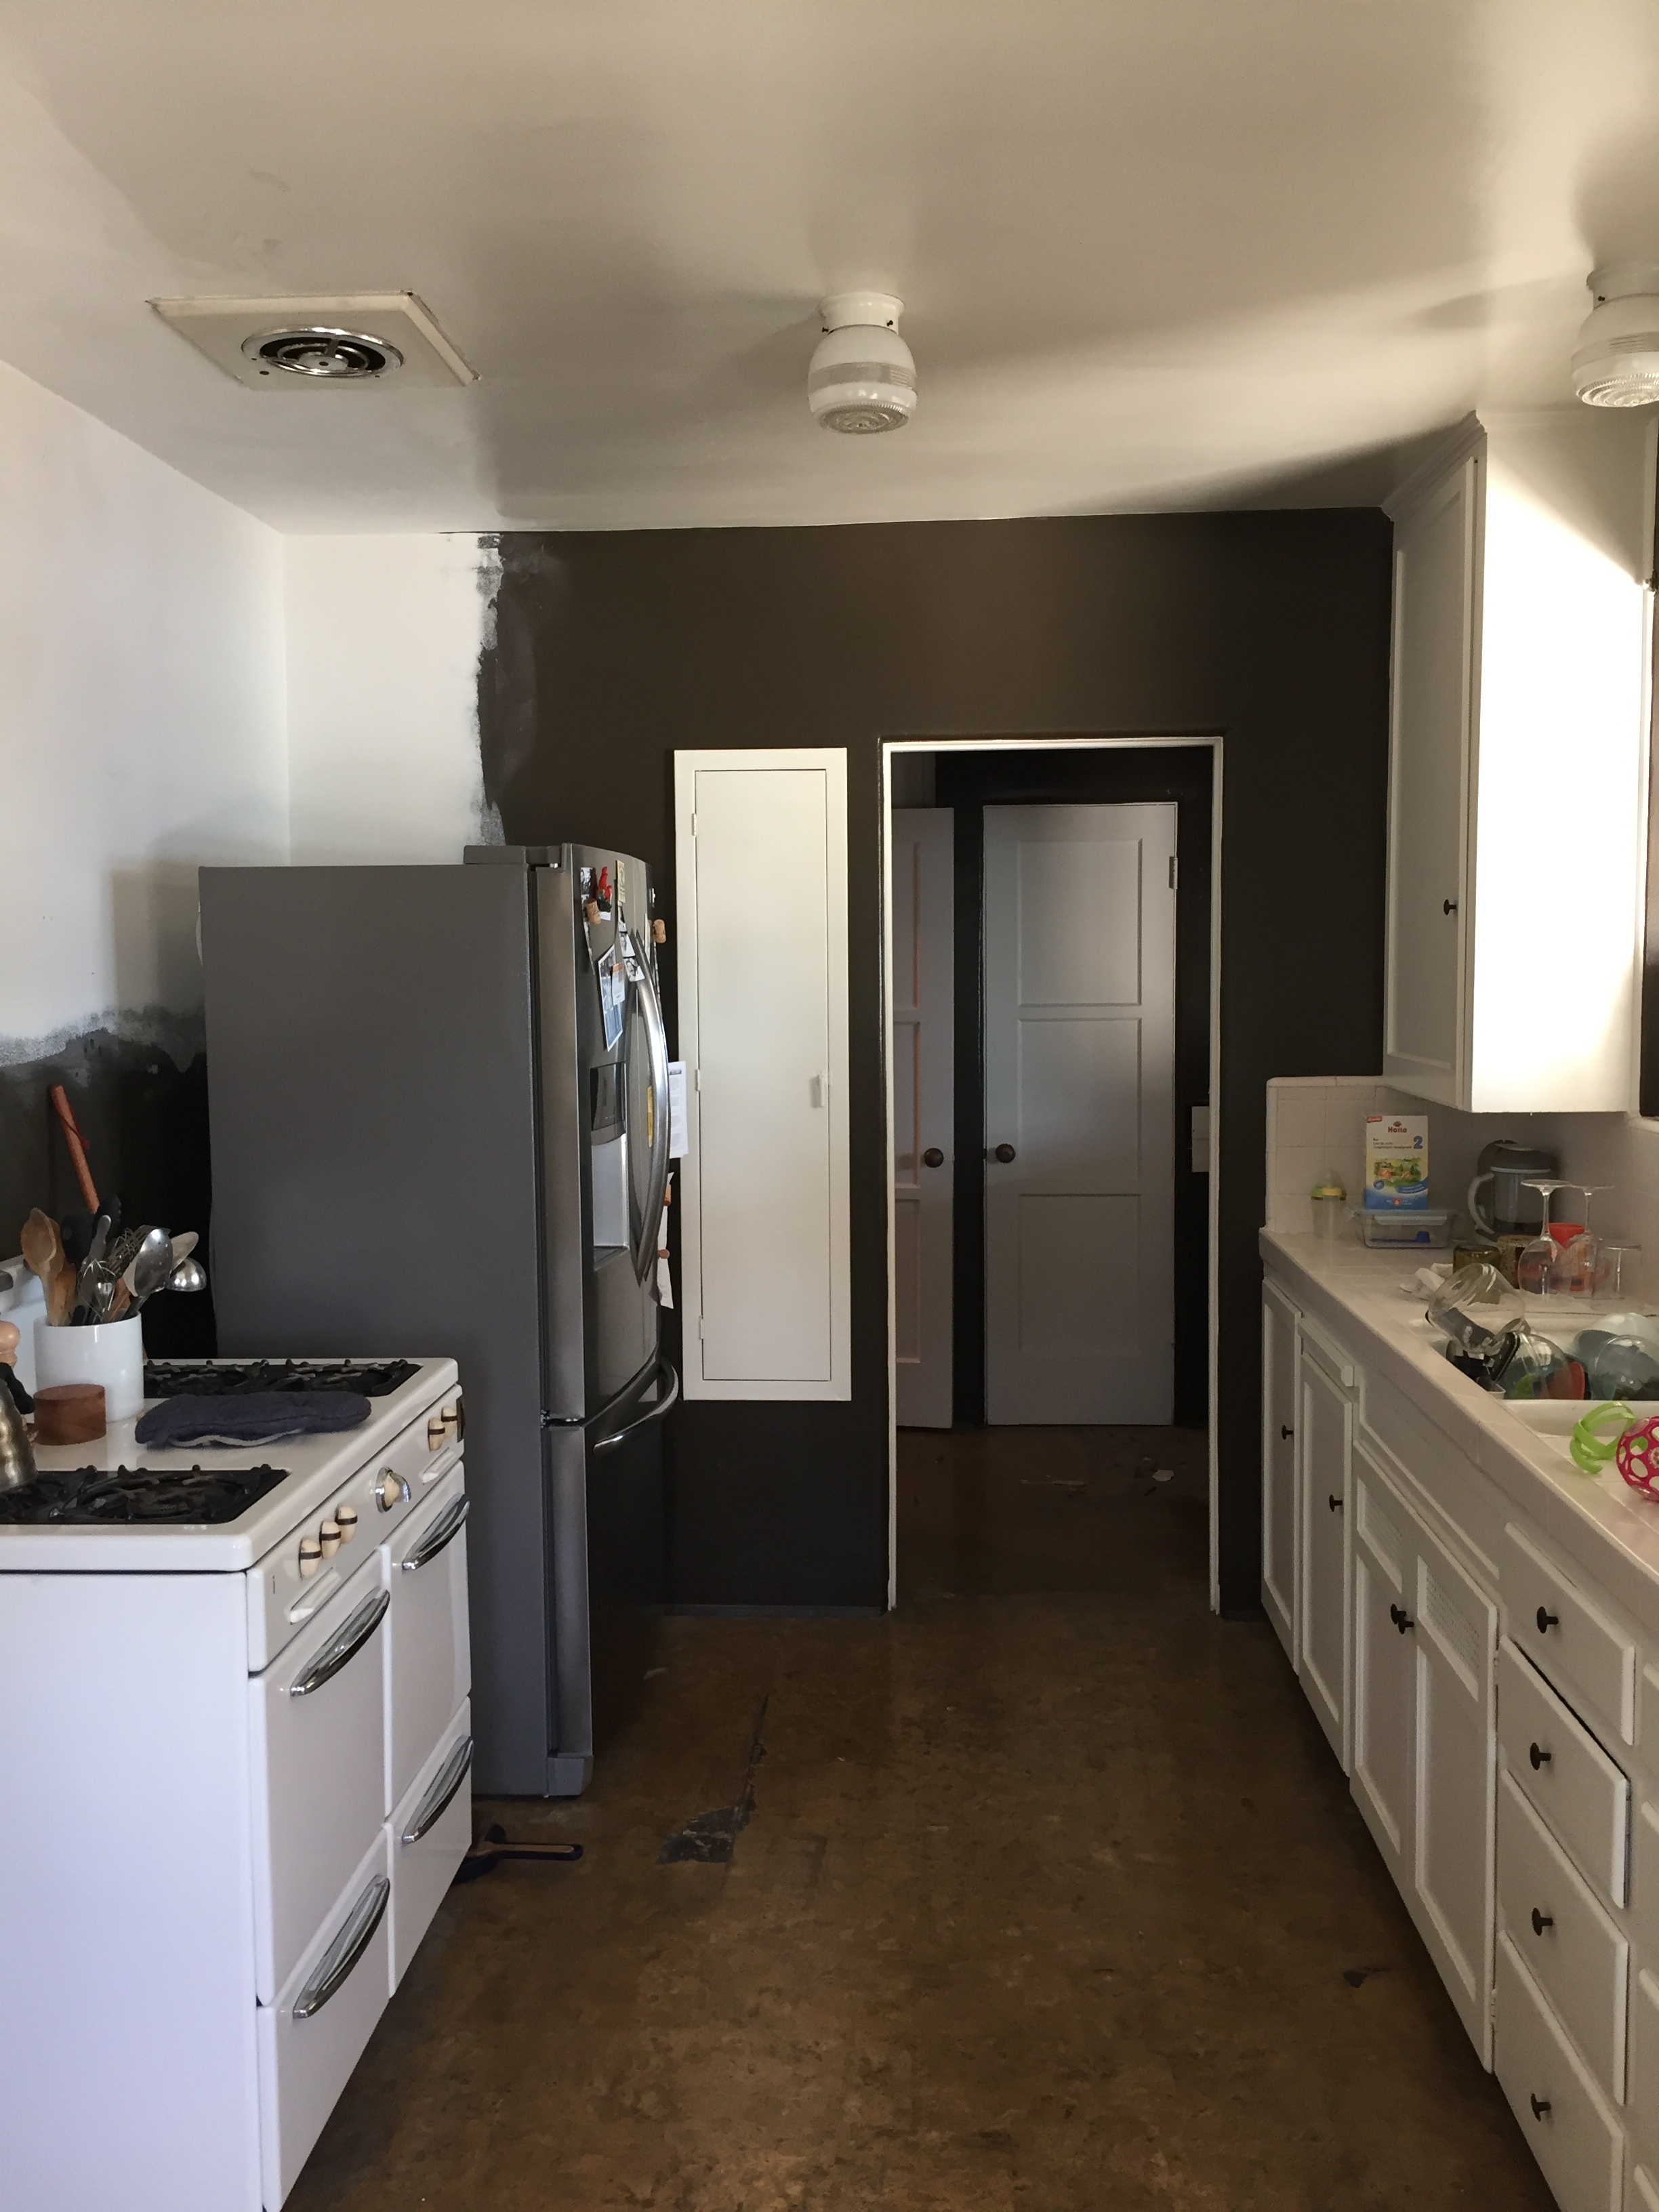
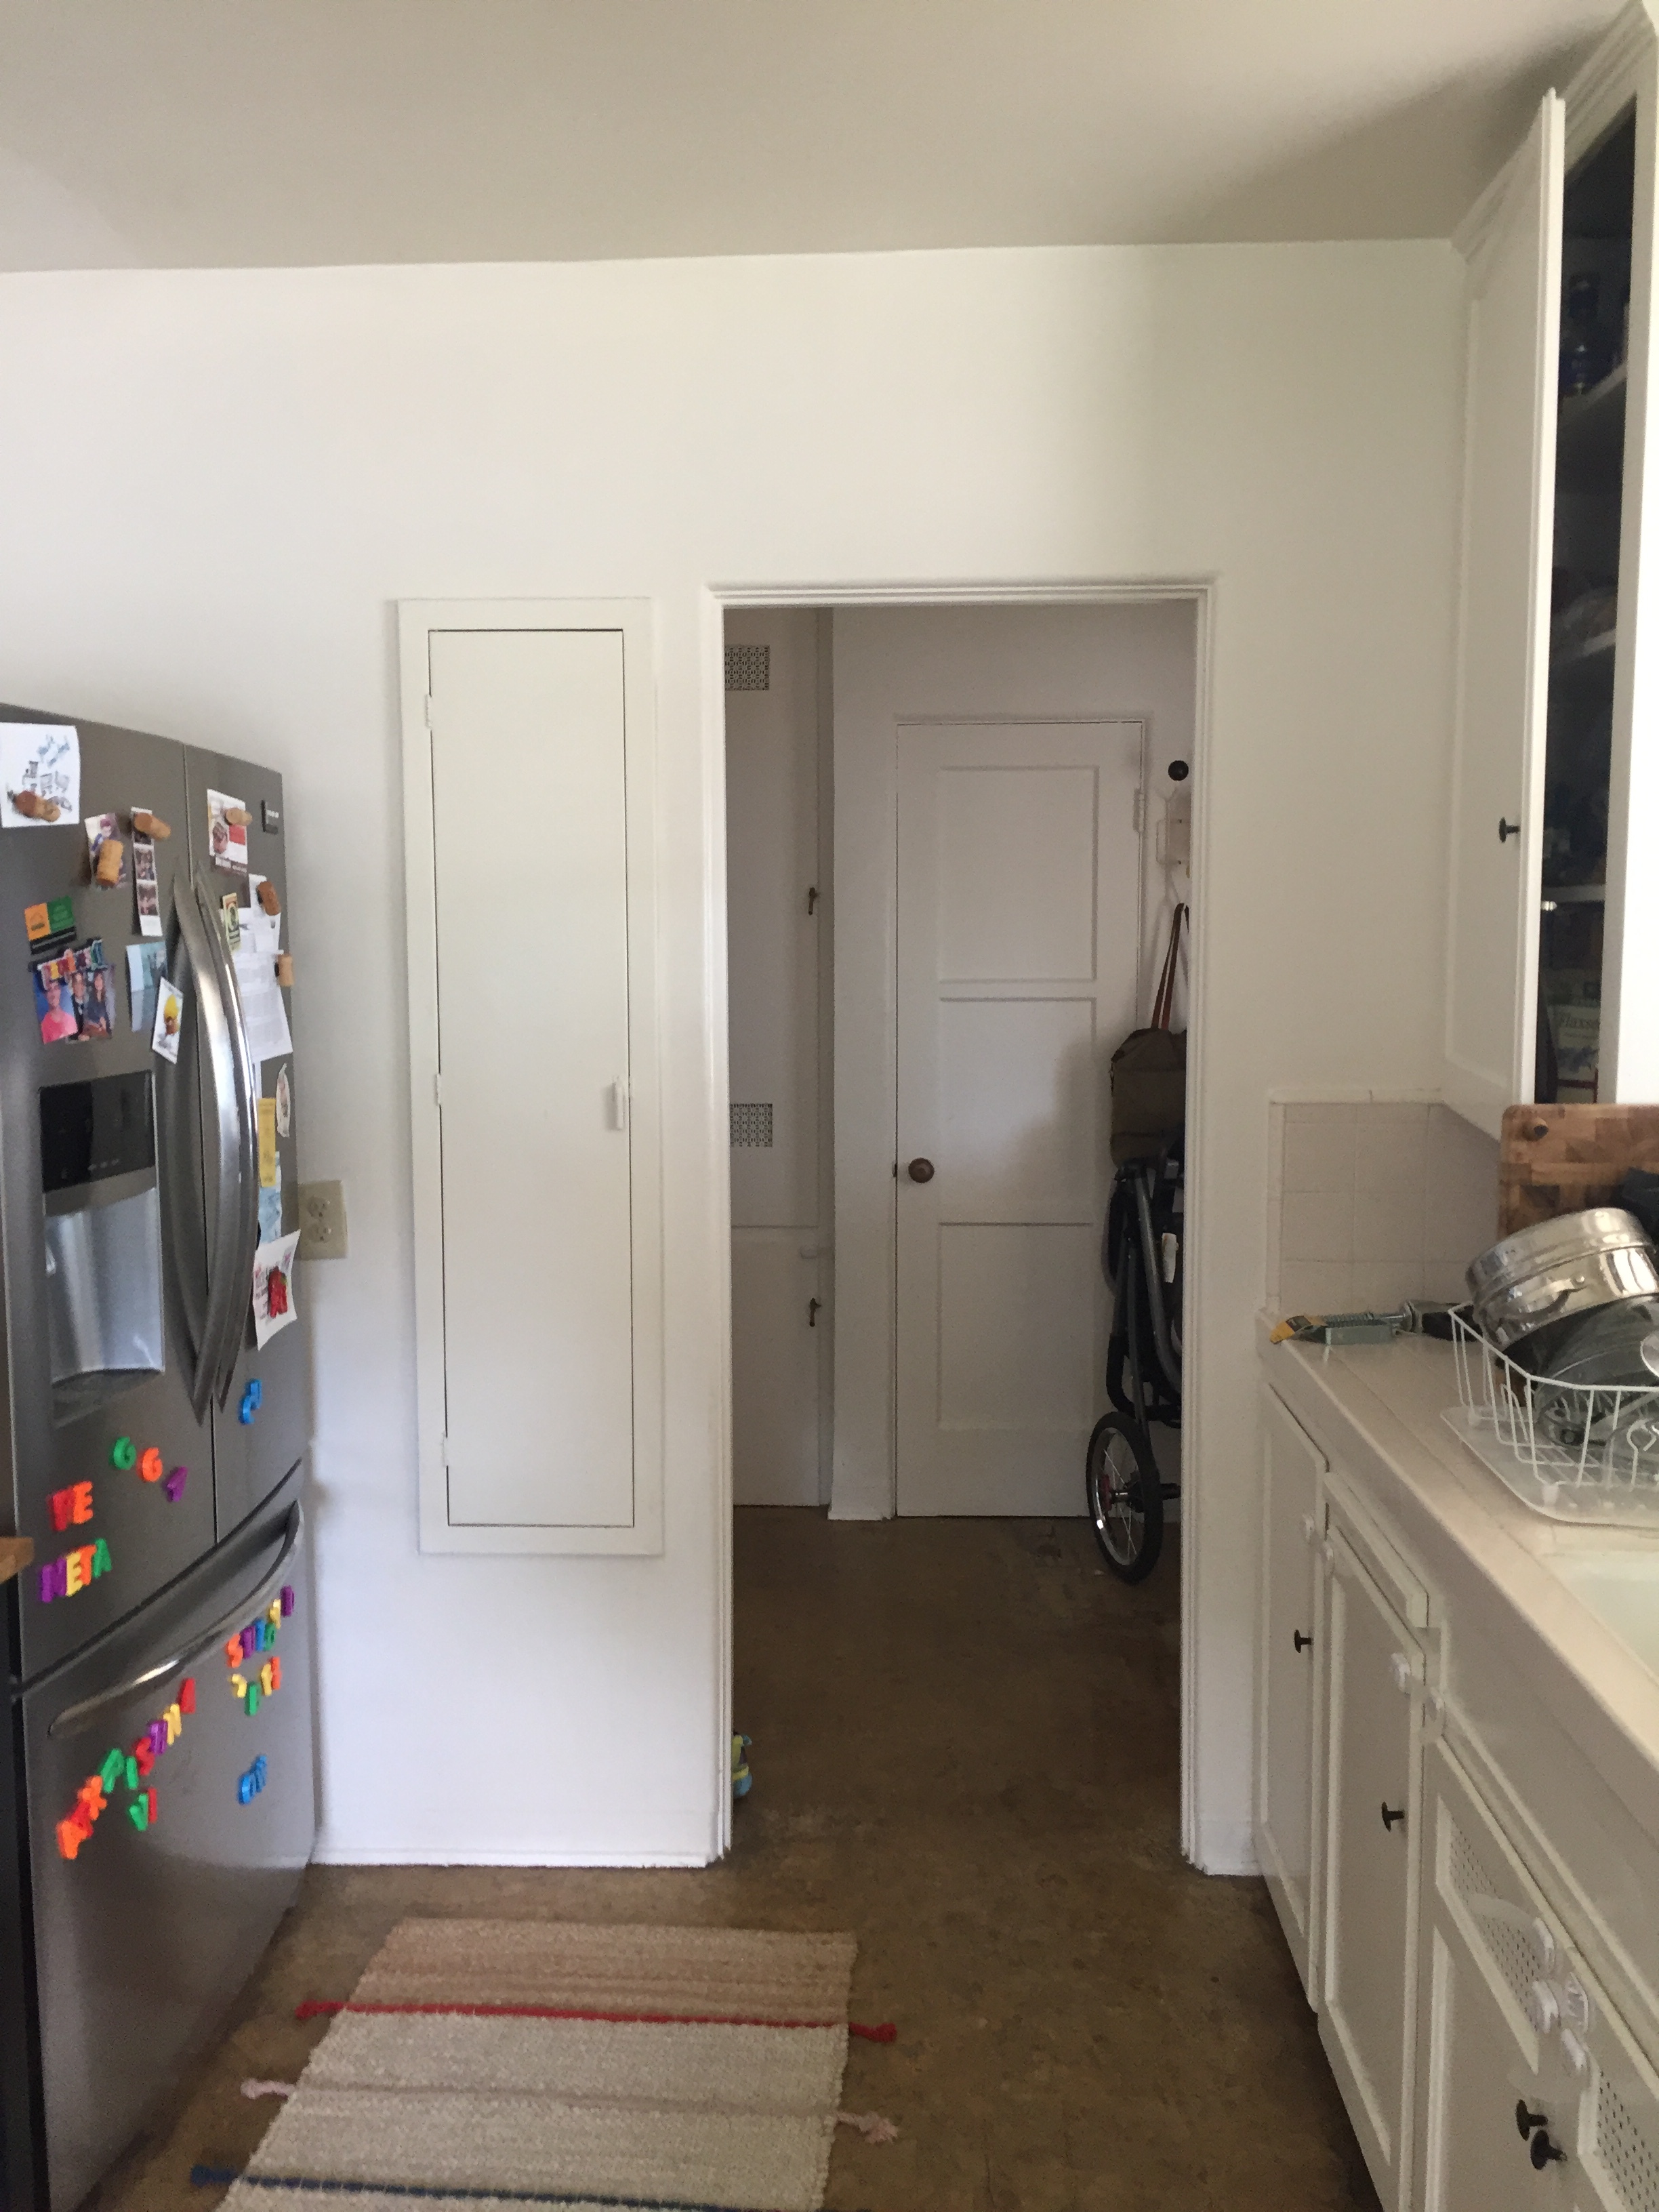
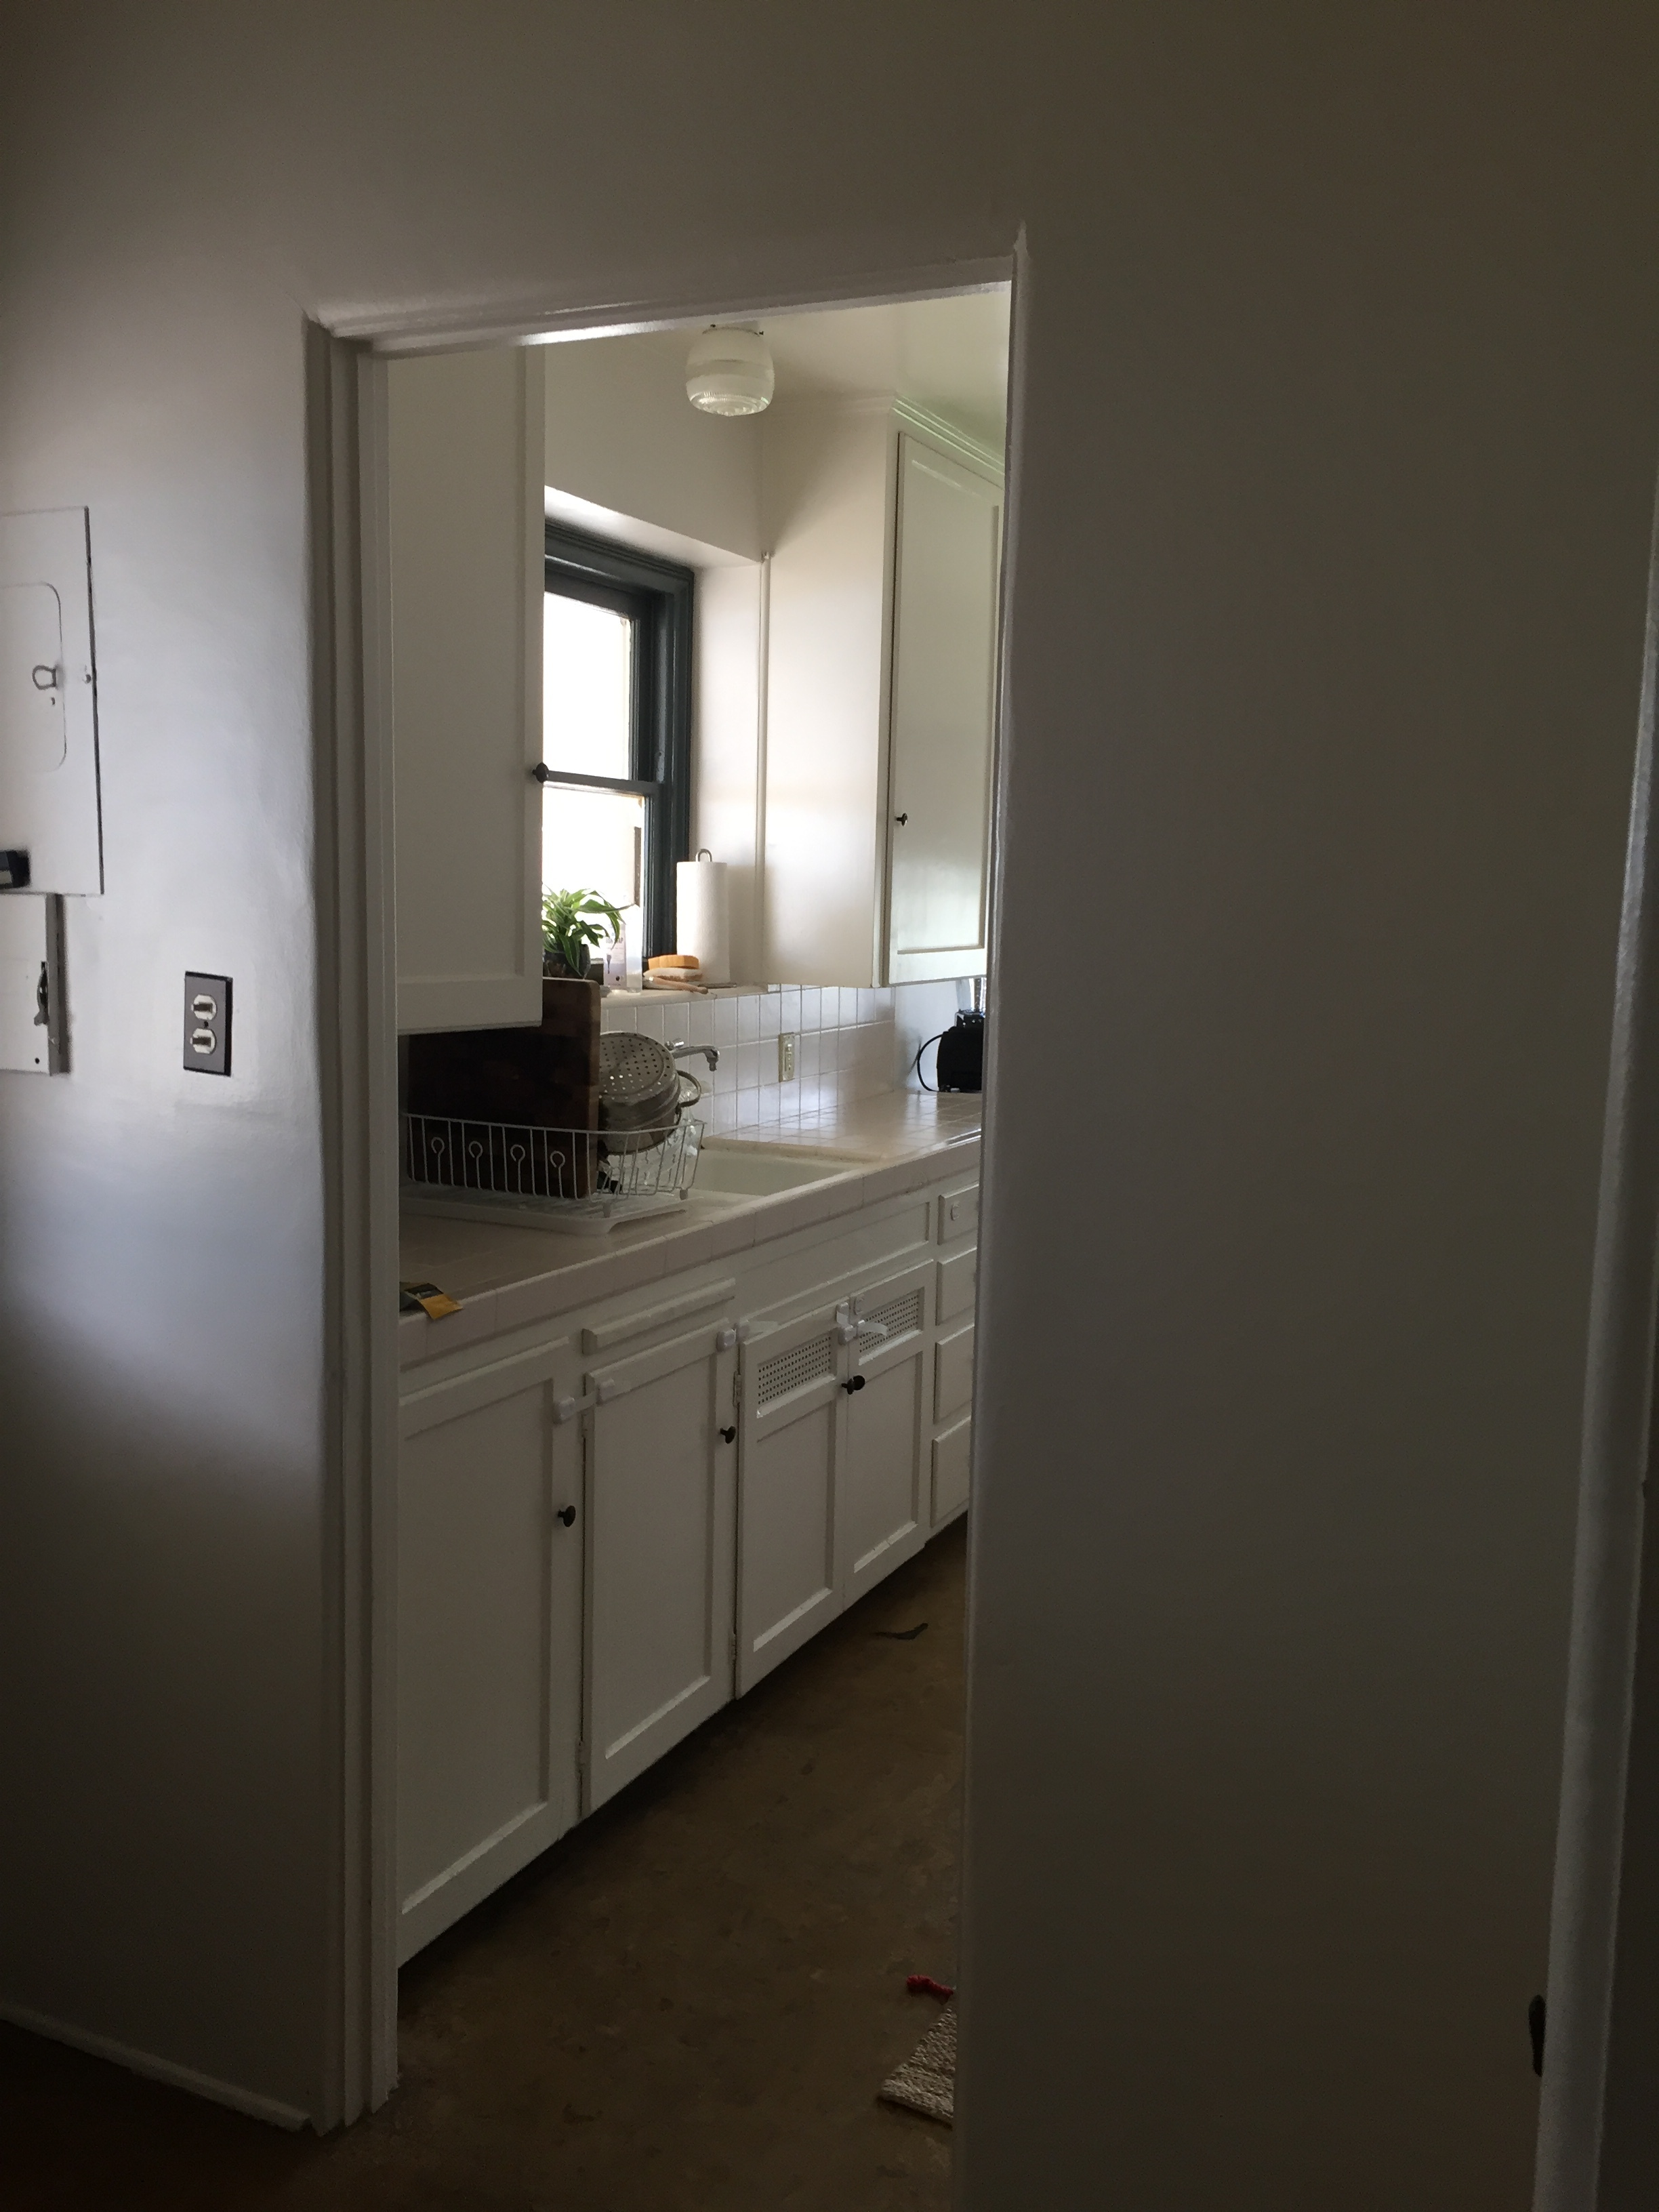
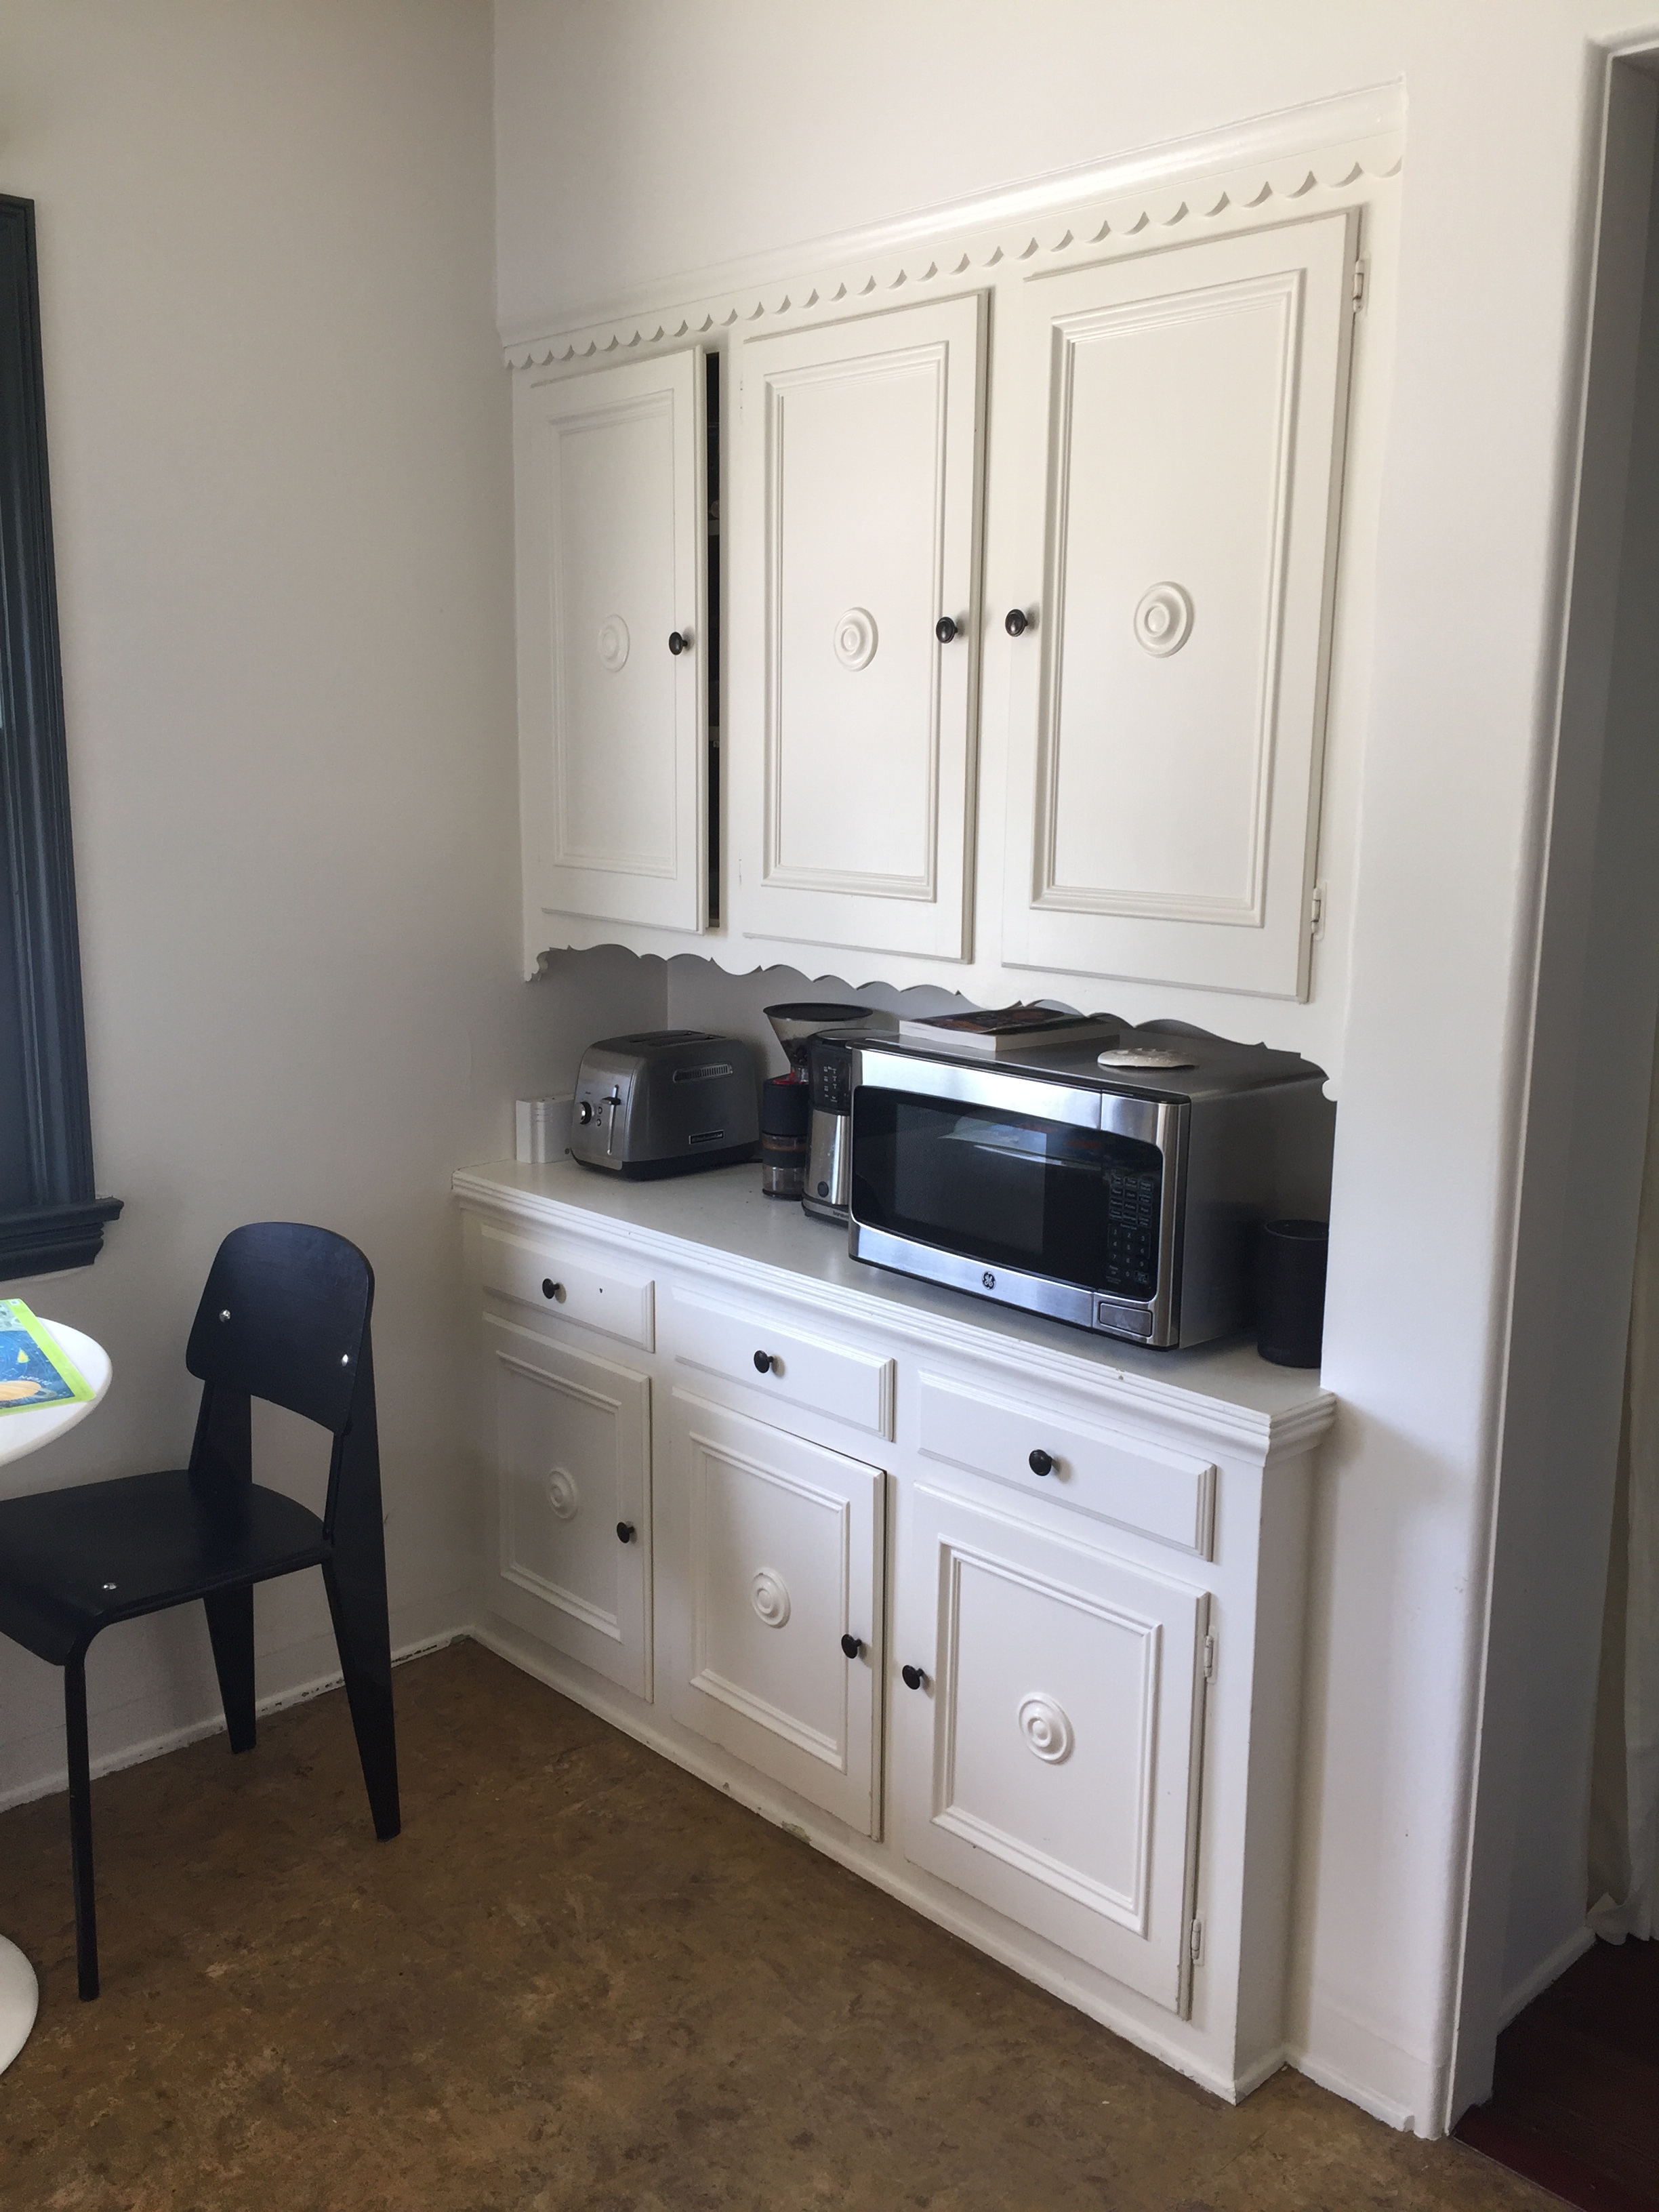
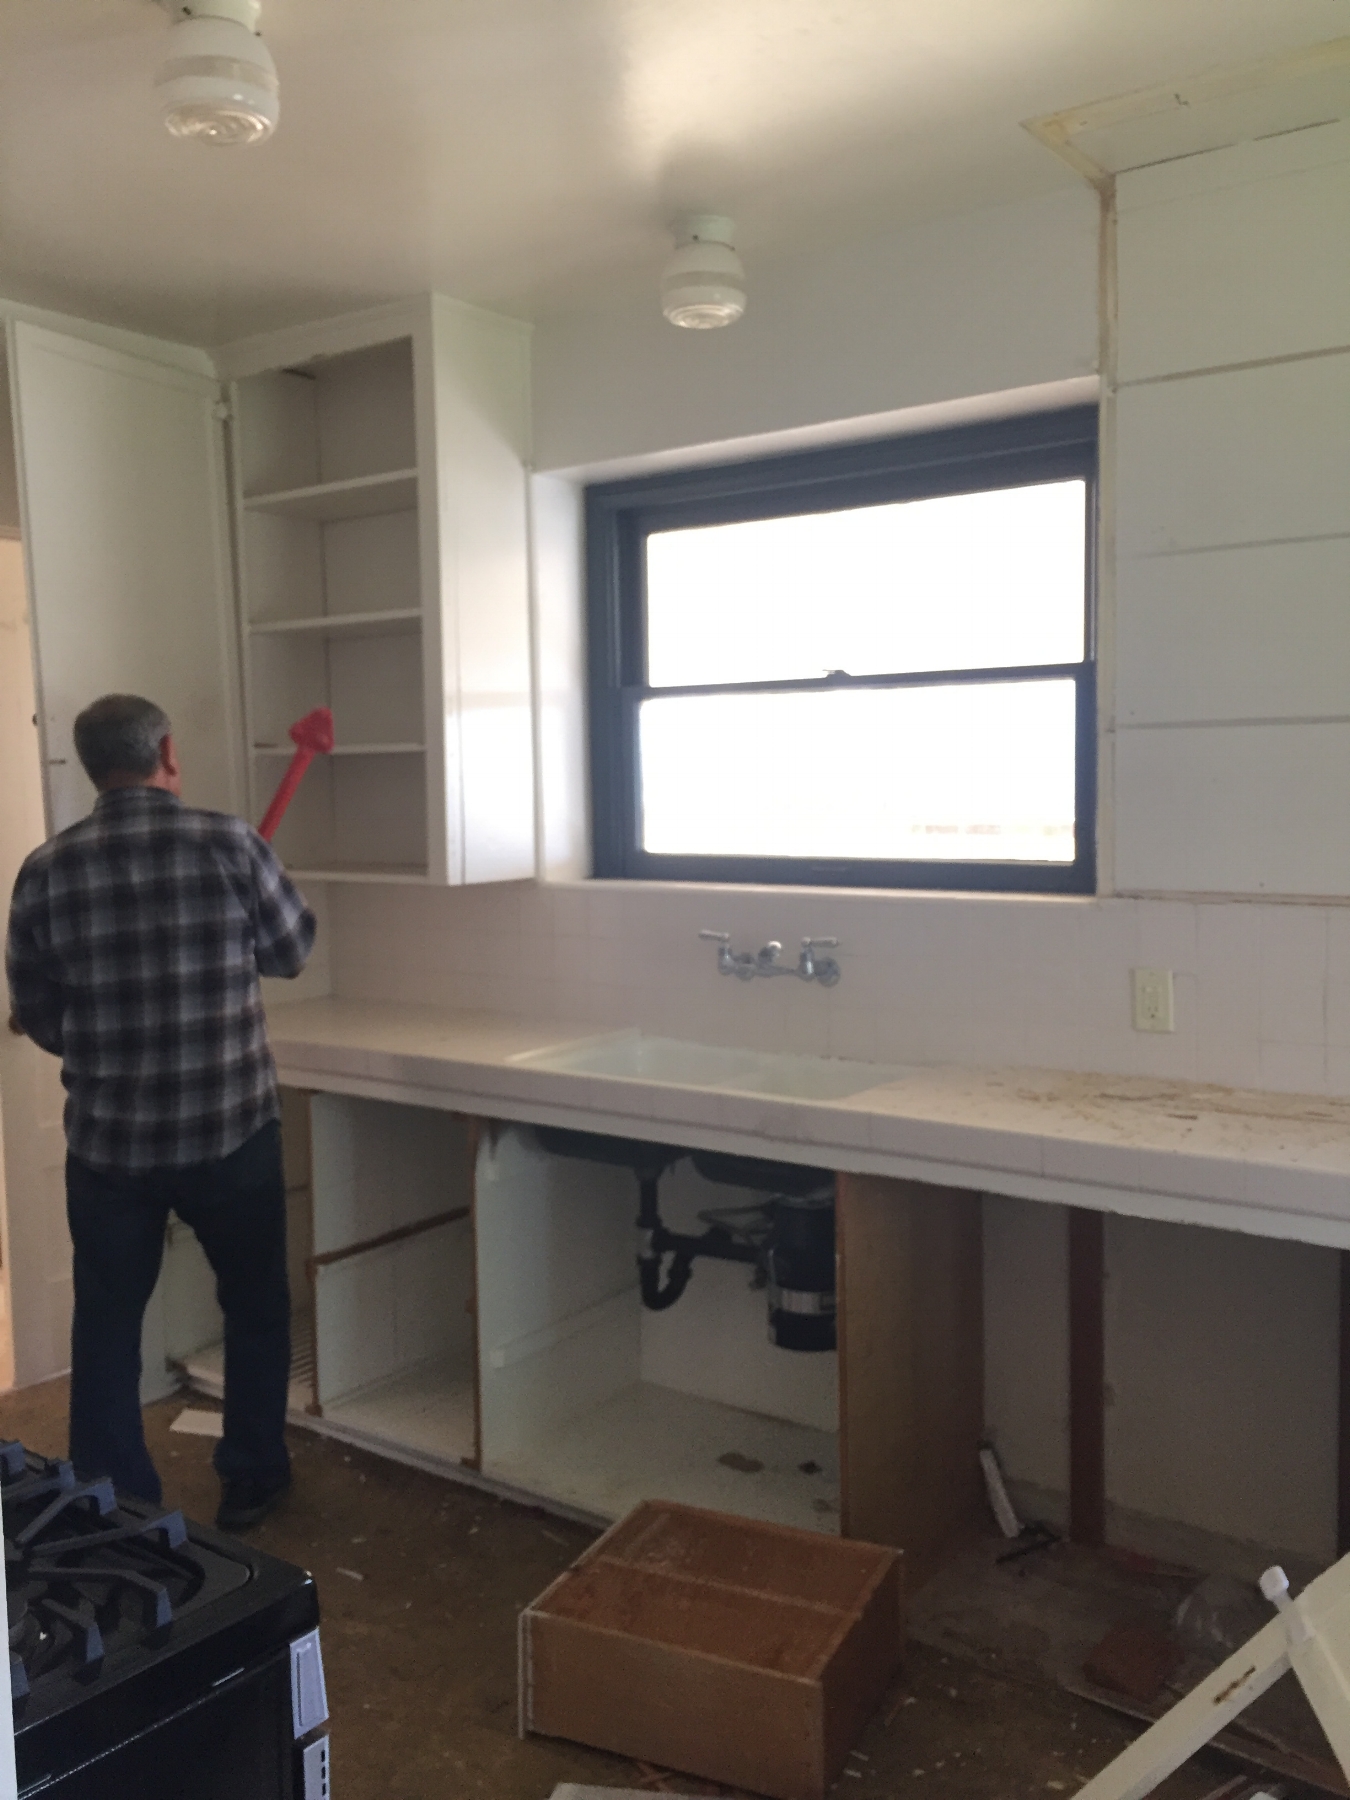
Well its certainly been a while since I’ve posted about the Harrison Hacienda Kitchen - the last time was in 2016 when we first moved in! Quite a lot has happened since then: we renovated the backyard, the playroom, did some tweaks here and there to our bedrooms (which I’ll post about separately) but the largest project we’ve taken on so far is our kitchen. Here are some before pictures to jog your memory.
Before:

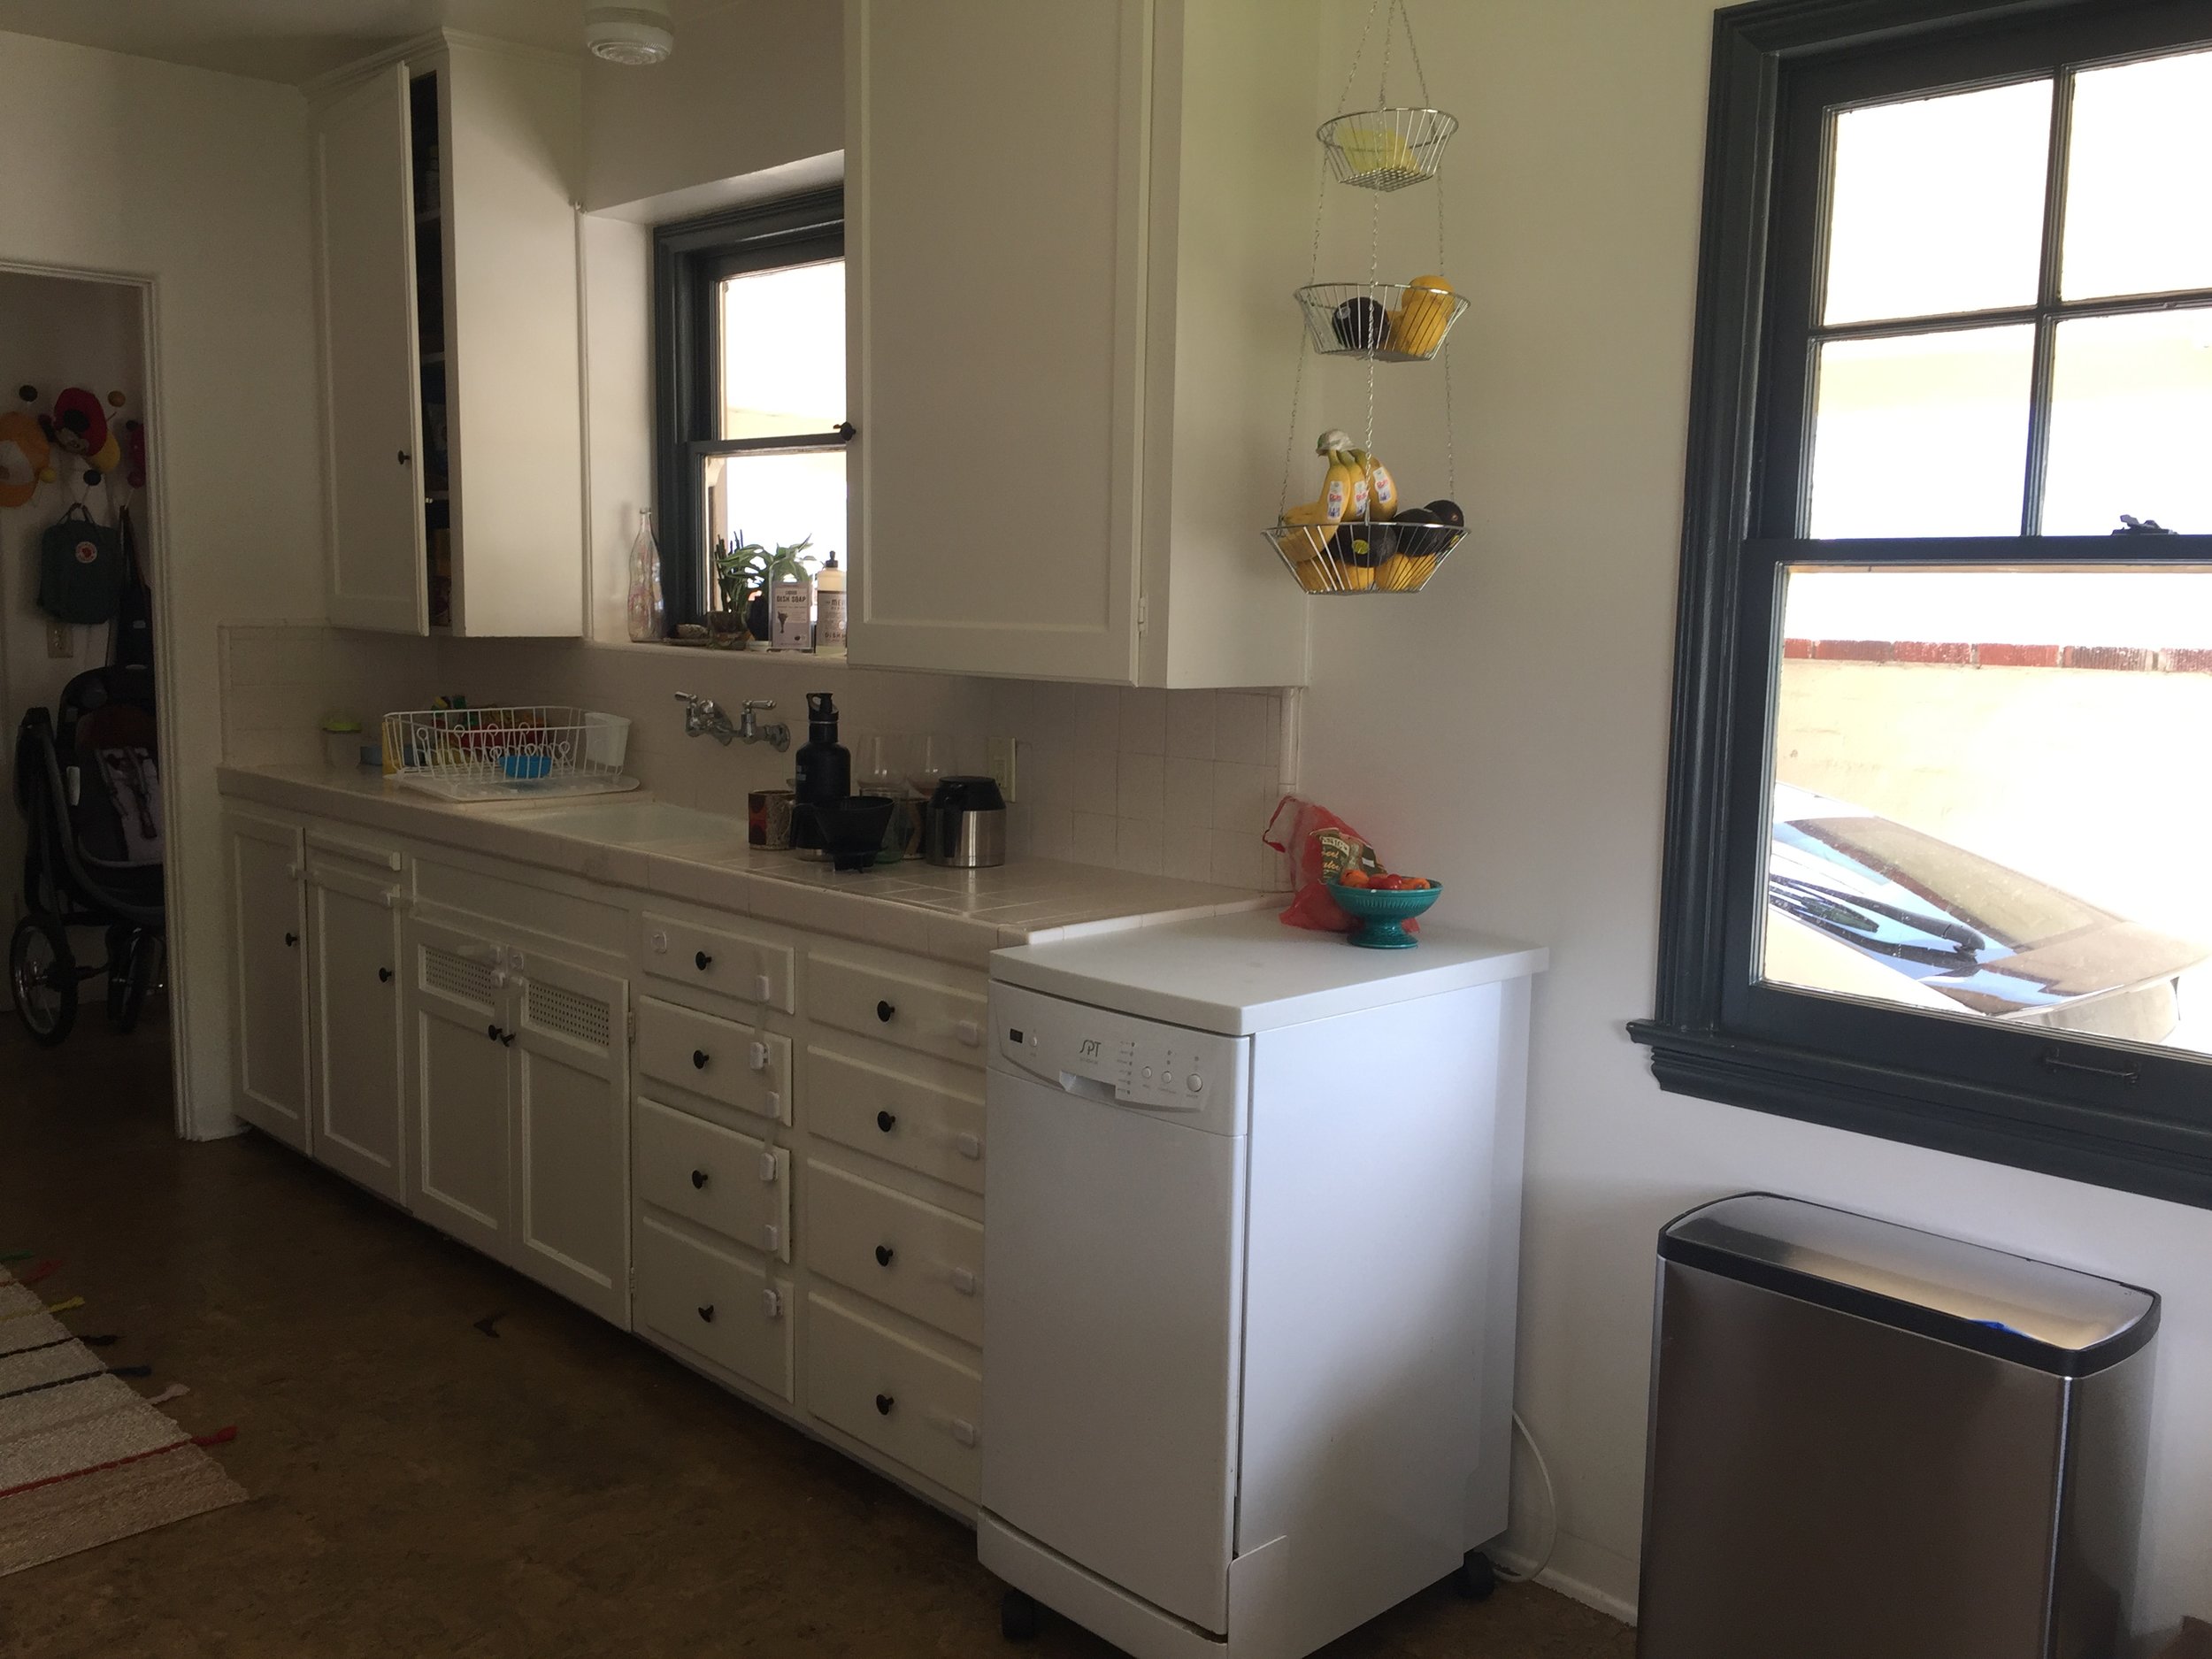

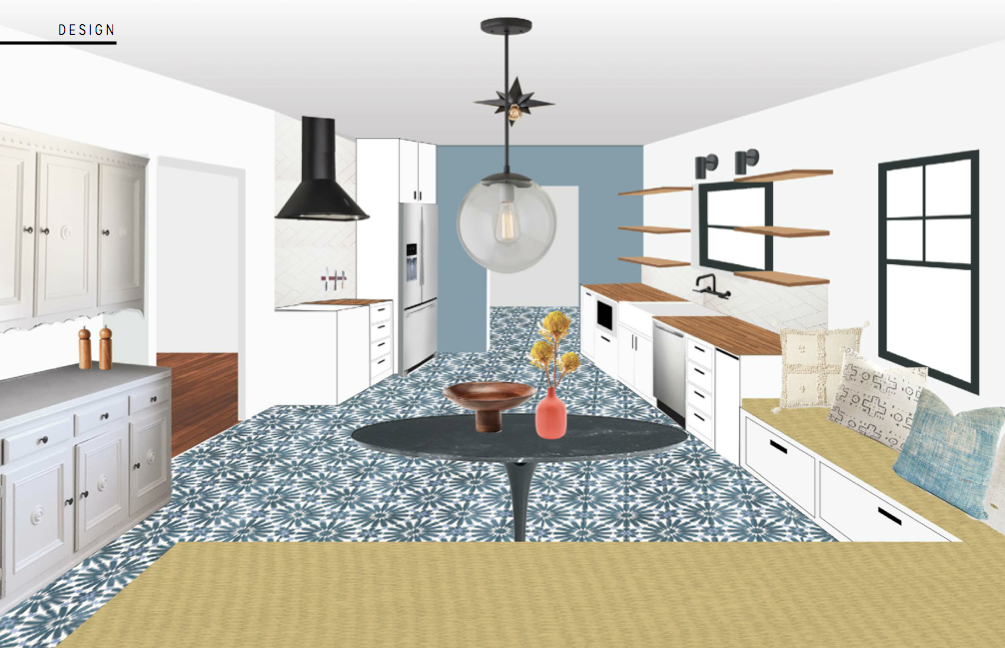
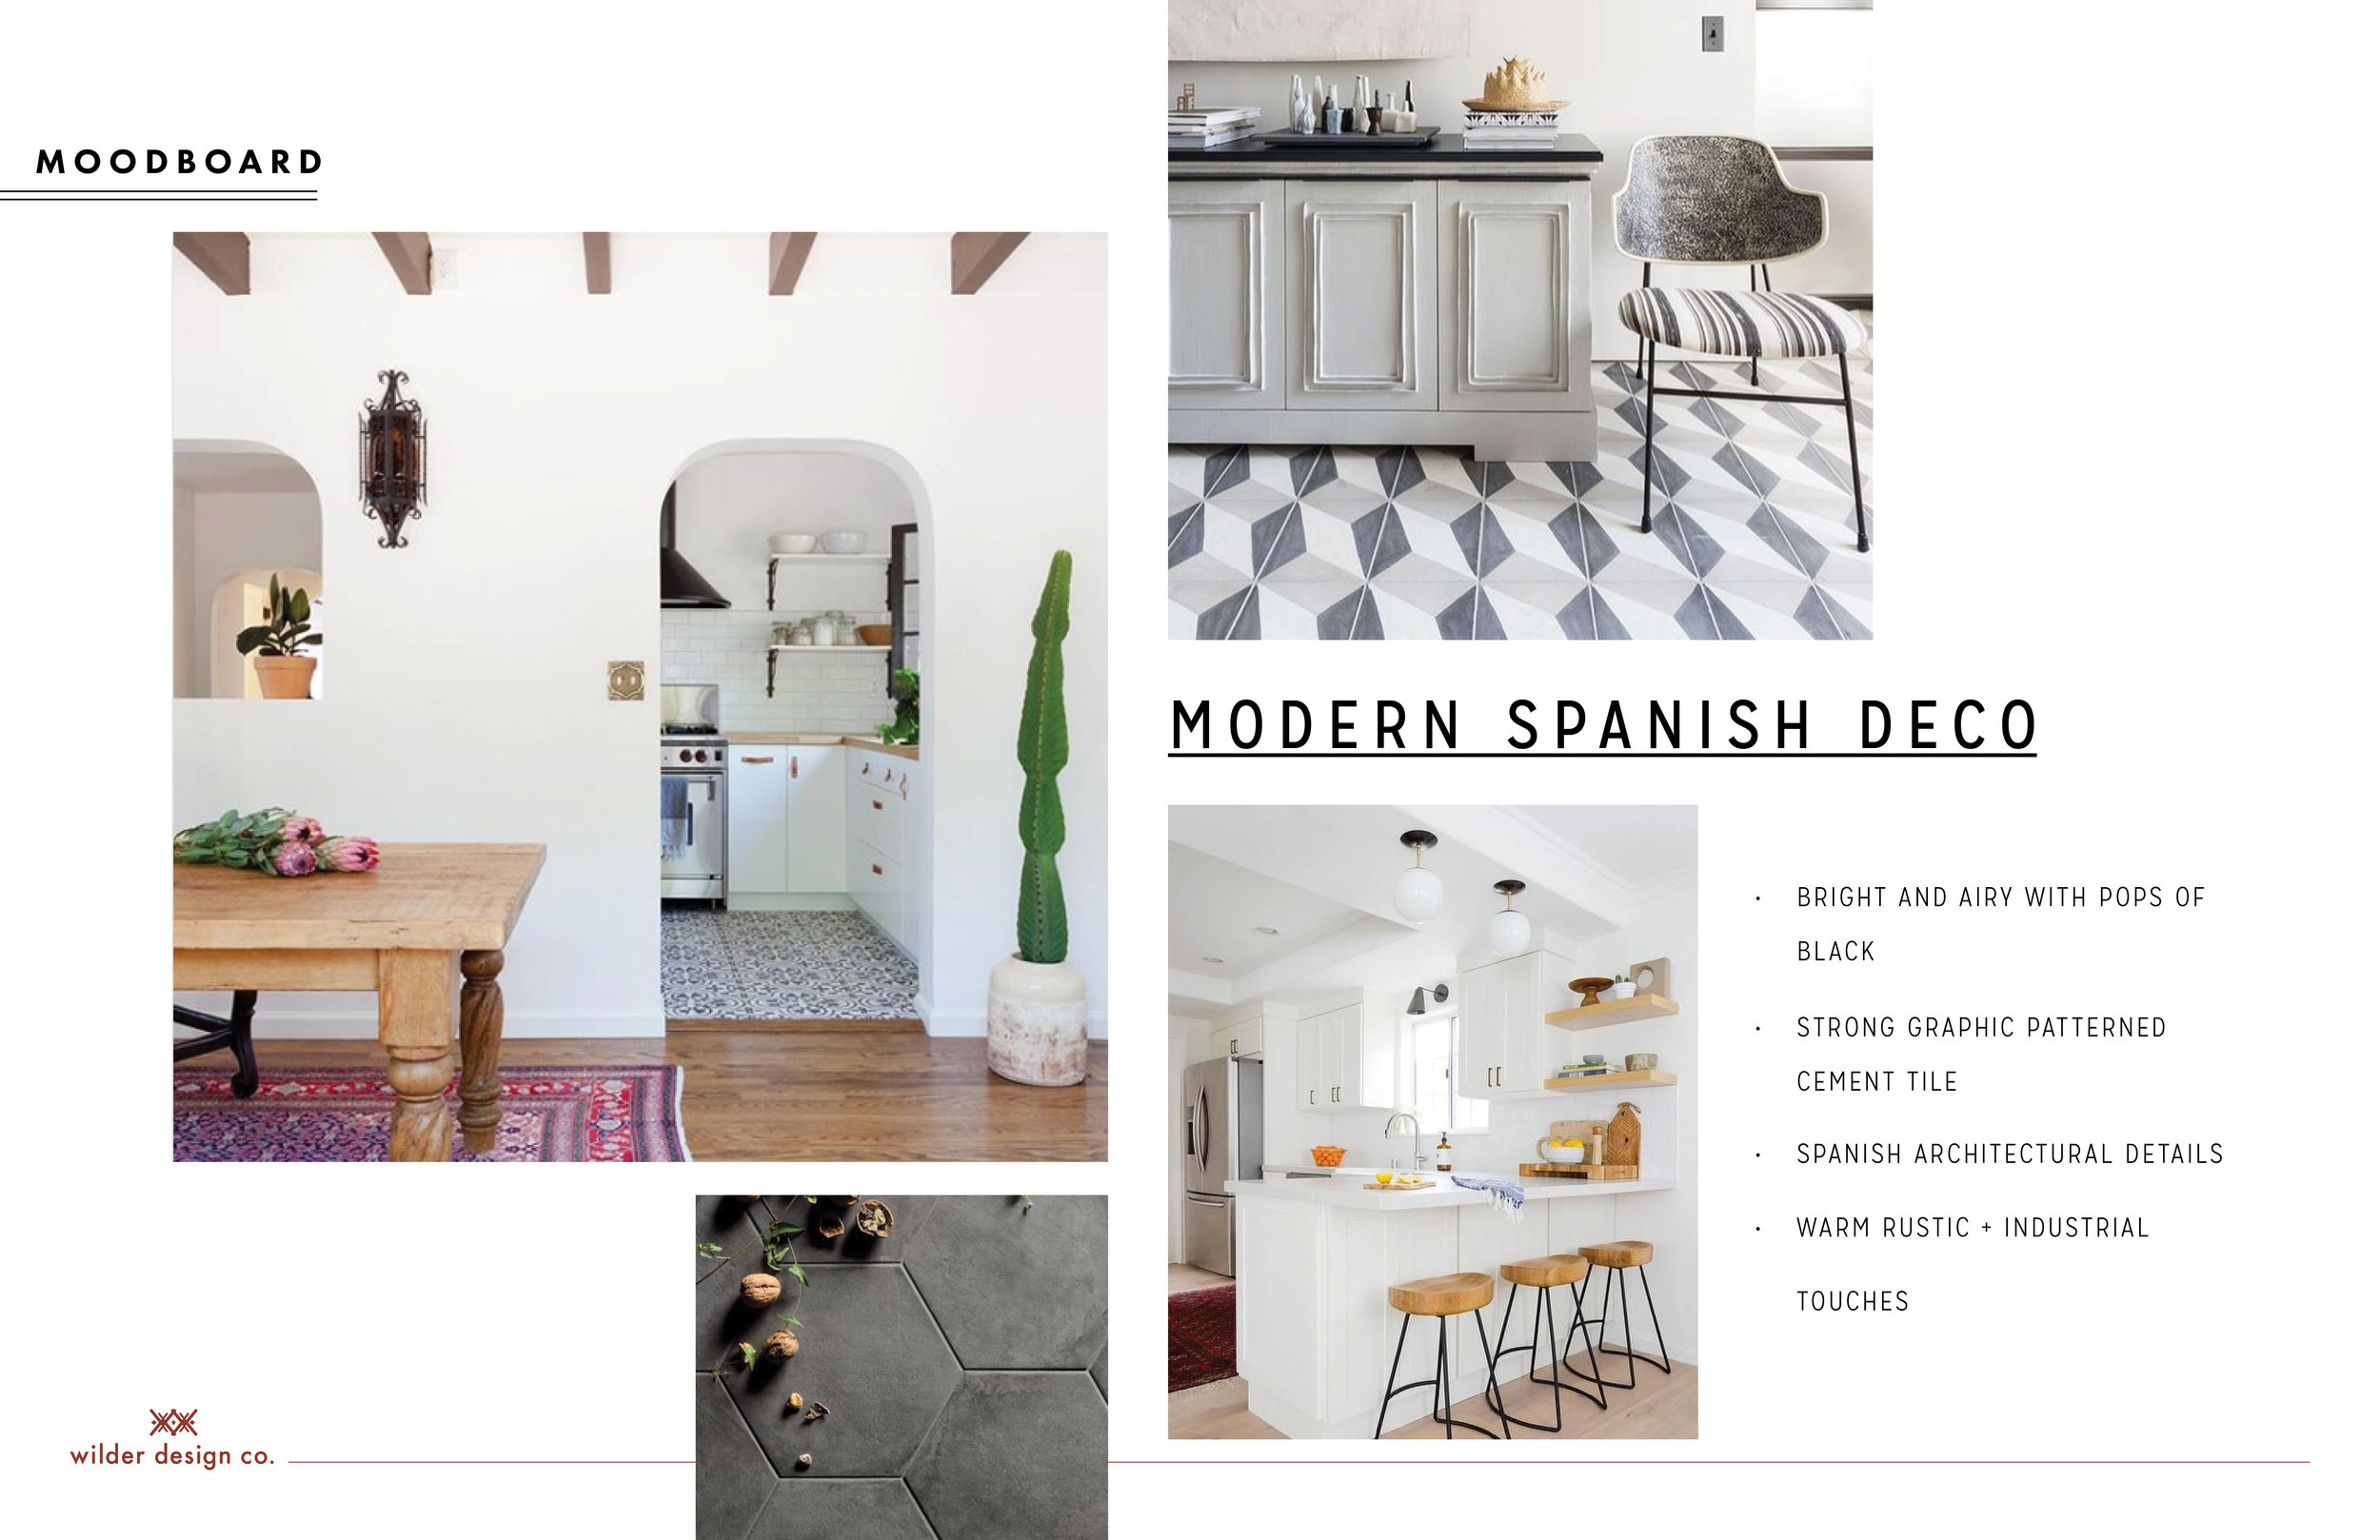
This kitchen had seen a lot of action over the years and was in dire need of a make over. We knew this would require a lot of planning and soul searching so we spent the last 2 years doing just that. After going in various directions with the design we landed on our concept: Modern Spanish Deco. The goal for the whole house is to of course maintain and amplify its romantic spanish bones, but modernize it by keeping things minimal. We also wanted to add some graphic punch which draws from the deco influences in the home as well as the era in which it was built. Here was the game plan.
Design Plan:
Layout:
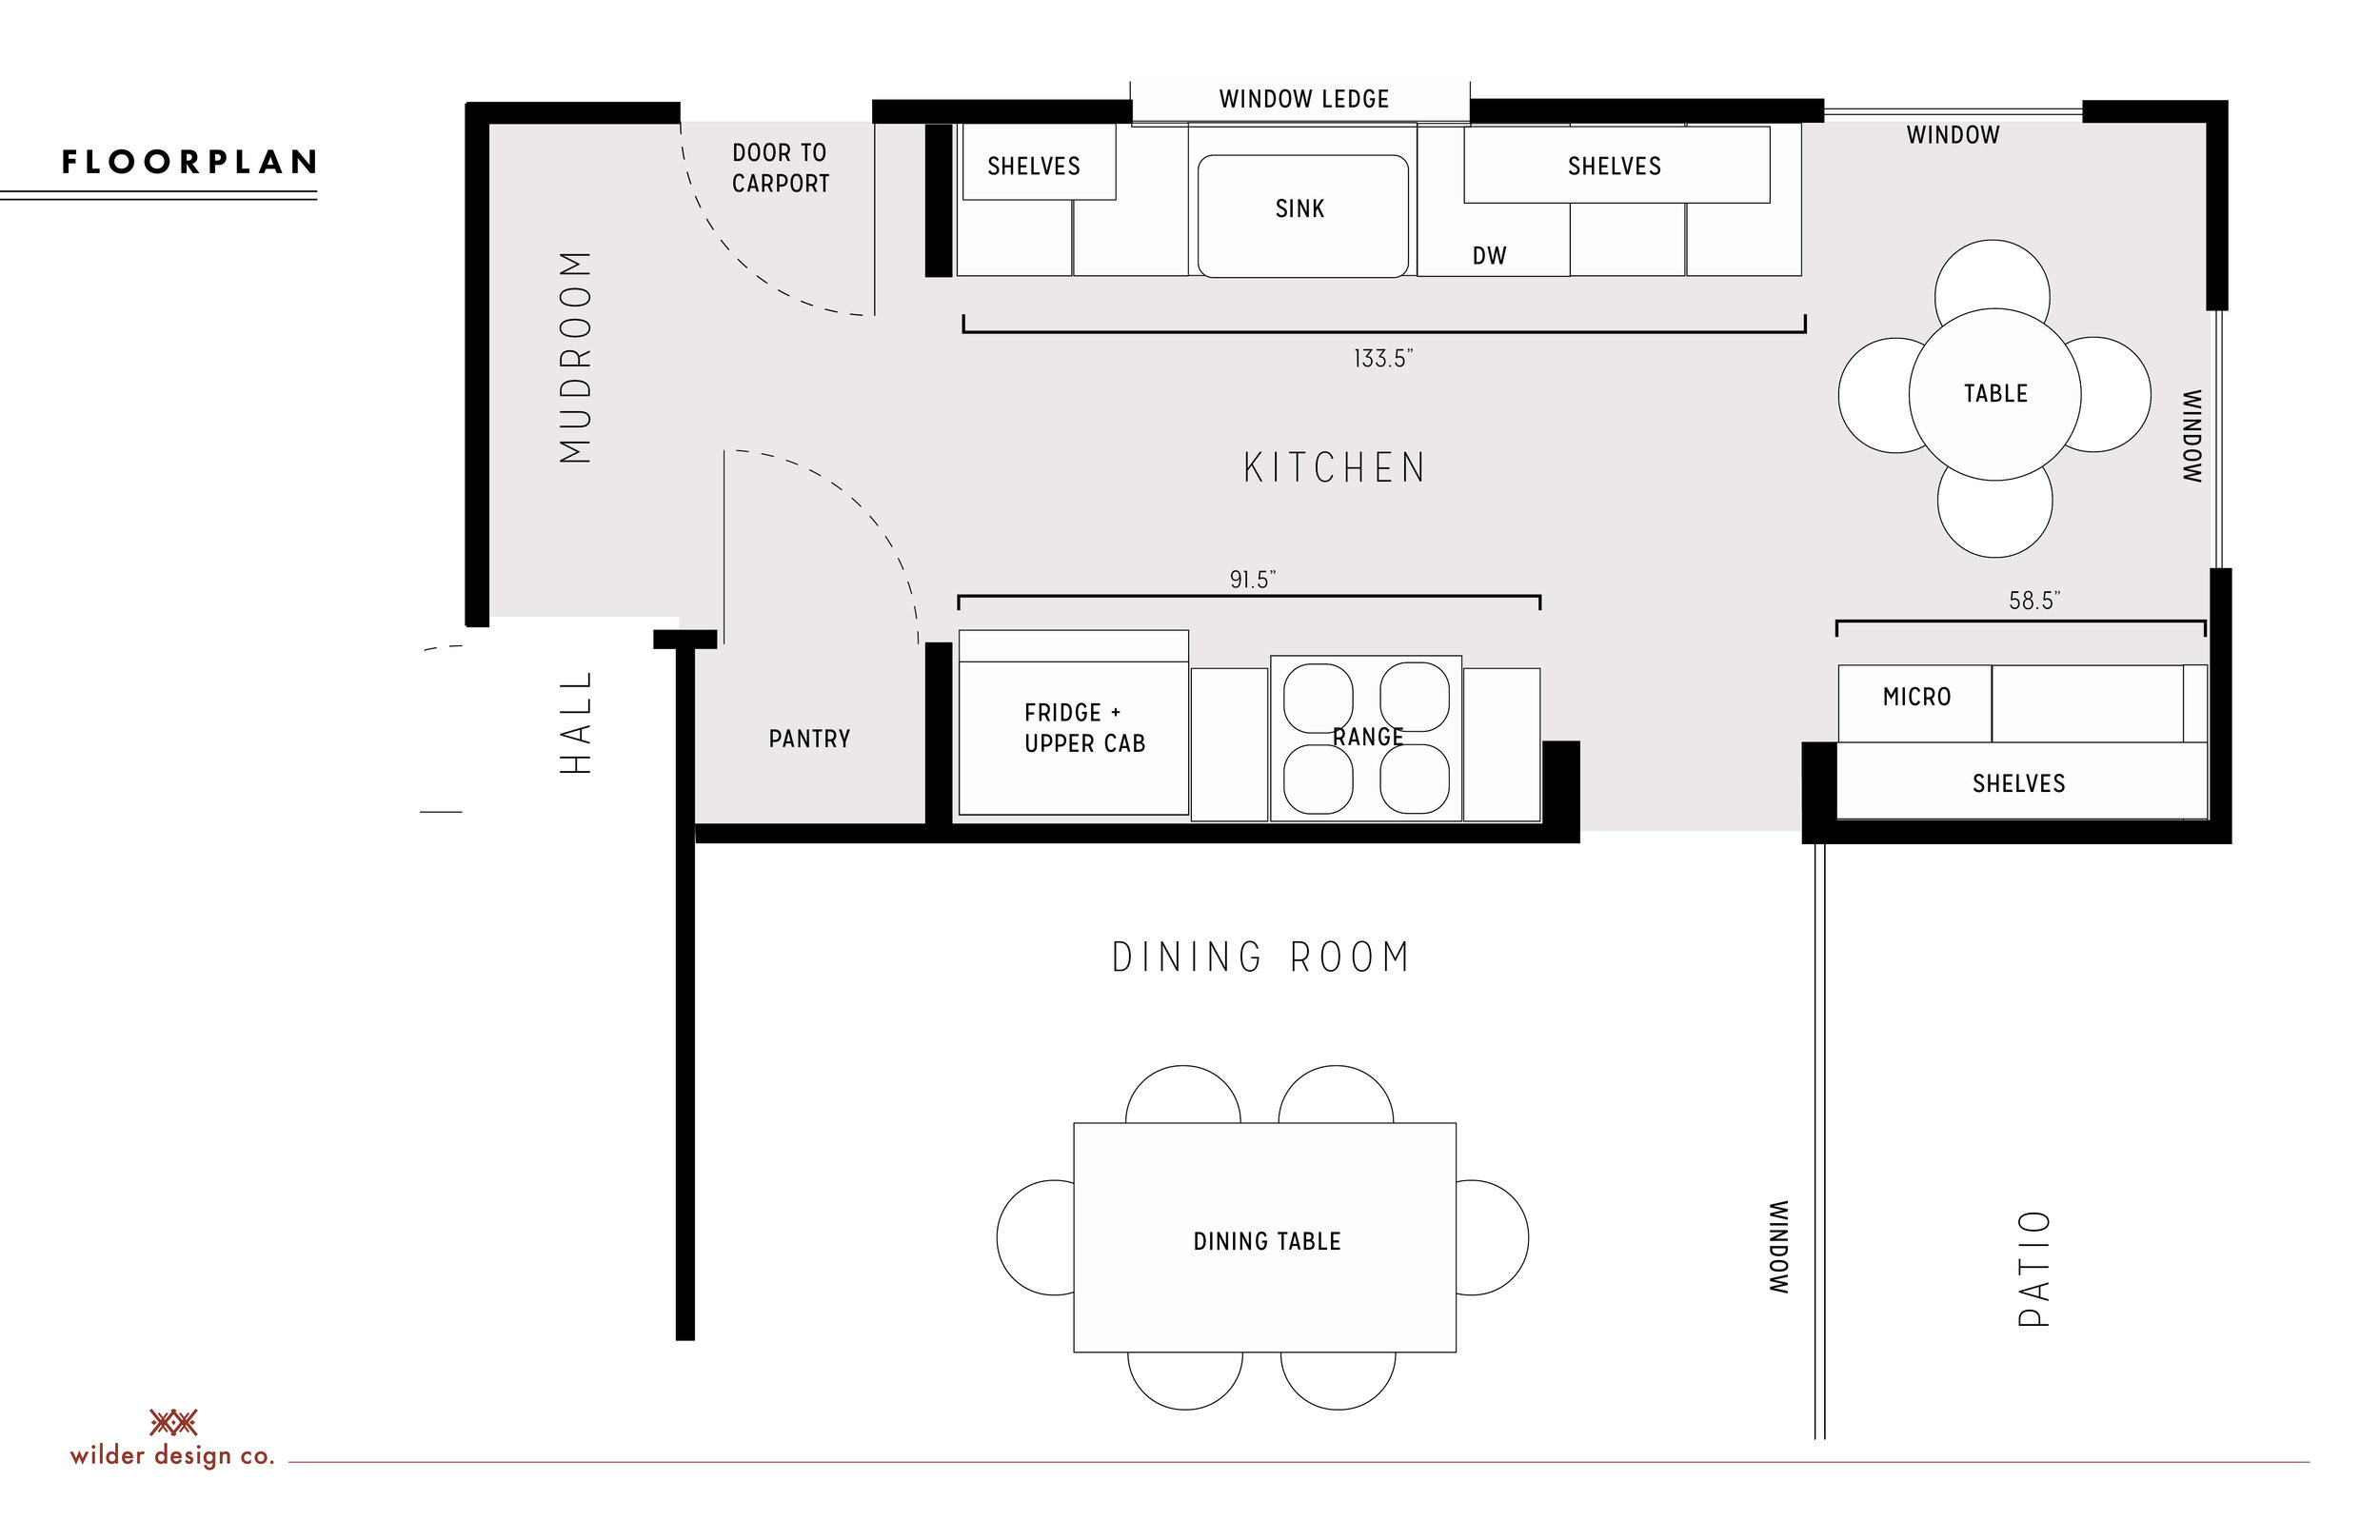
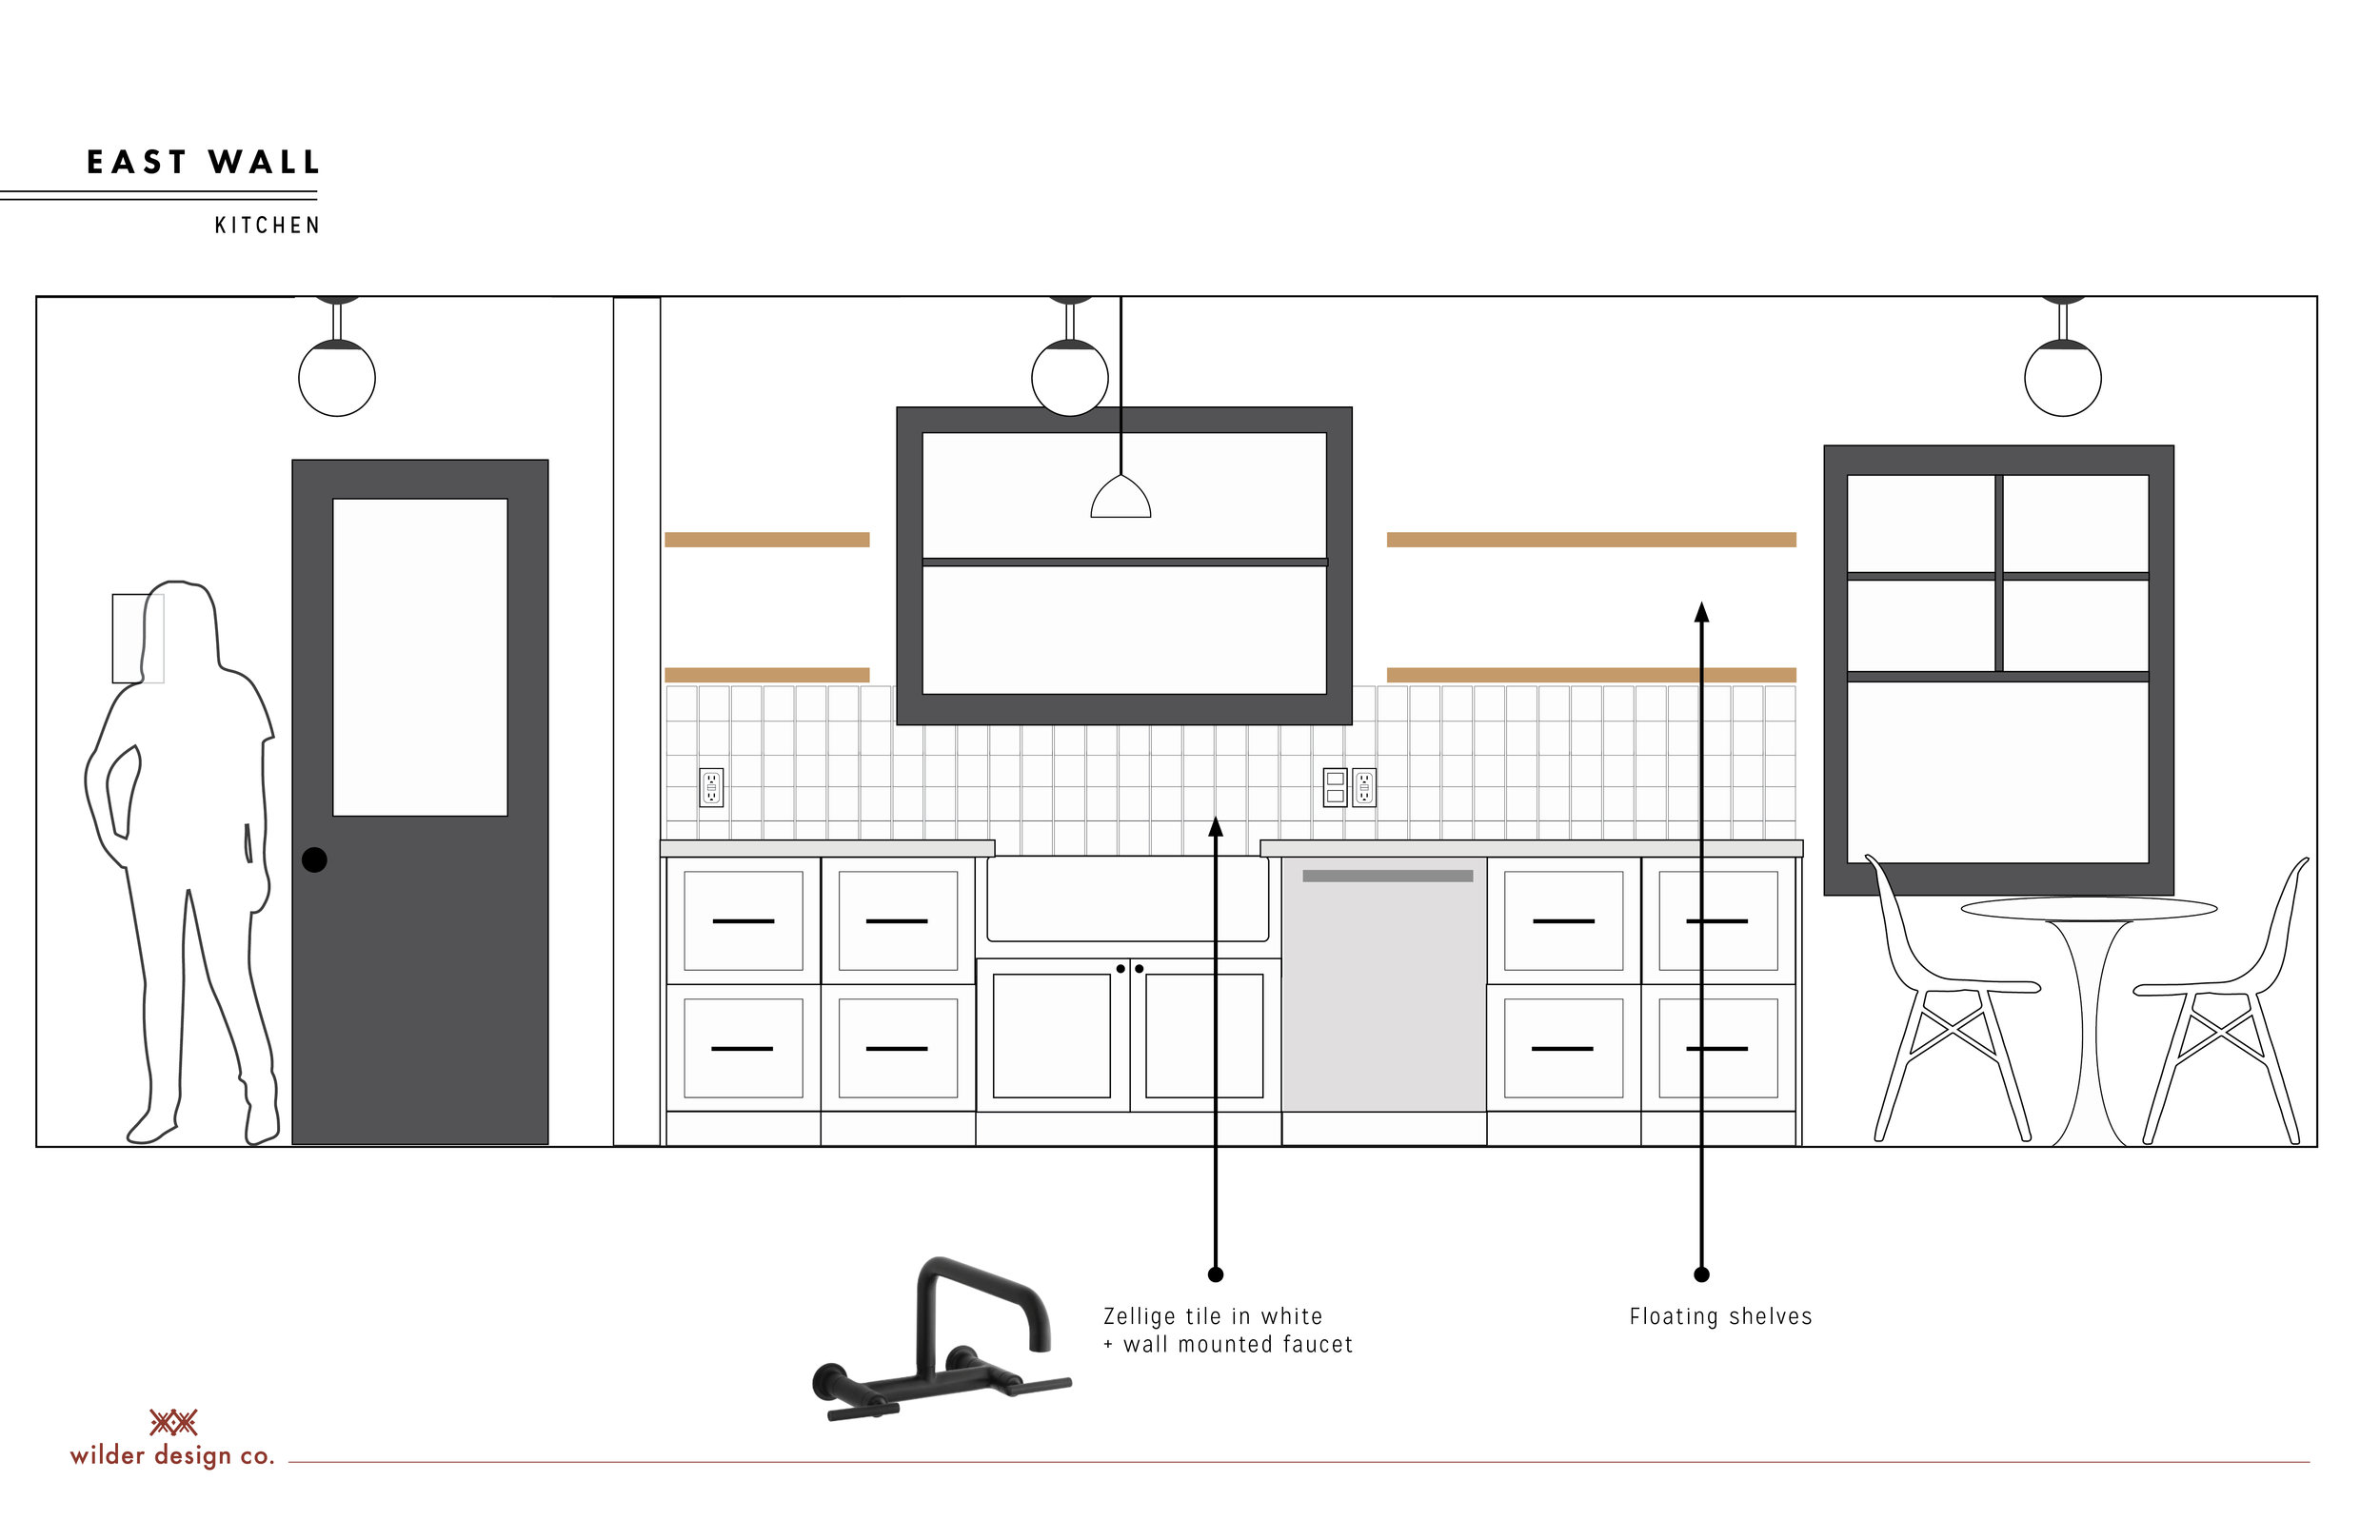
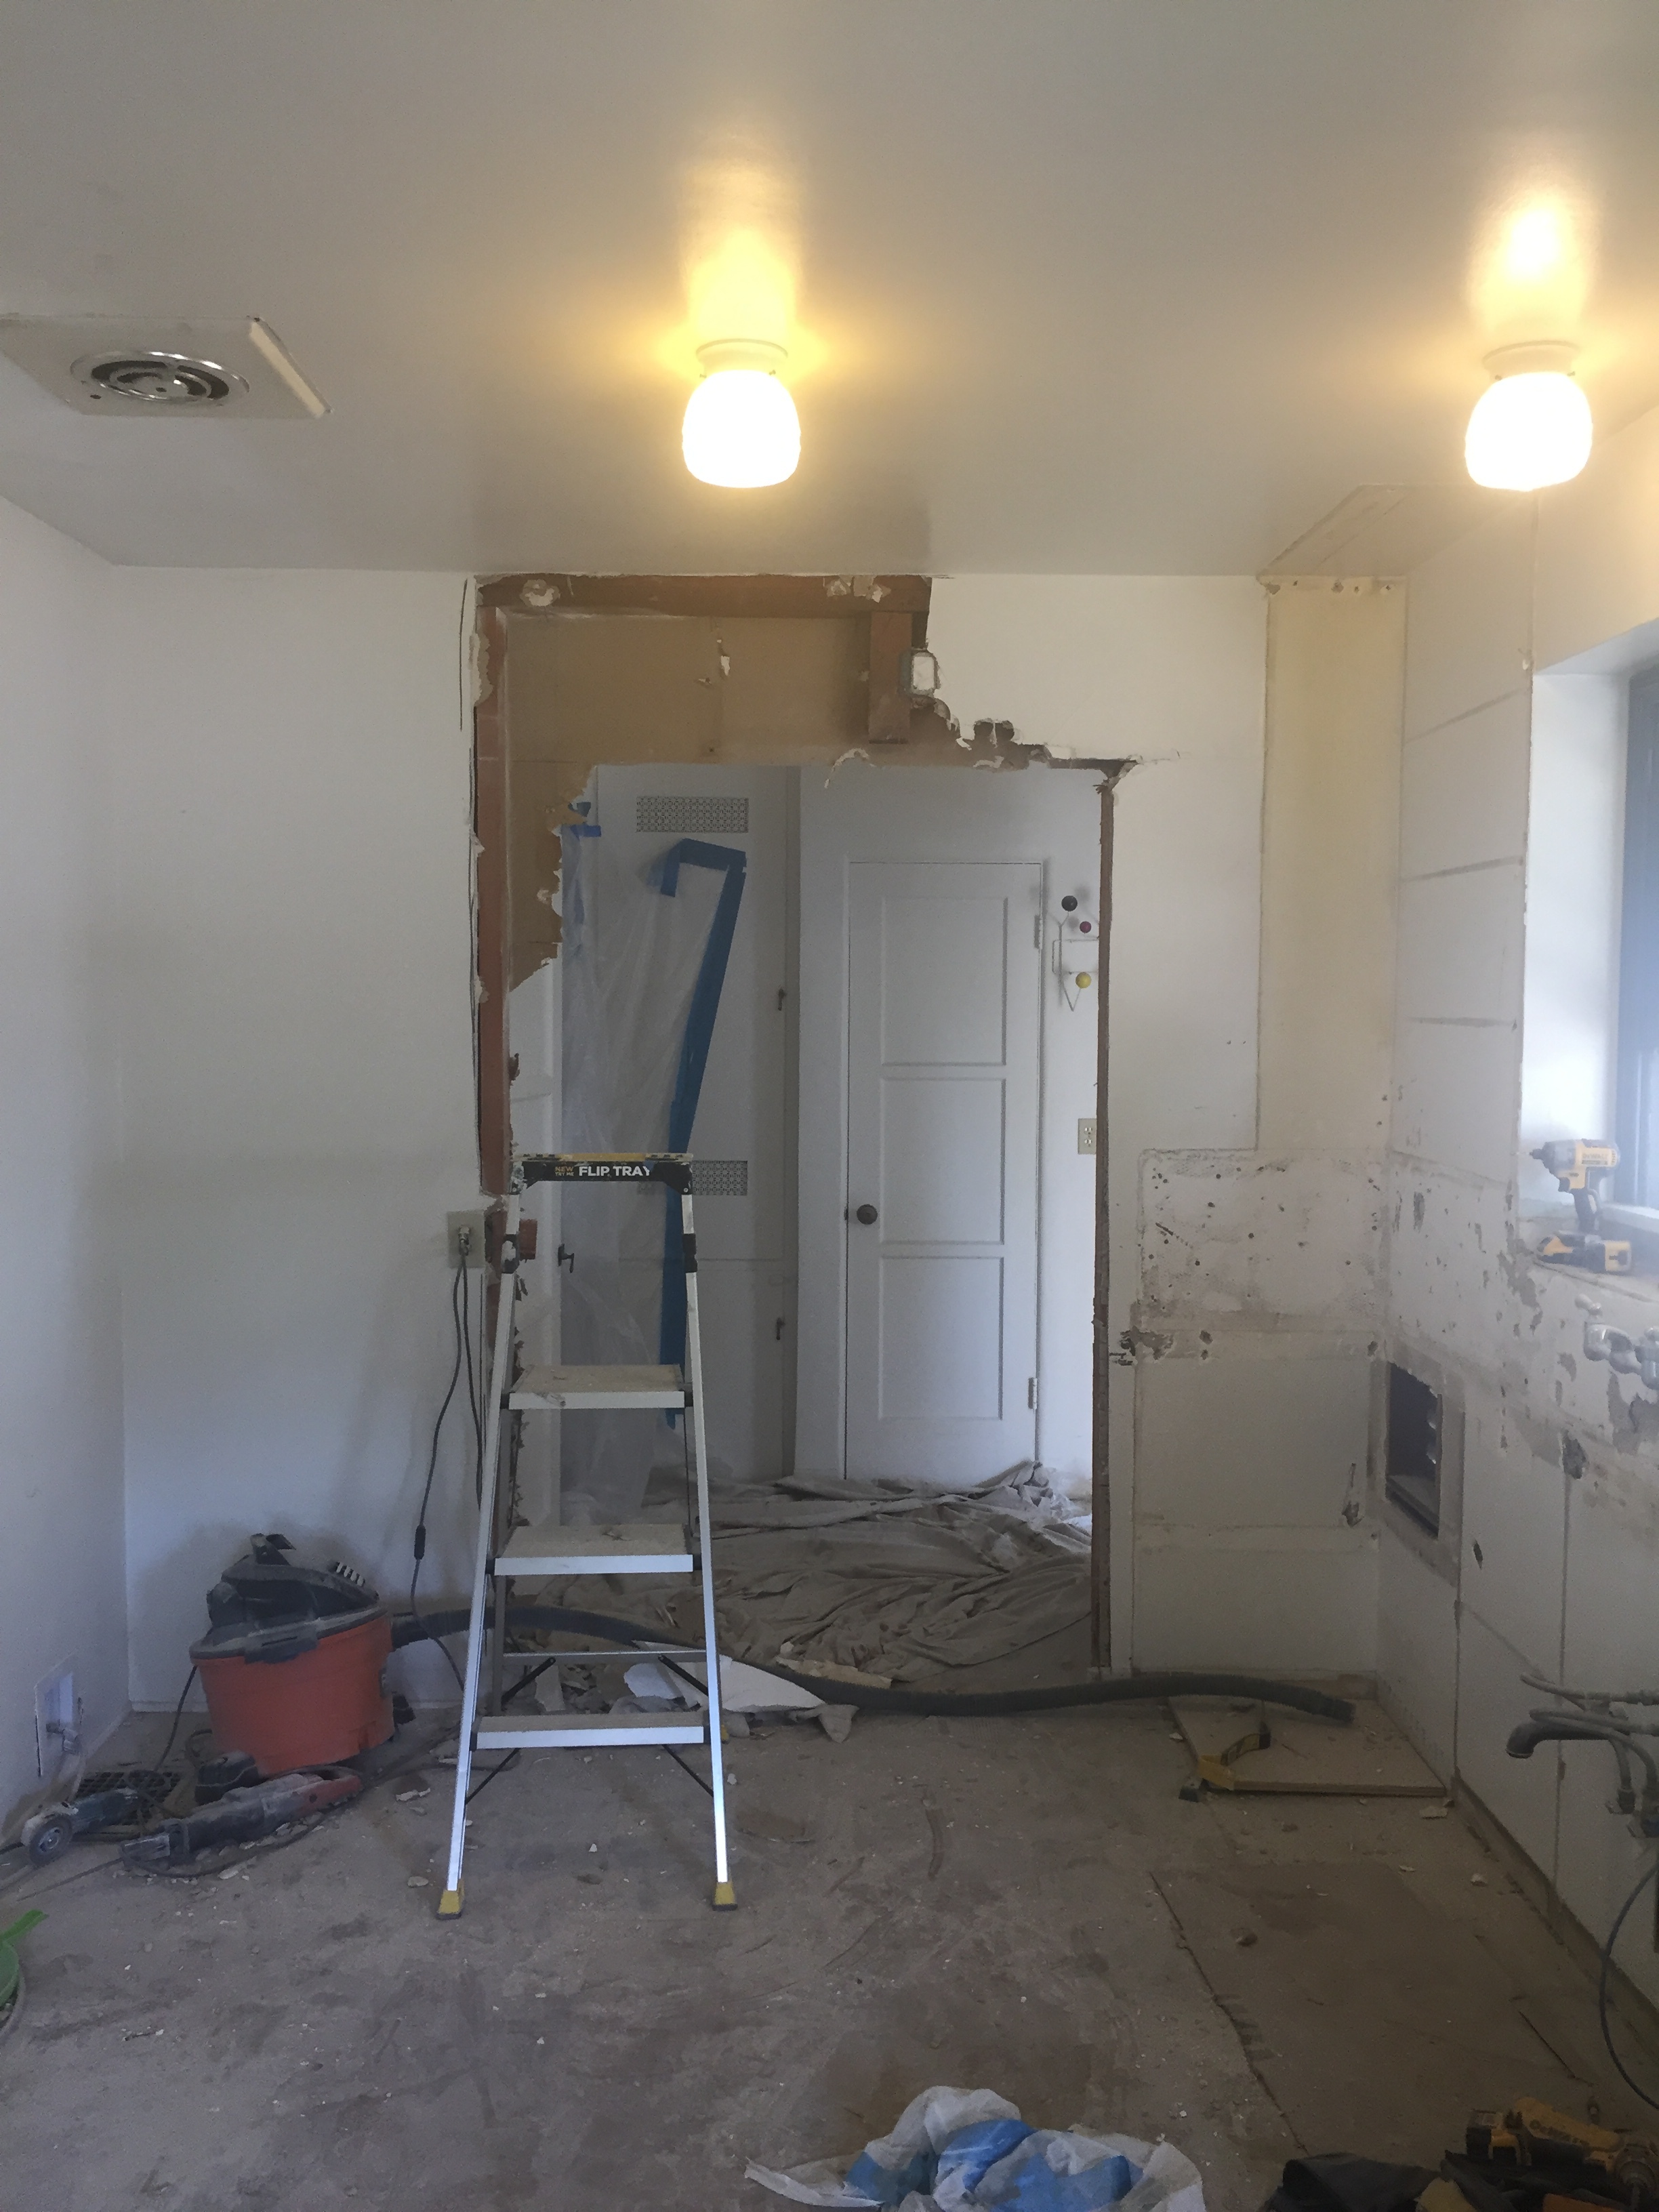
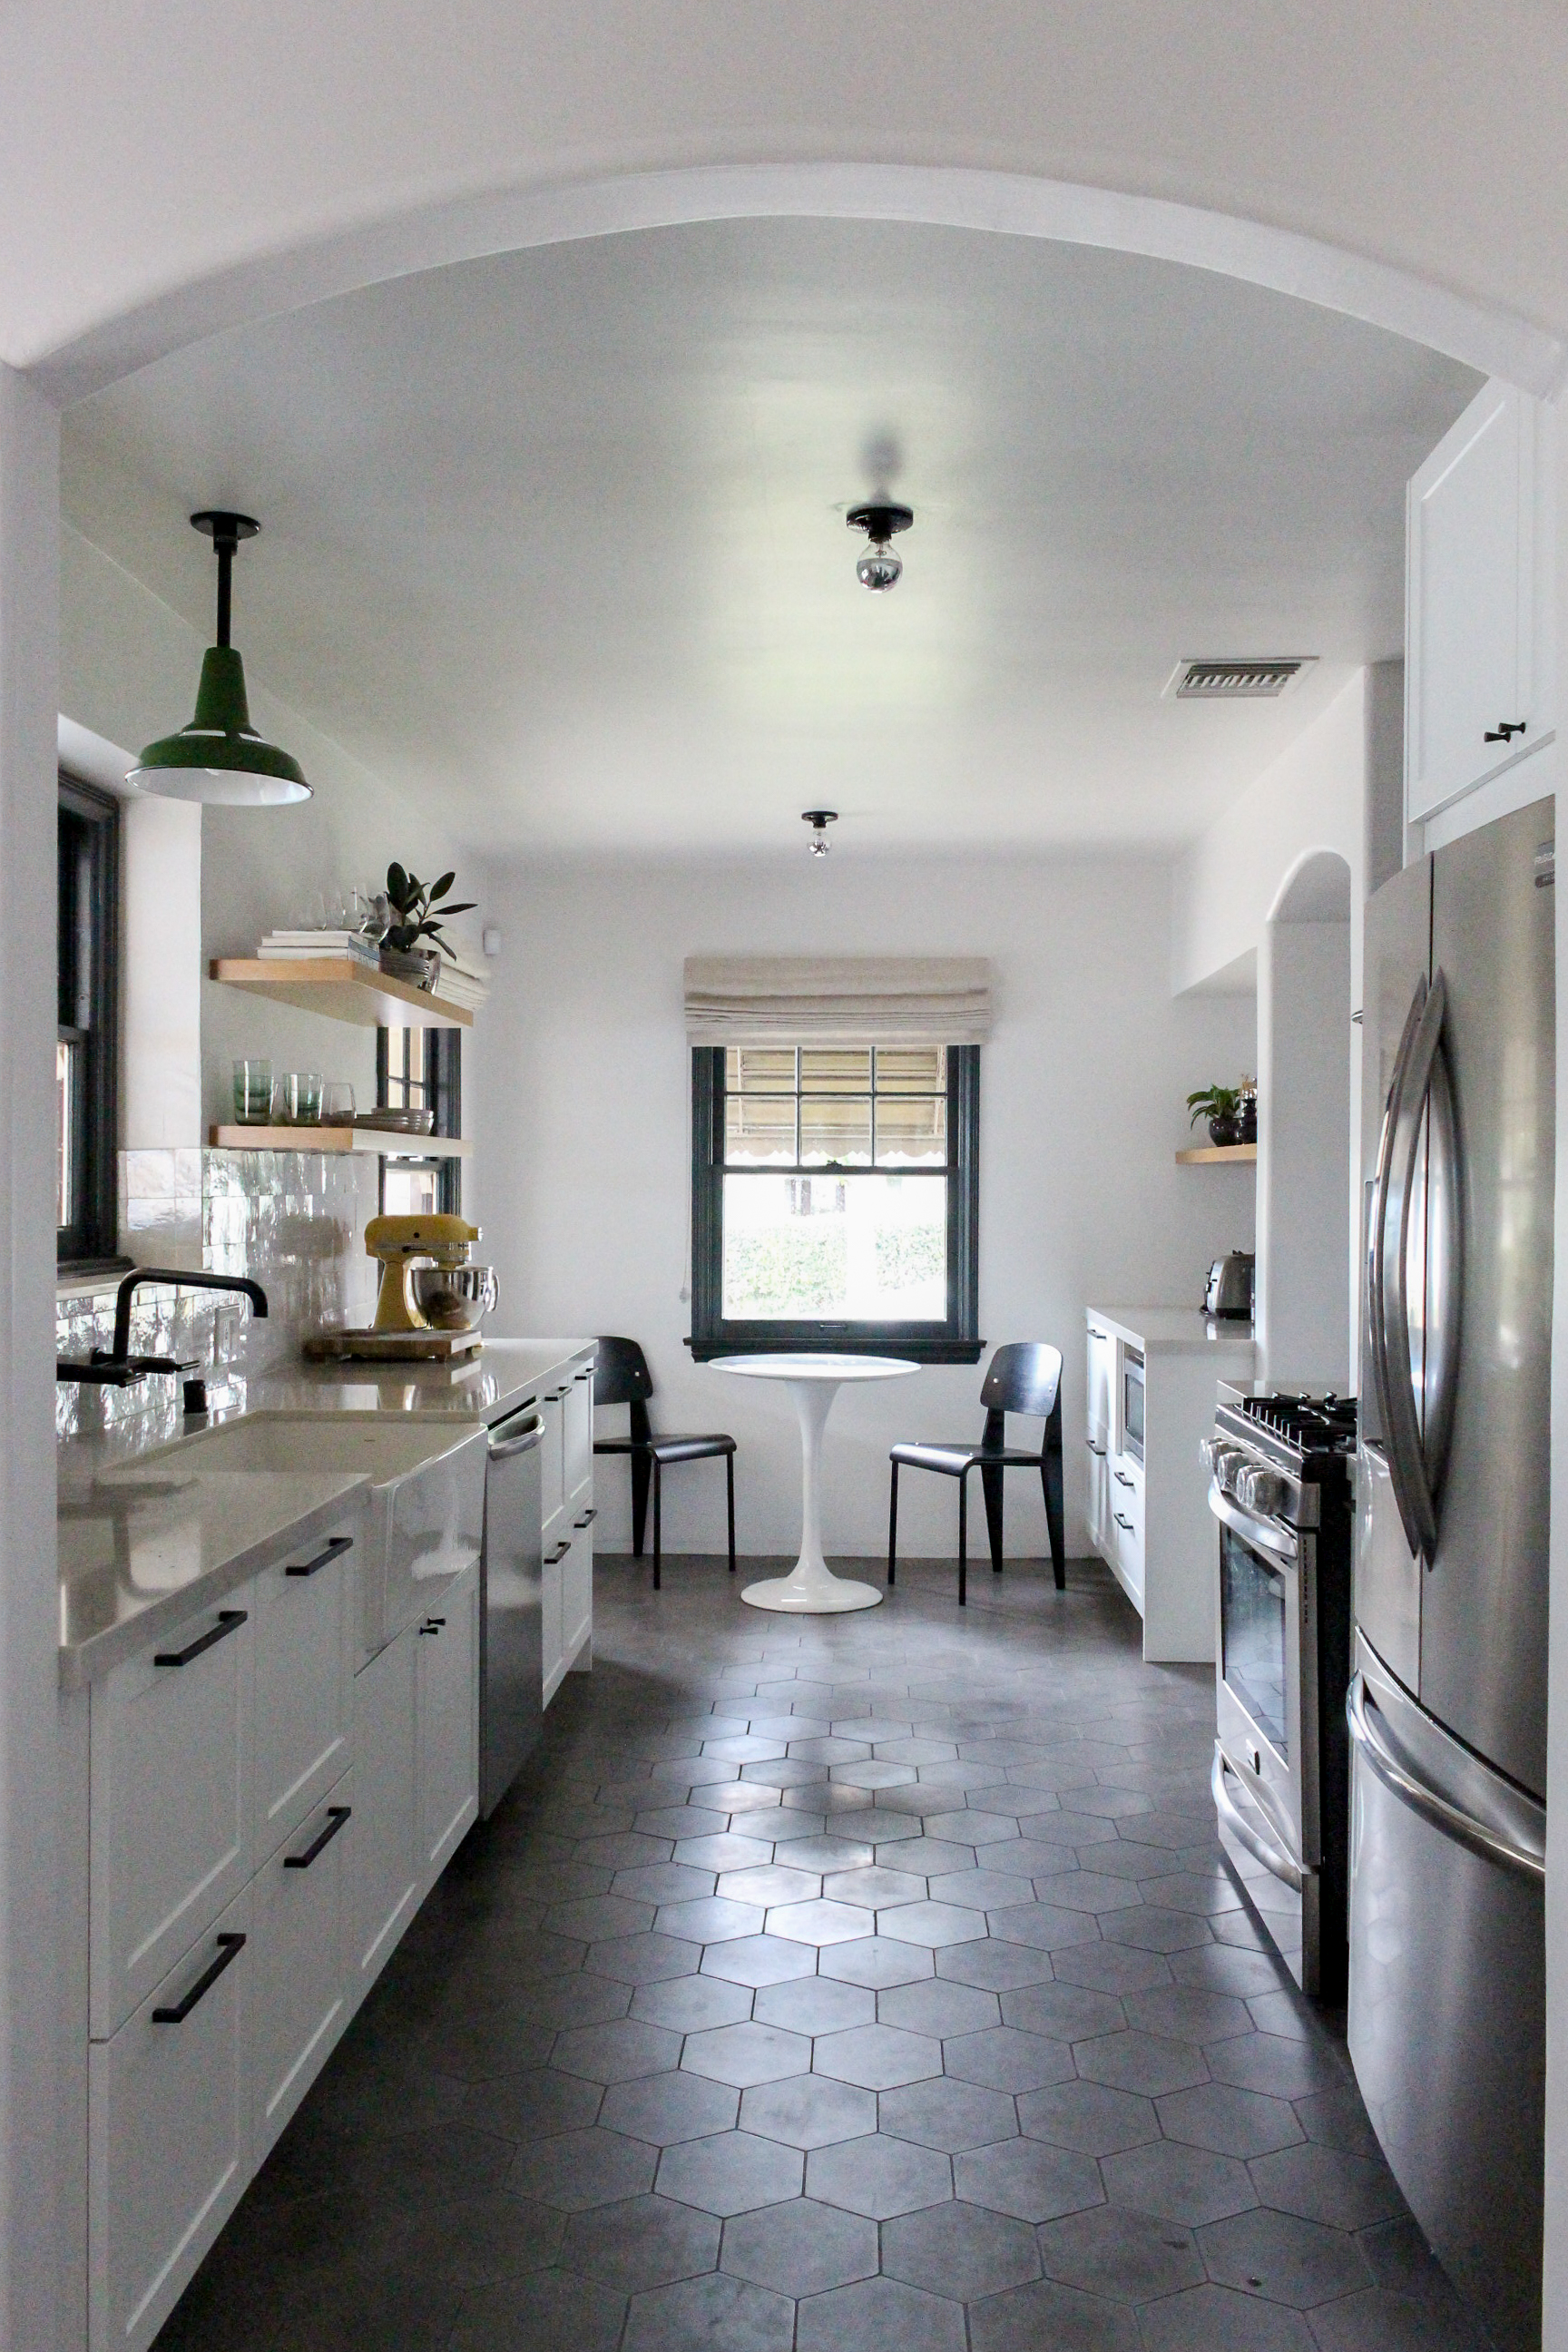
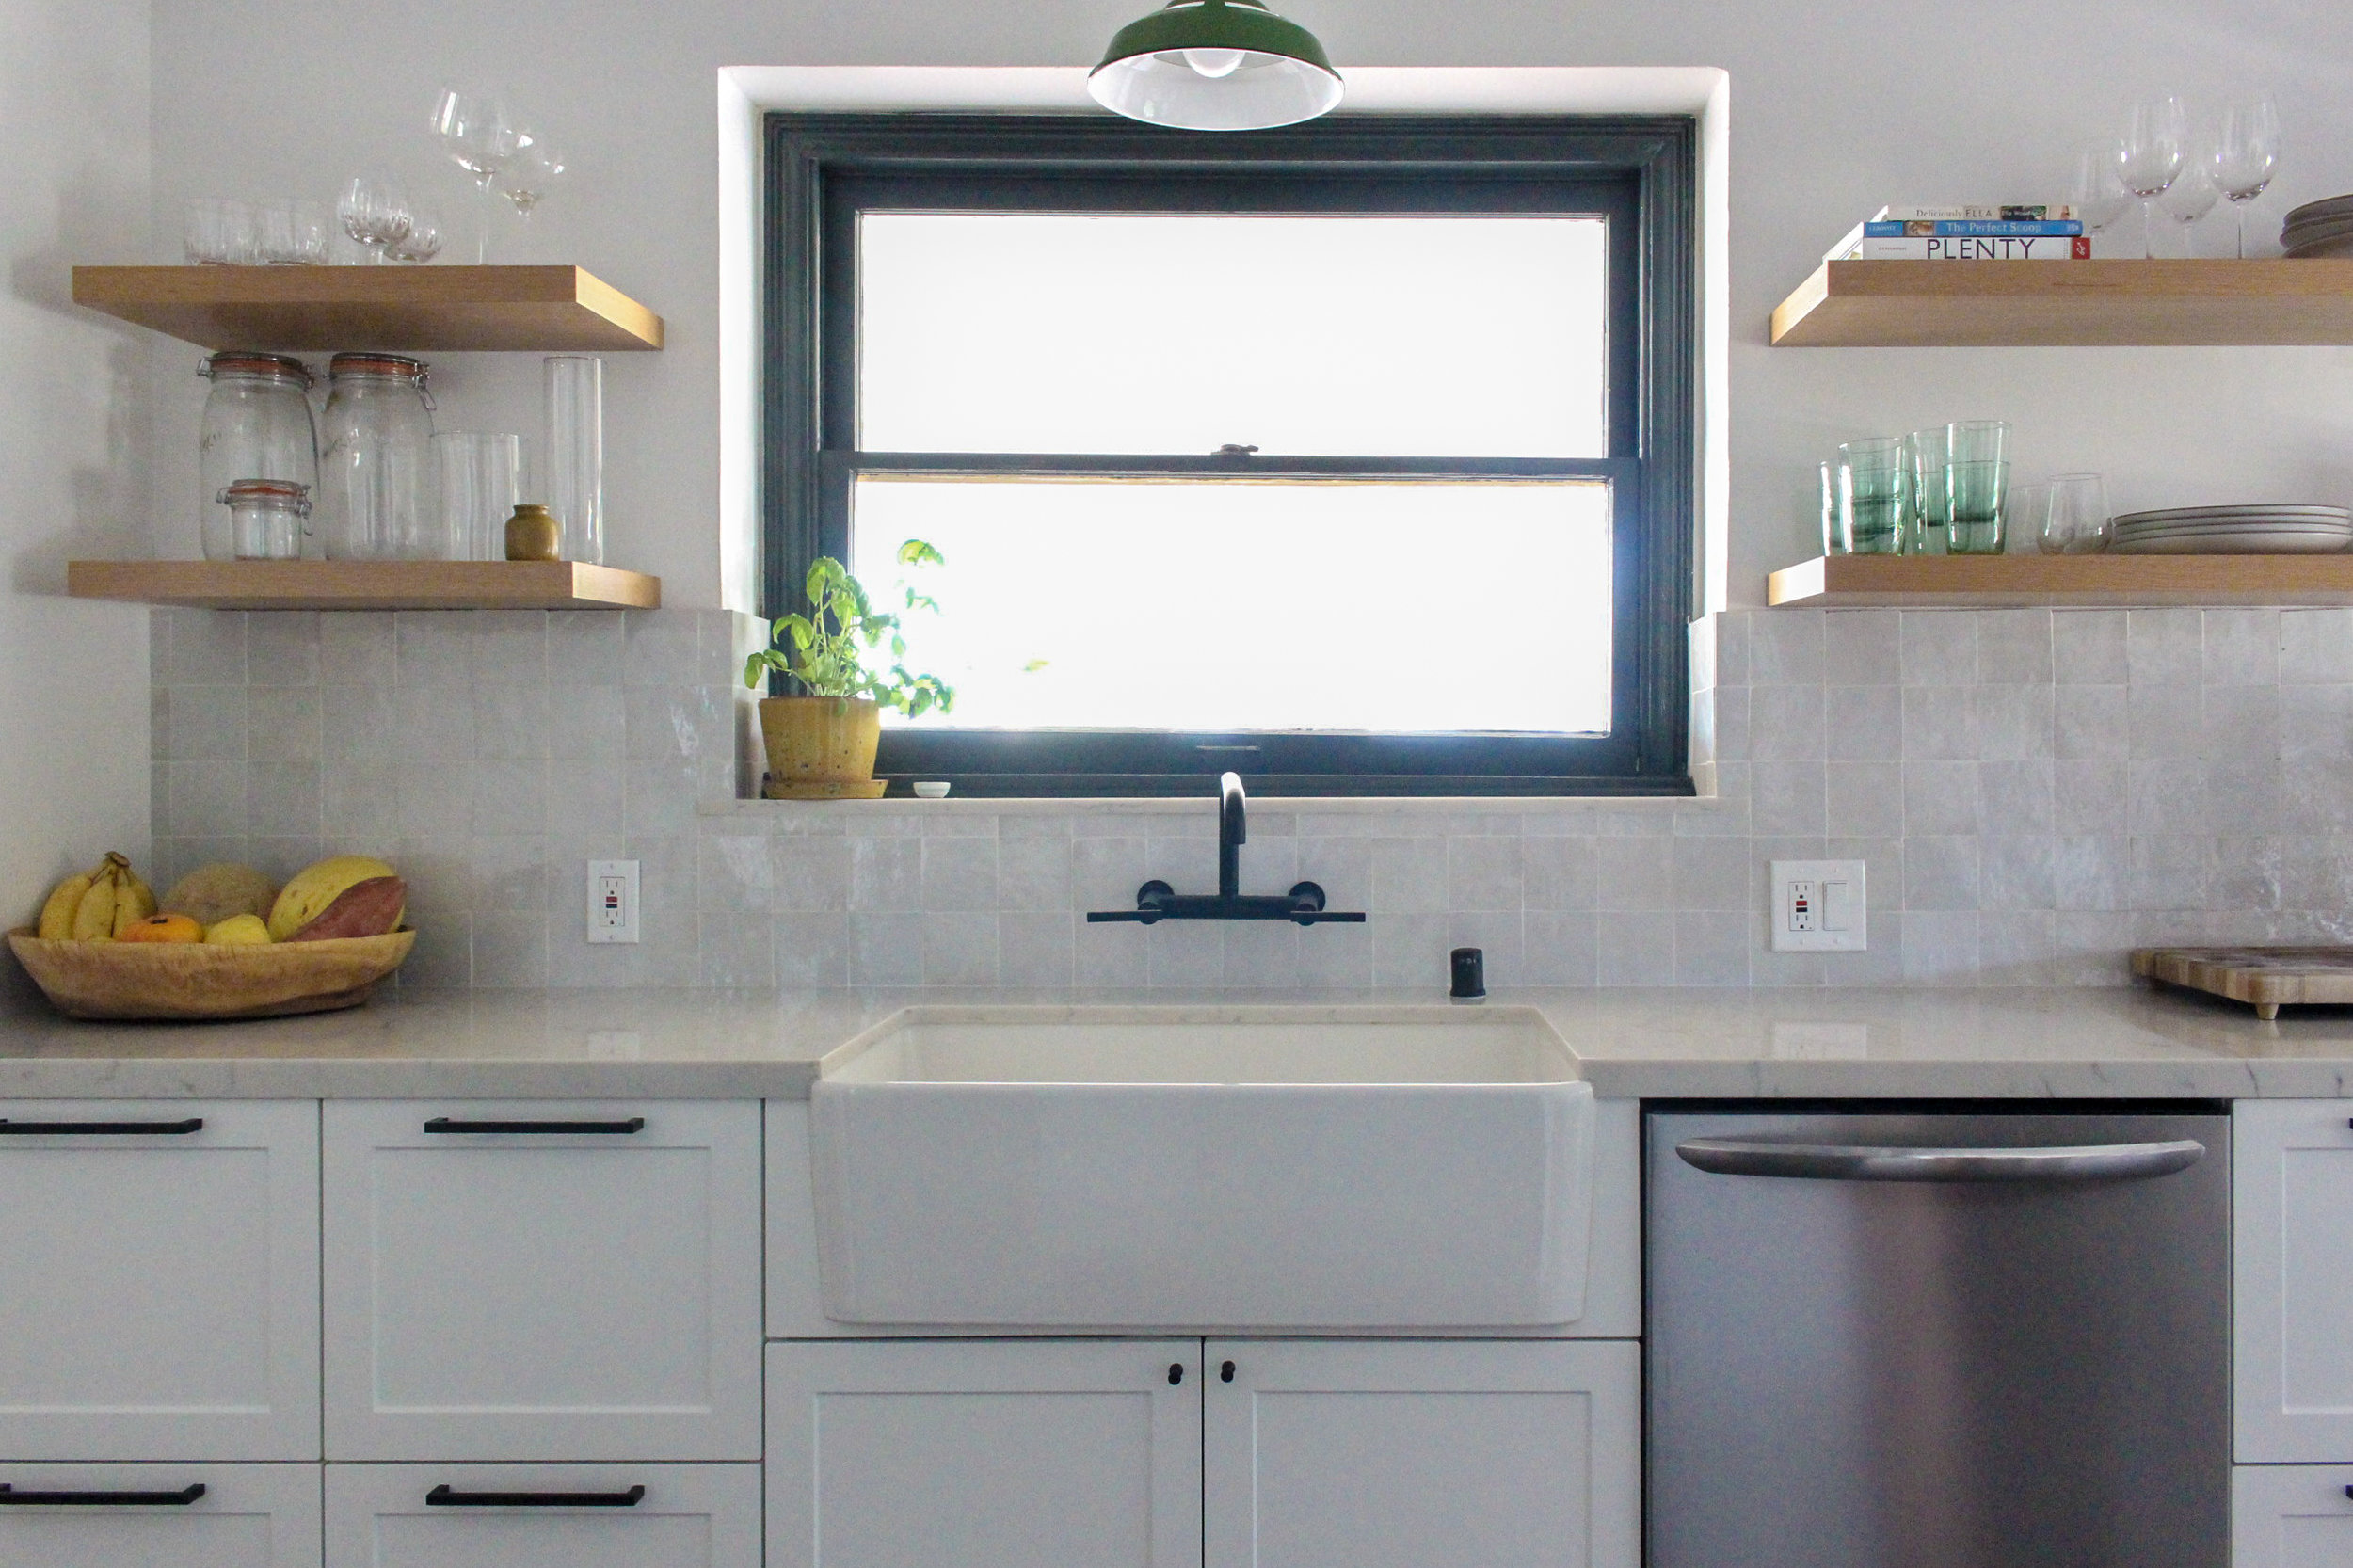
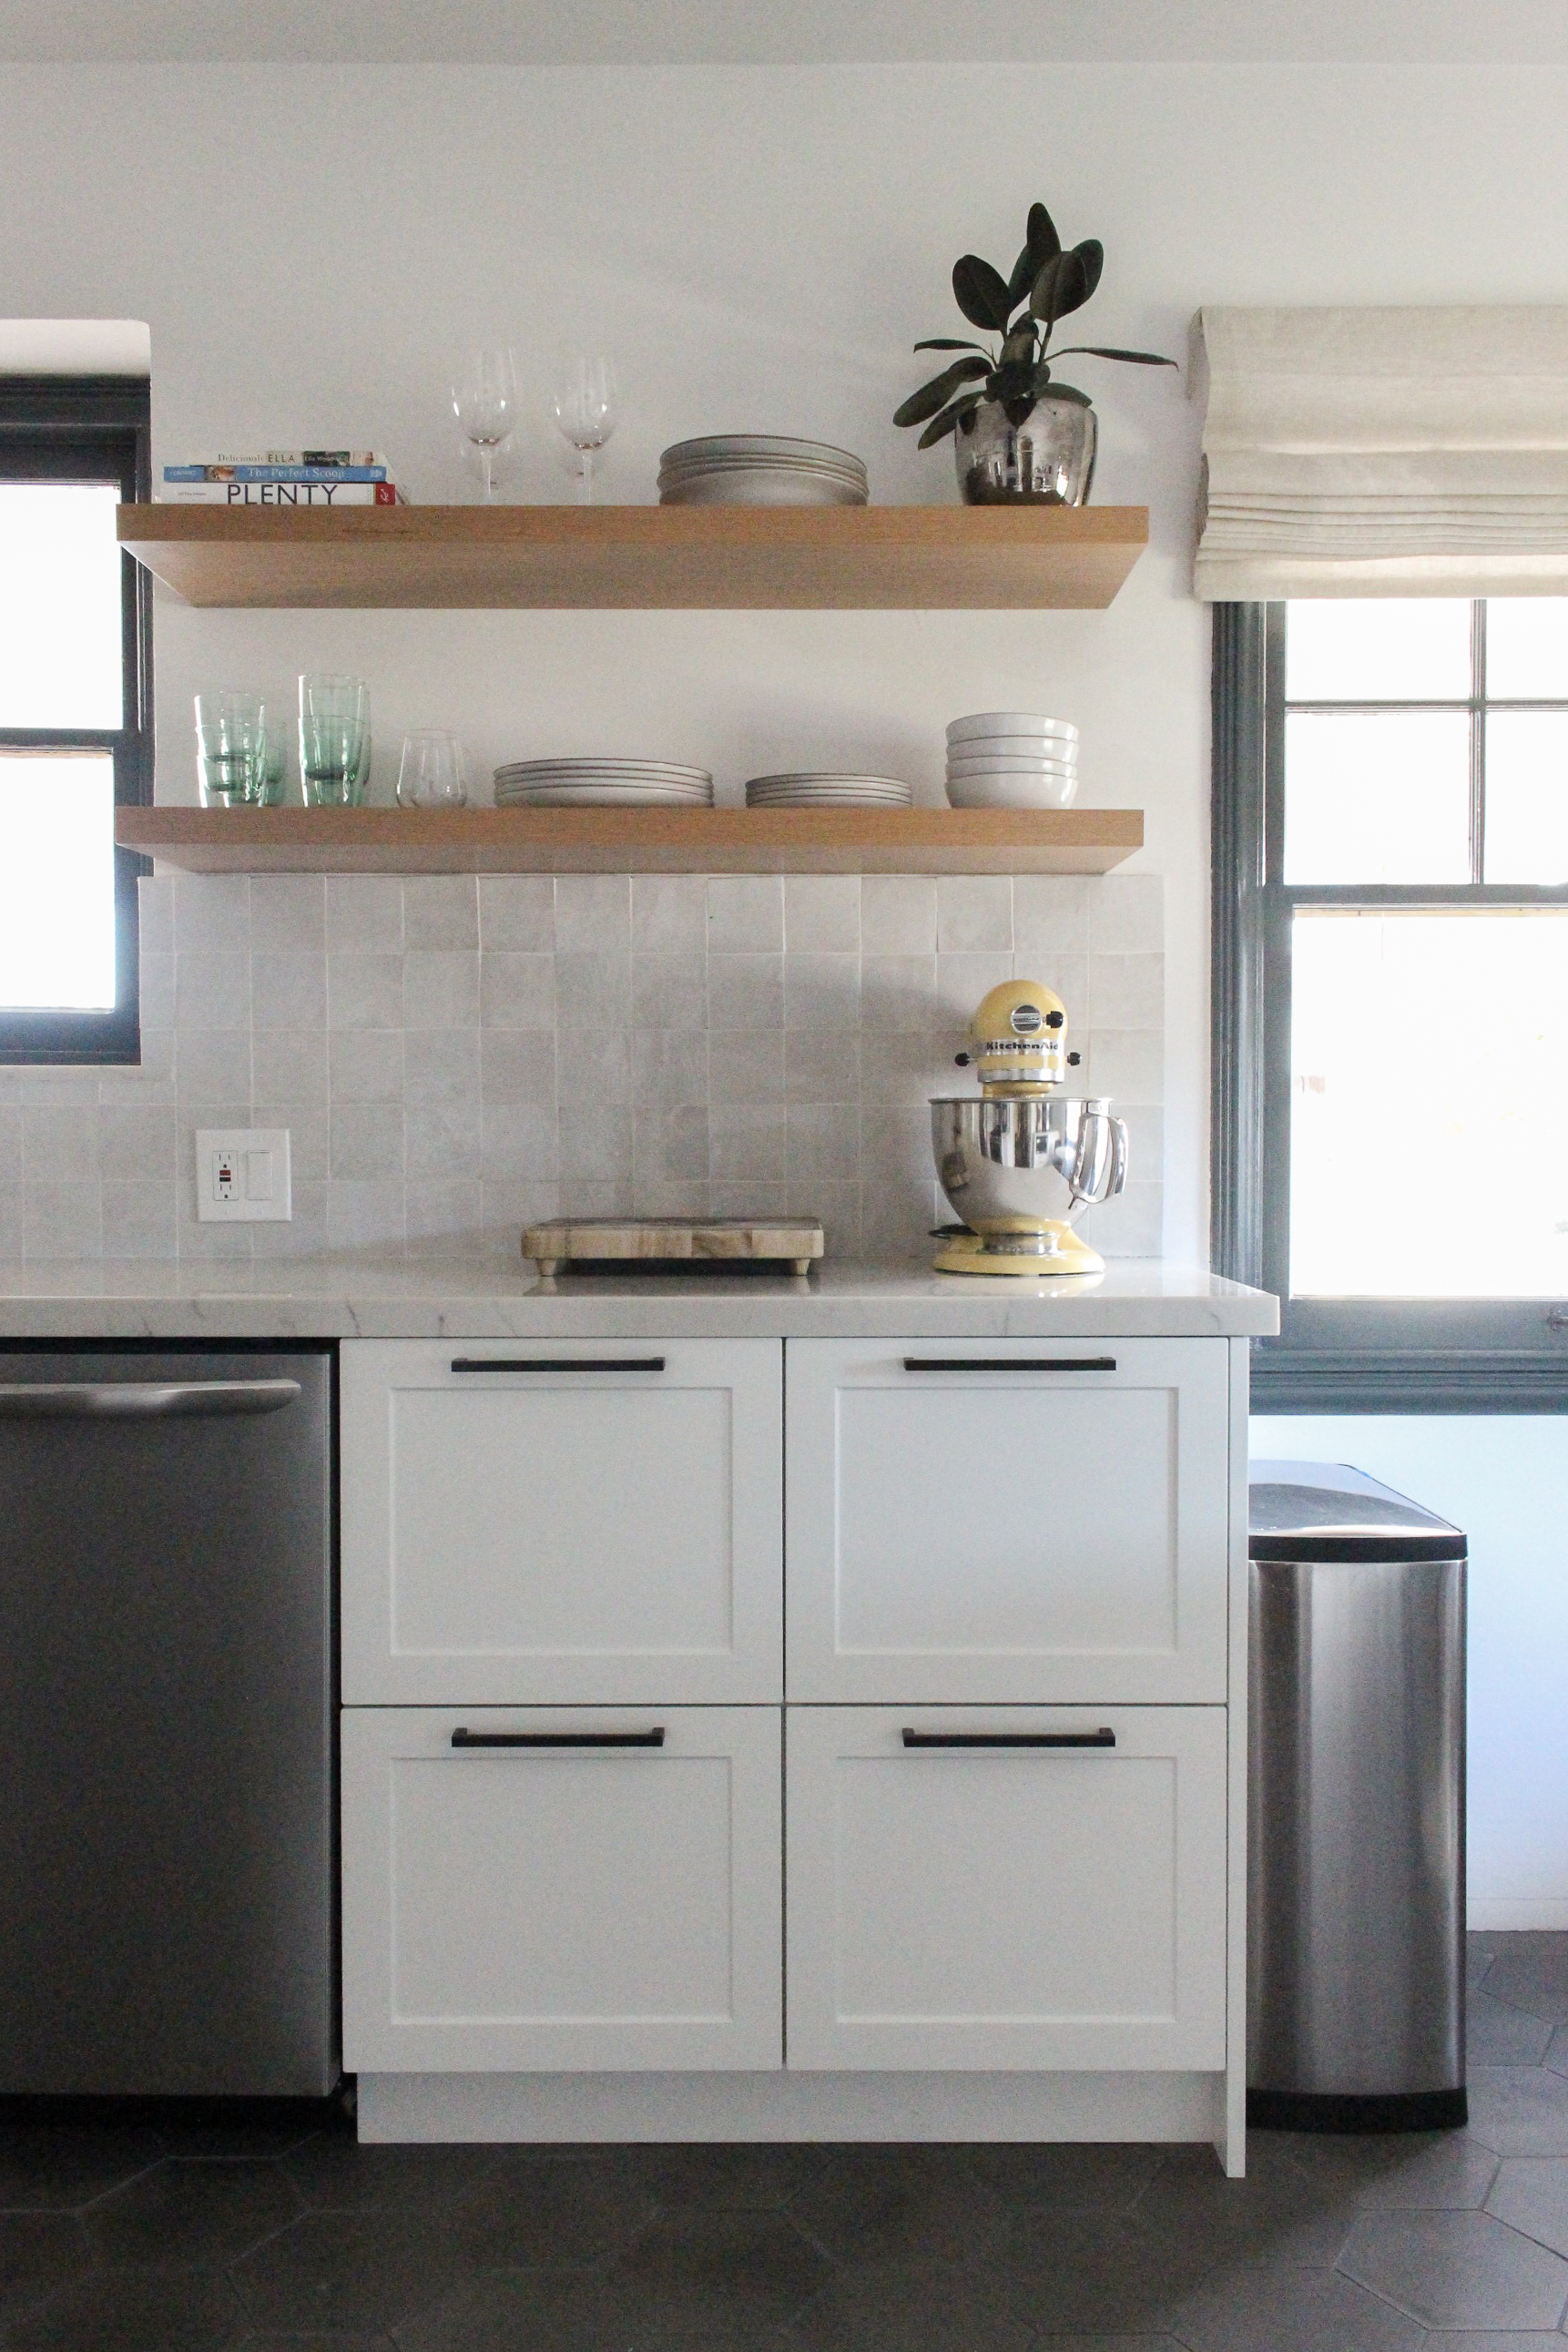
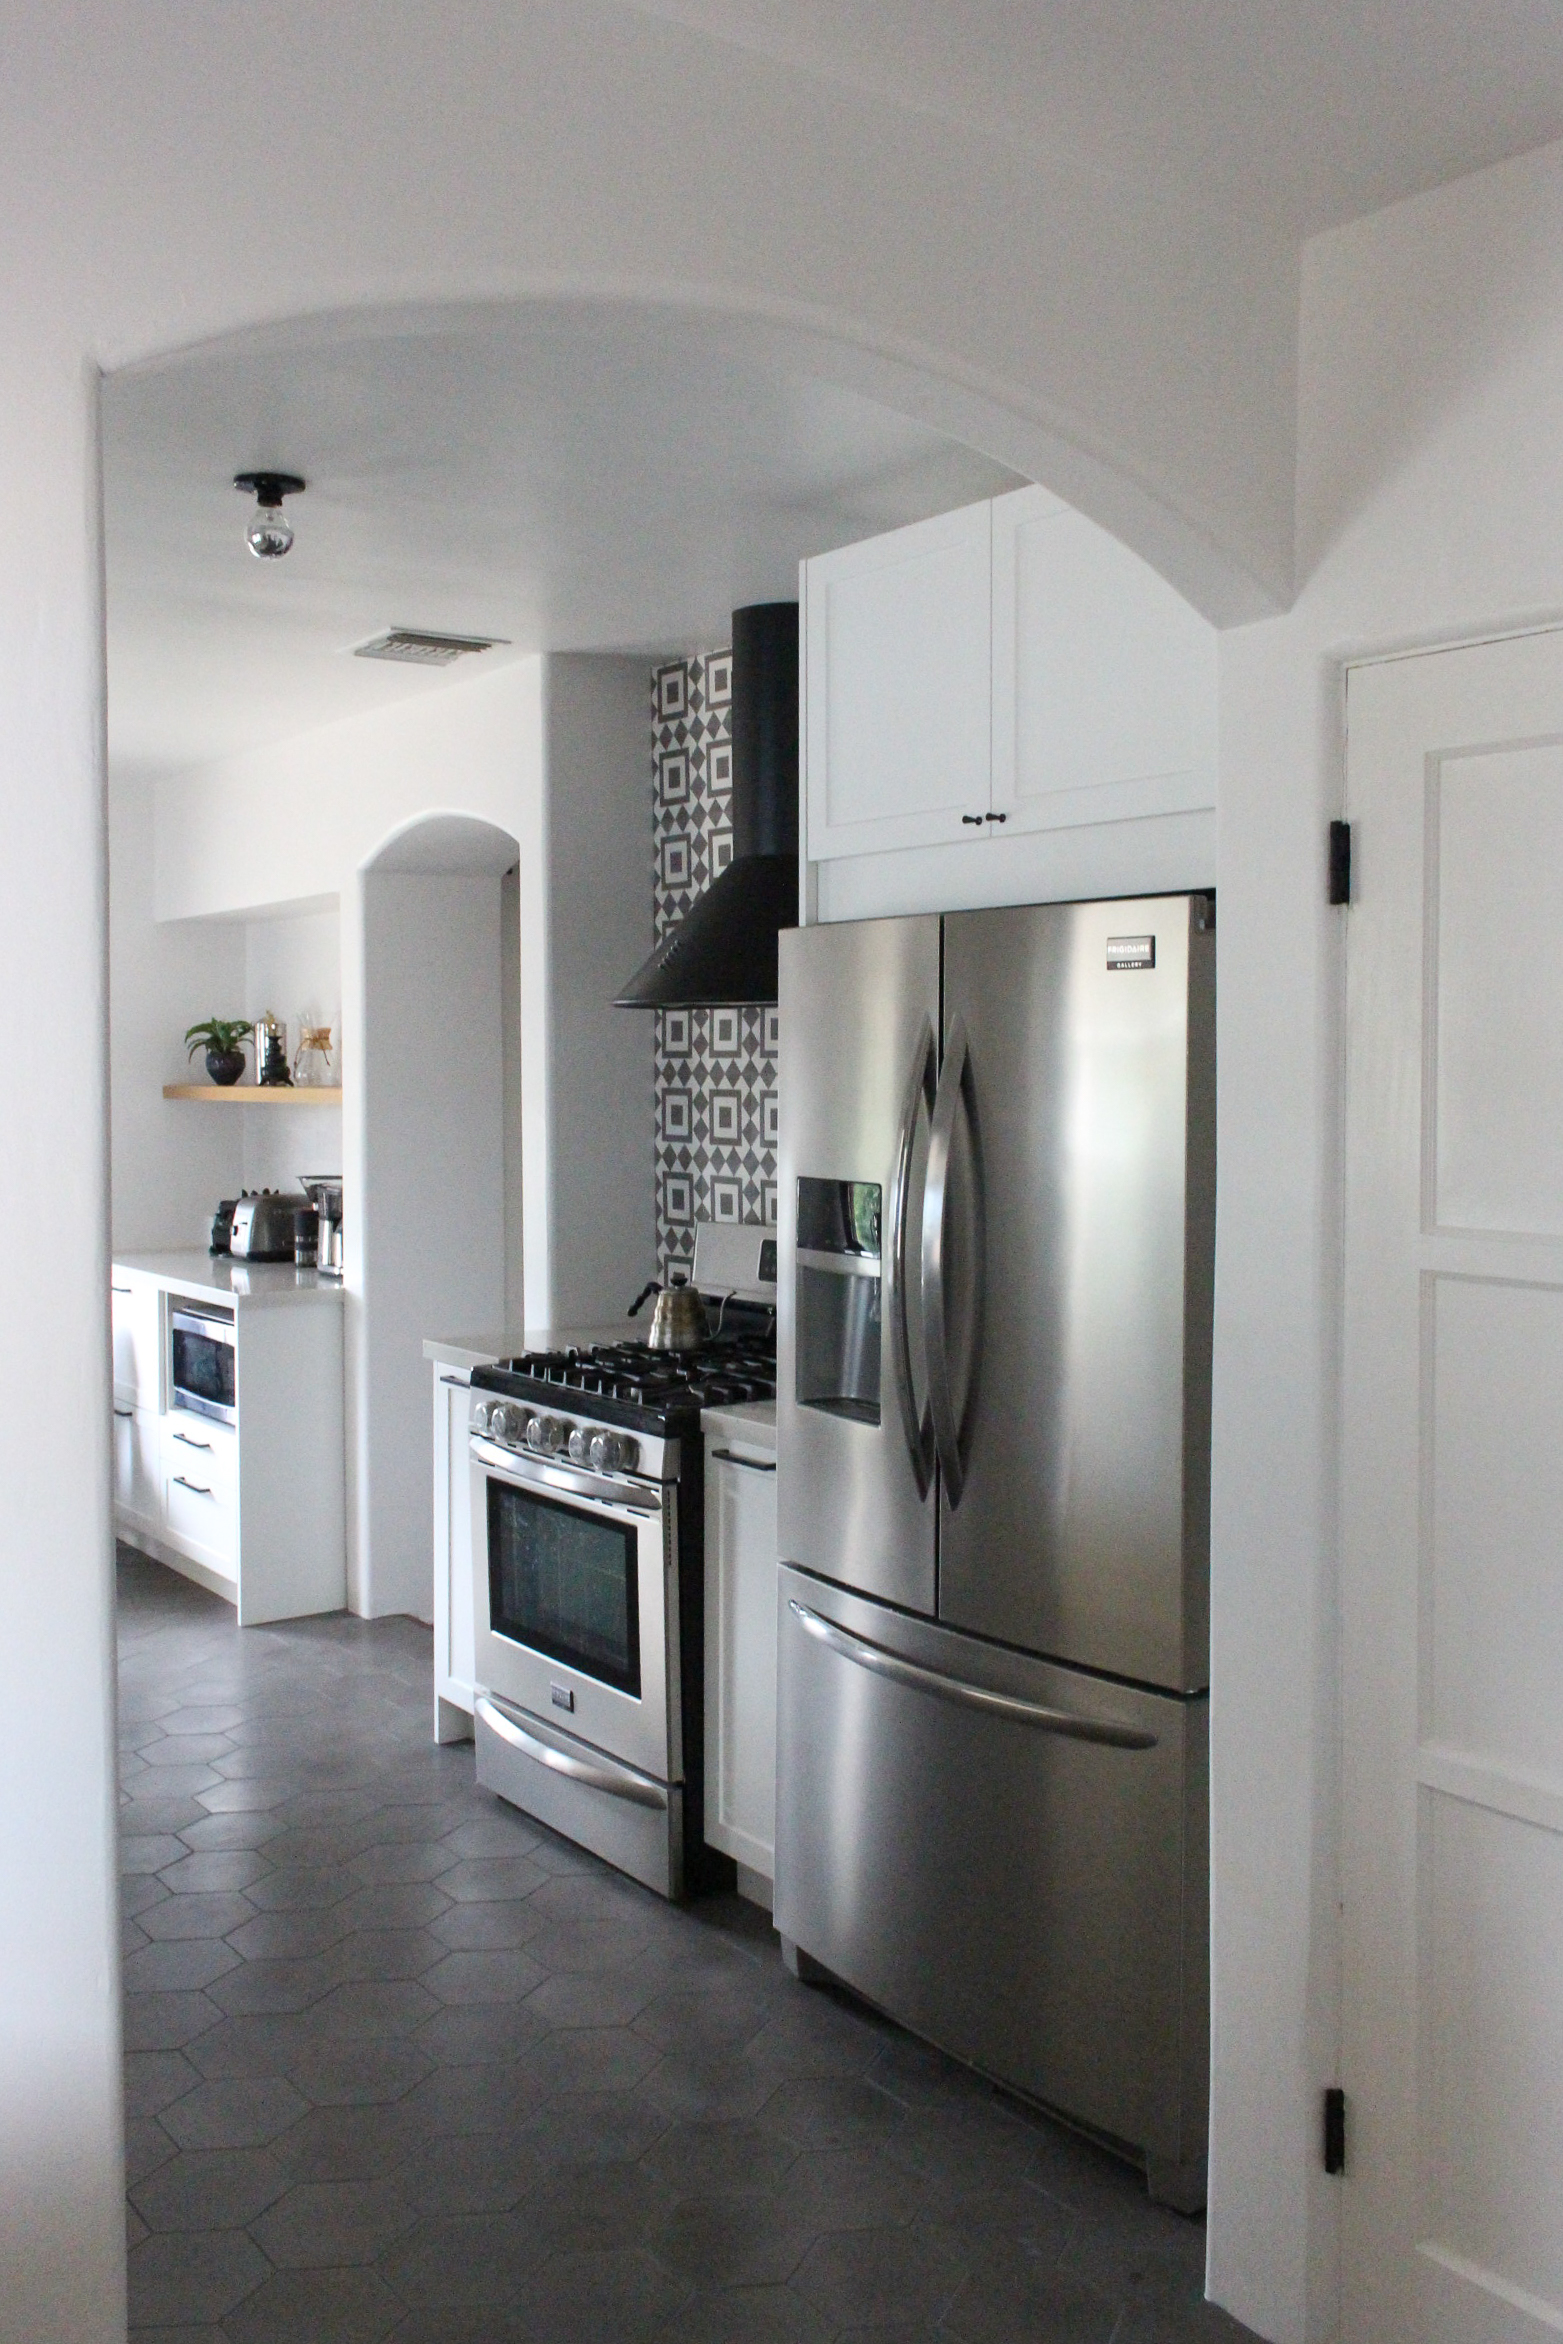
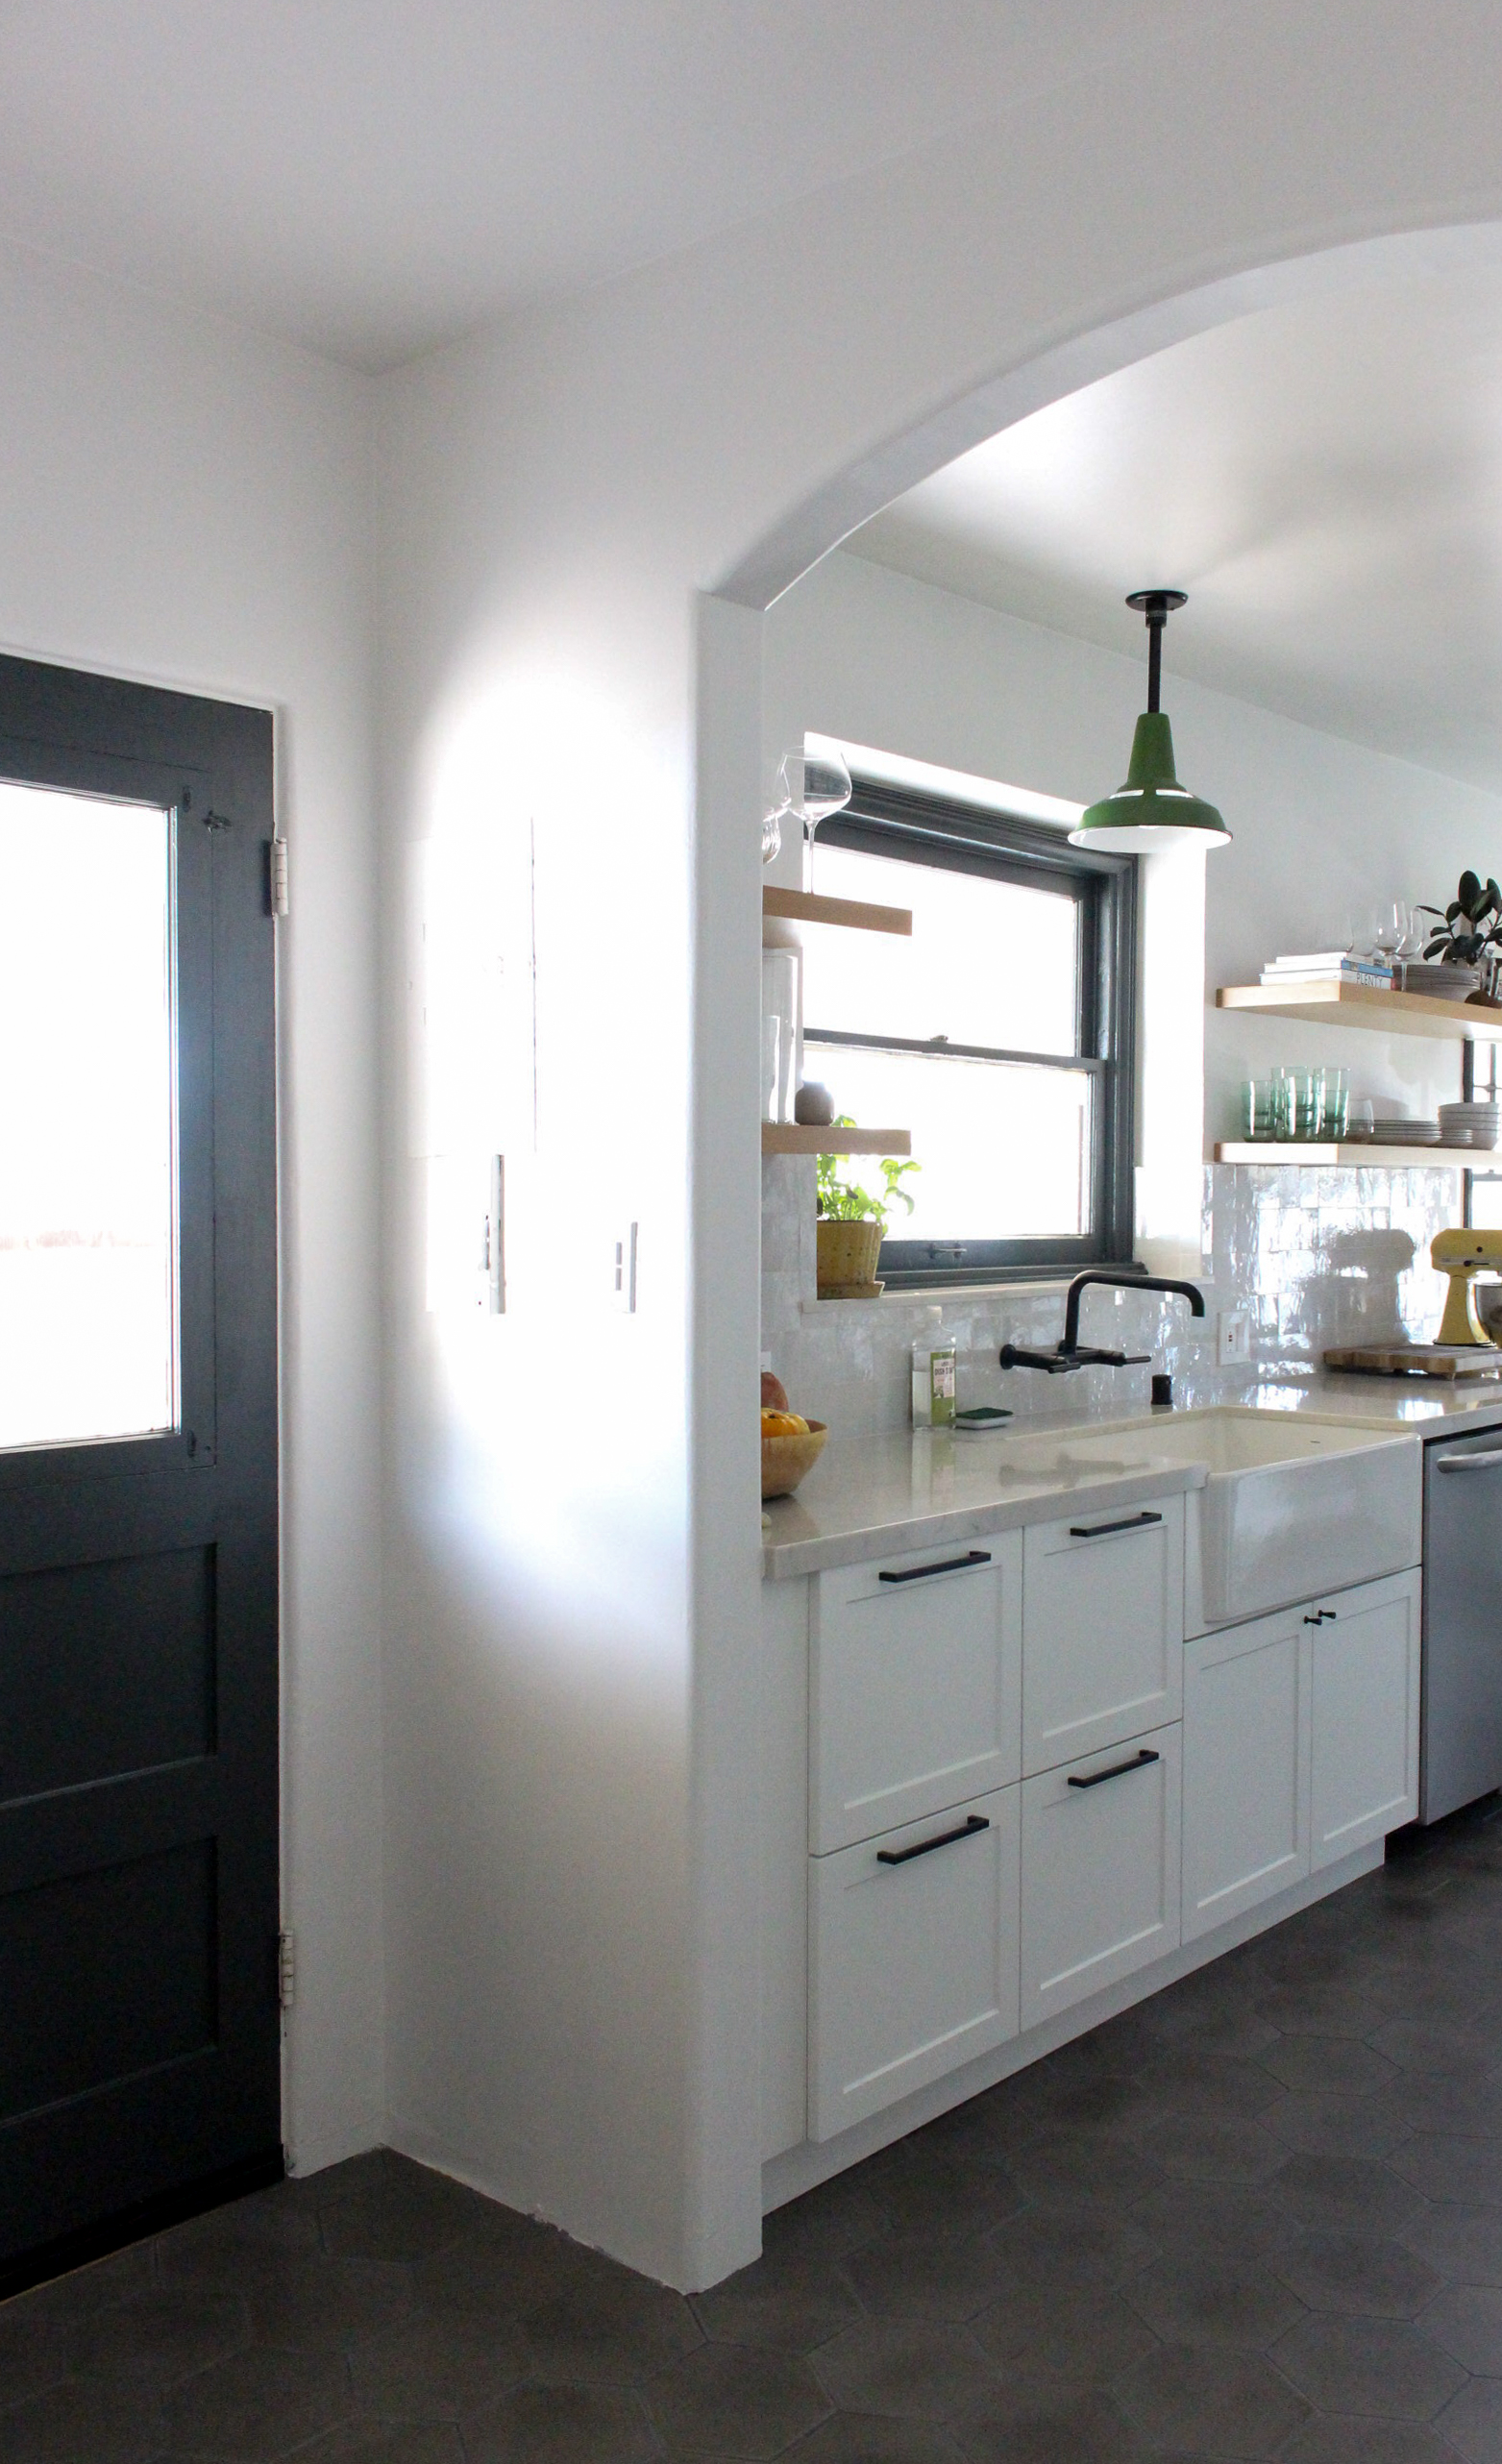
You may have noticed that we left the wall between the dining and kitchen intact. This was done mainly for budget reasons, but also made a lot more sense when it came to the dining room side of the wall. Keeping the wall preserves the integrity of the original kitchen which kept the space separate and special, not to mention giving us space to put a graphic backsplash! We did need more room to make the kitchen more functional, so instead of going for open concept, we decided to widen the existing entries into the kitchen to make it feel wider, as well as forgo upper cabinets to lighten things up.
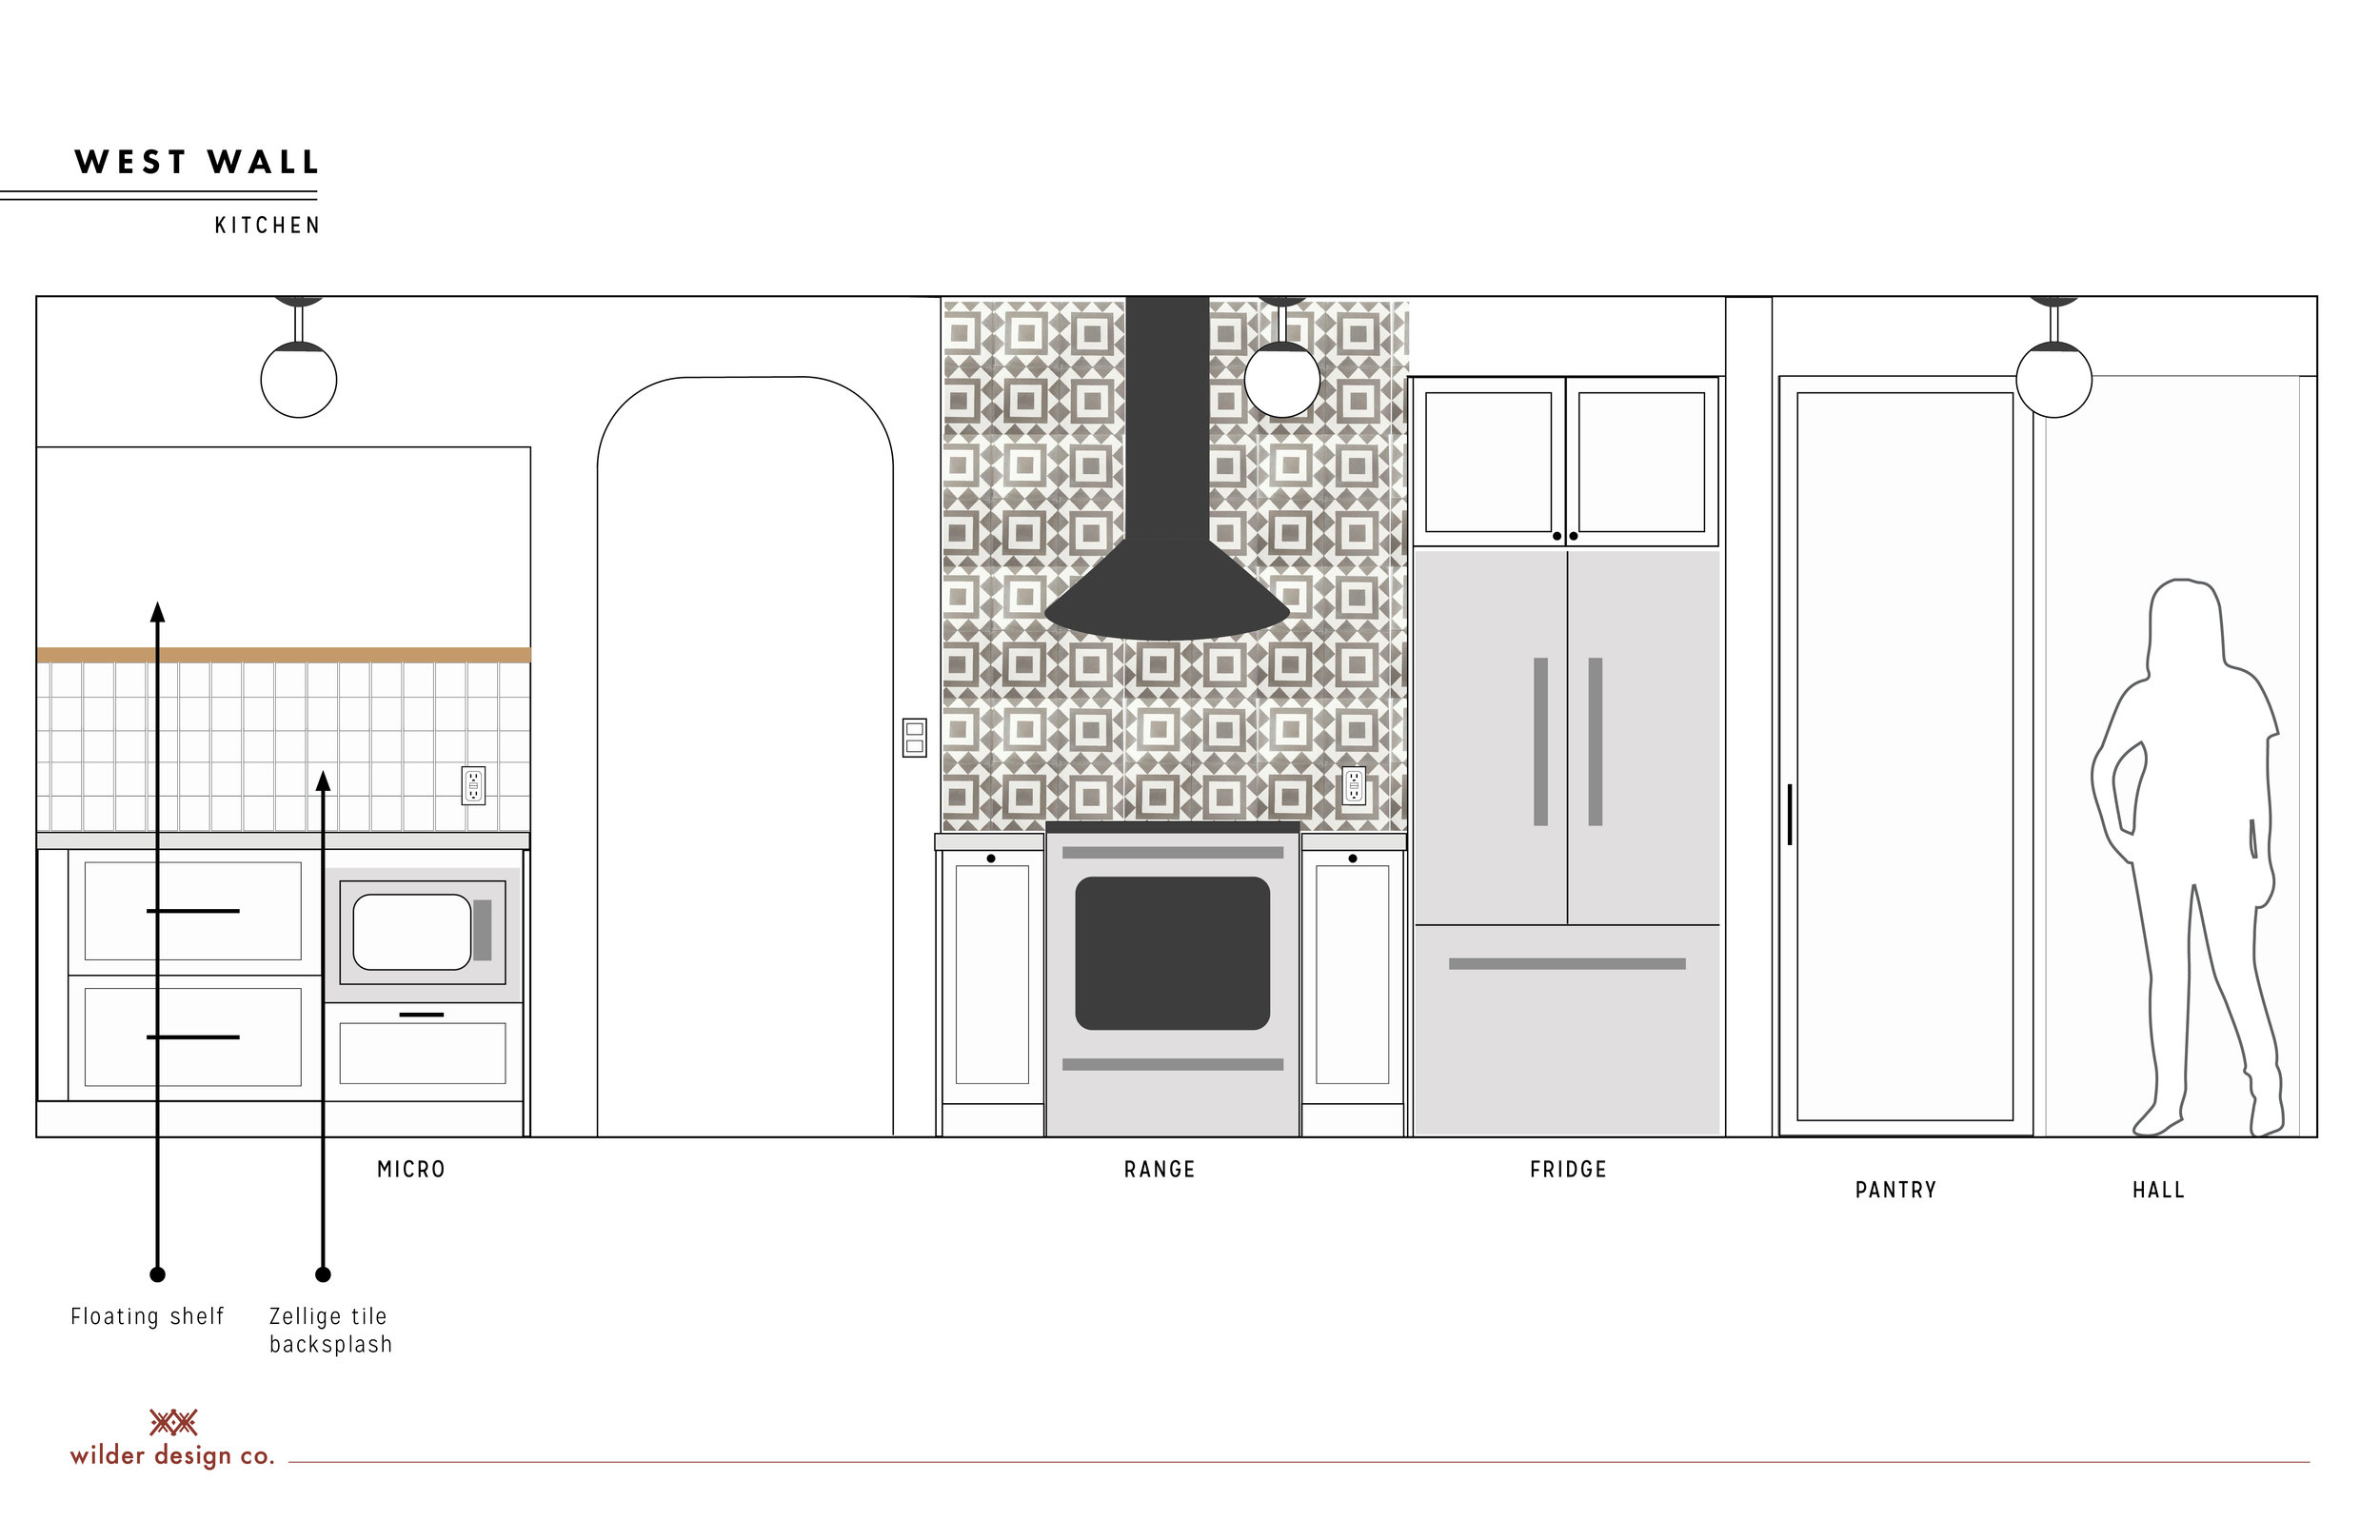
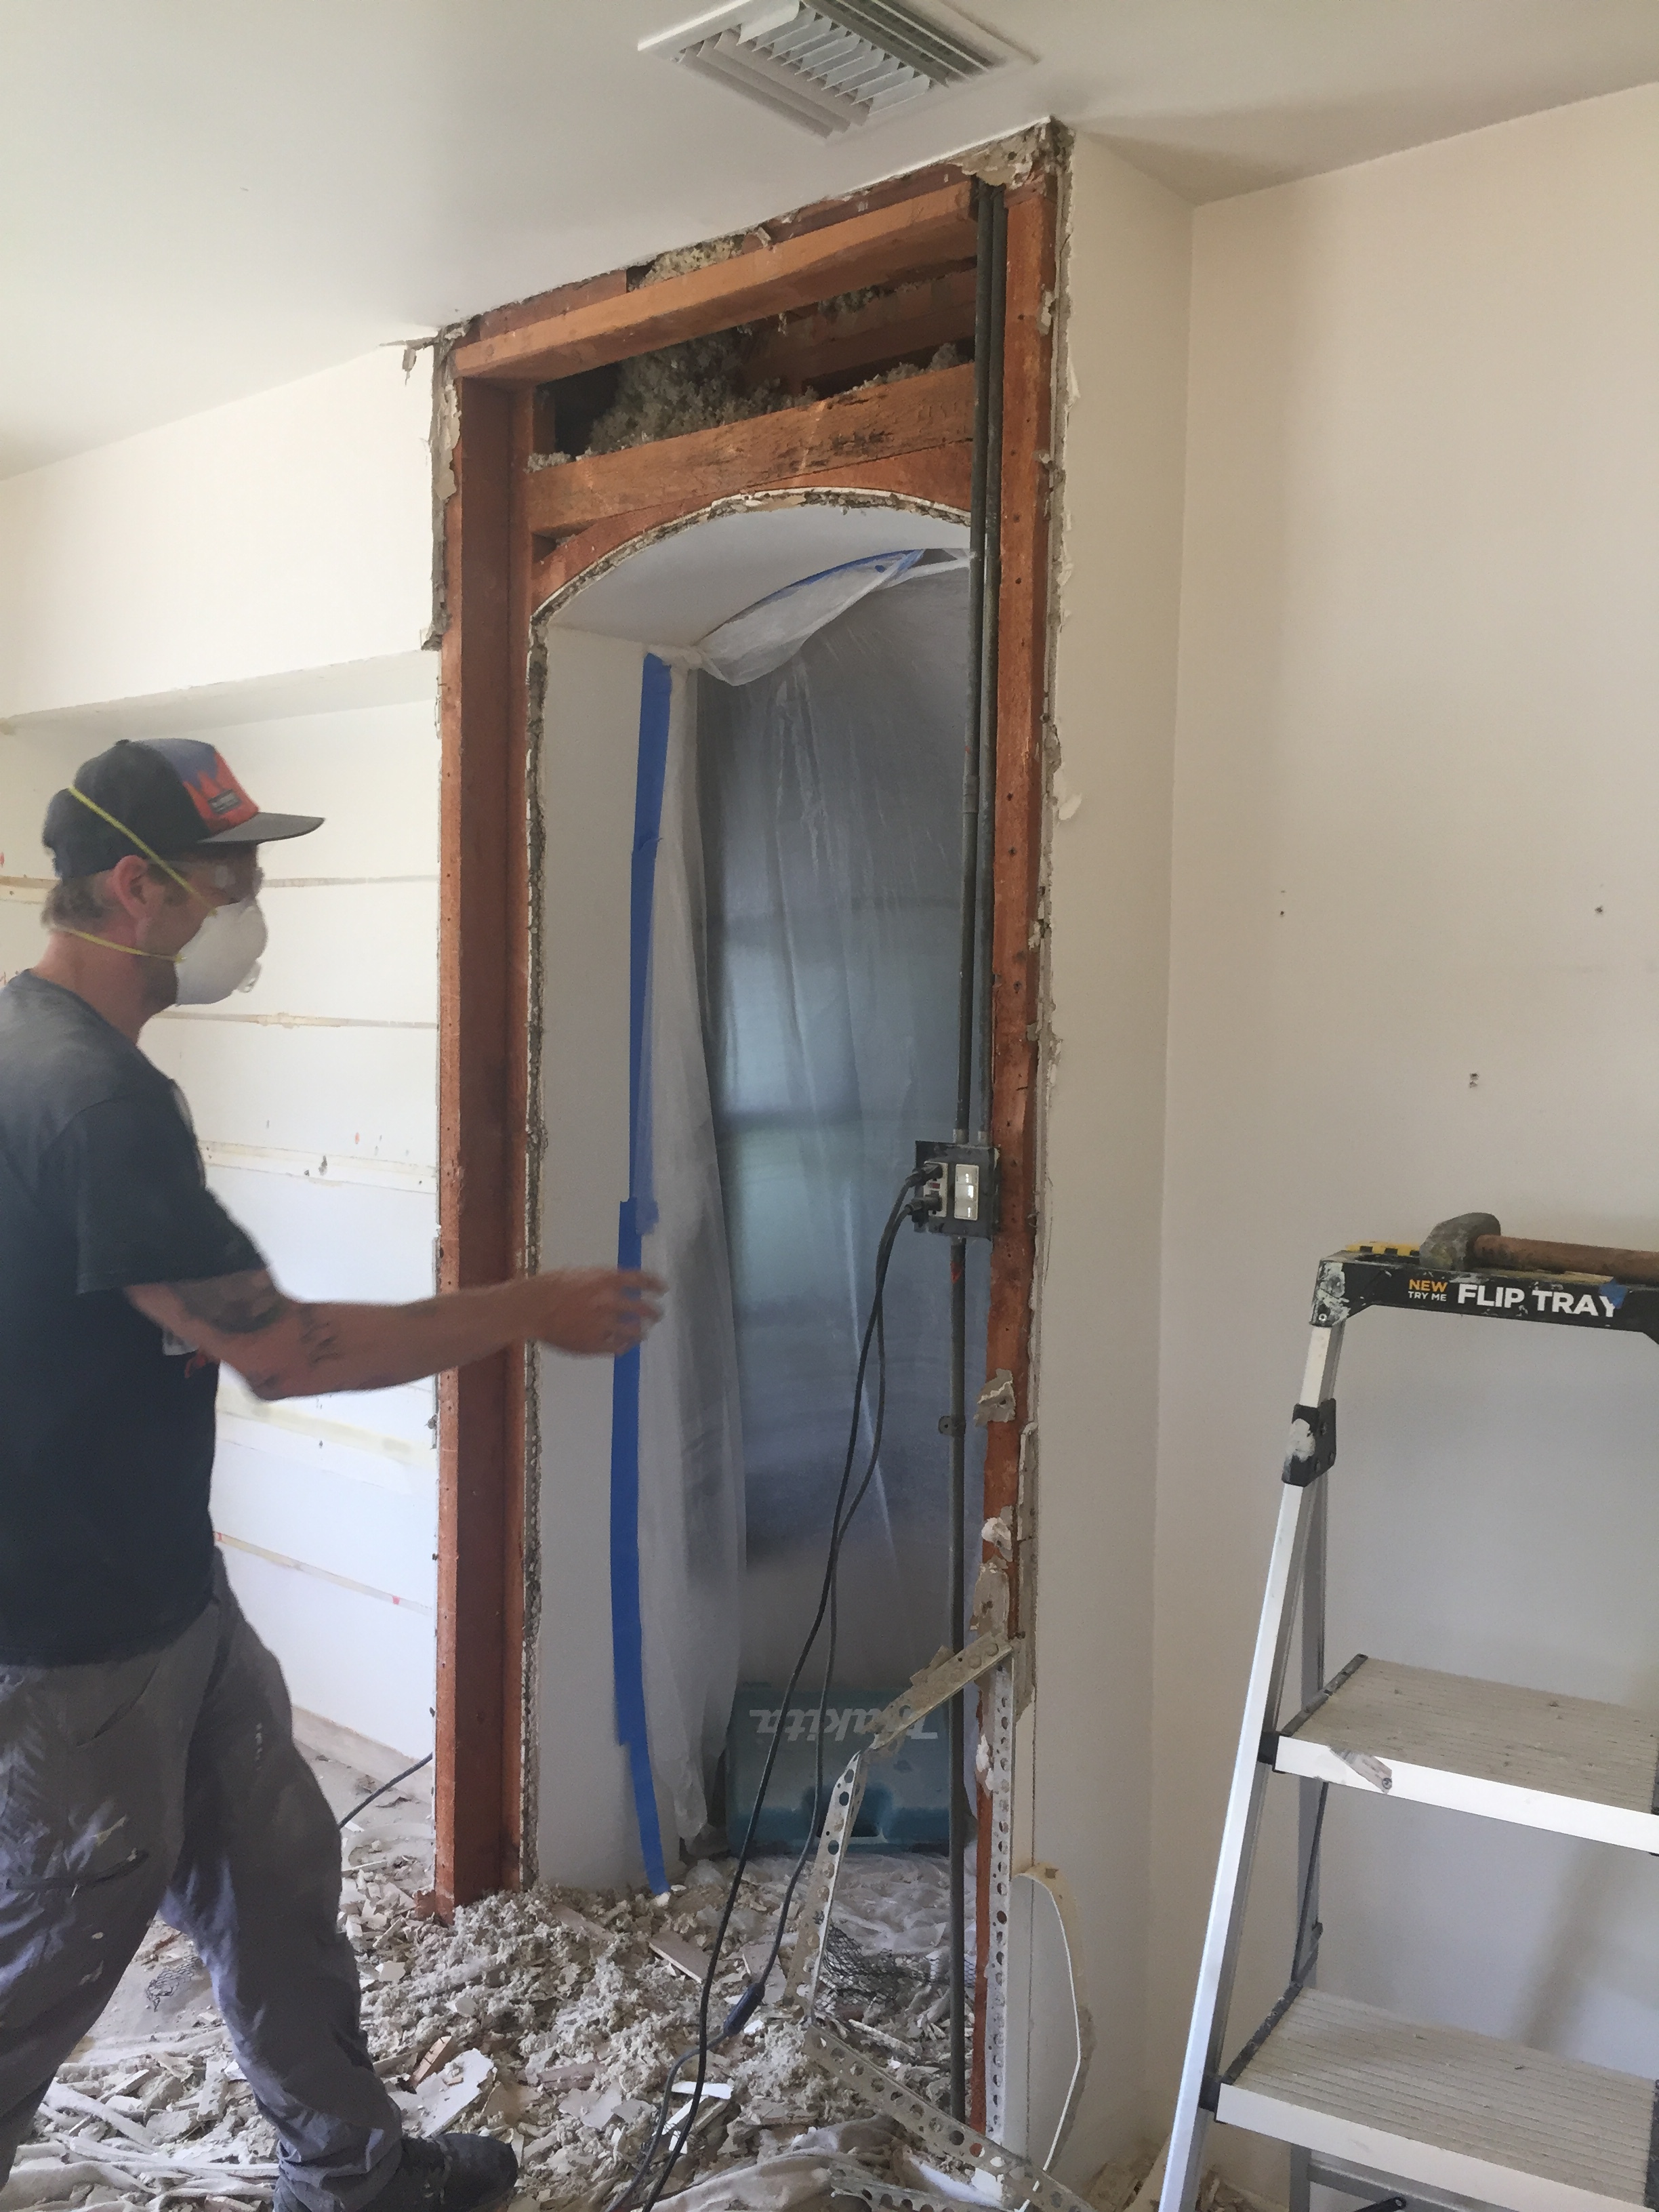
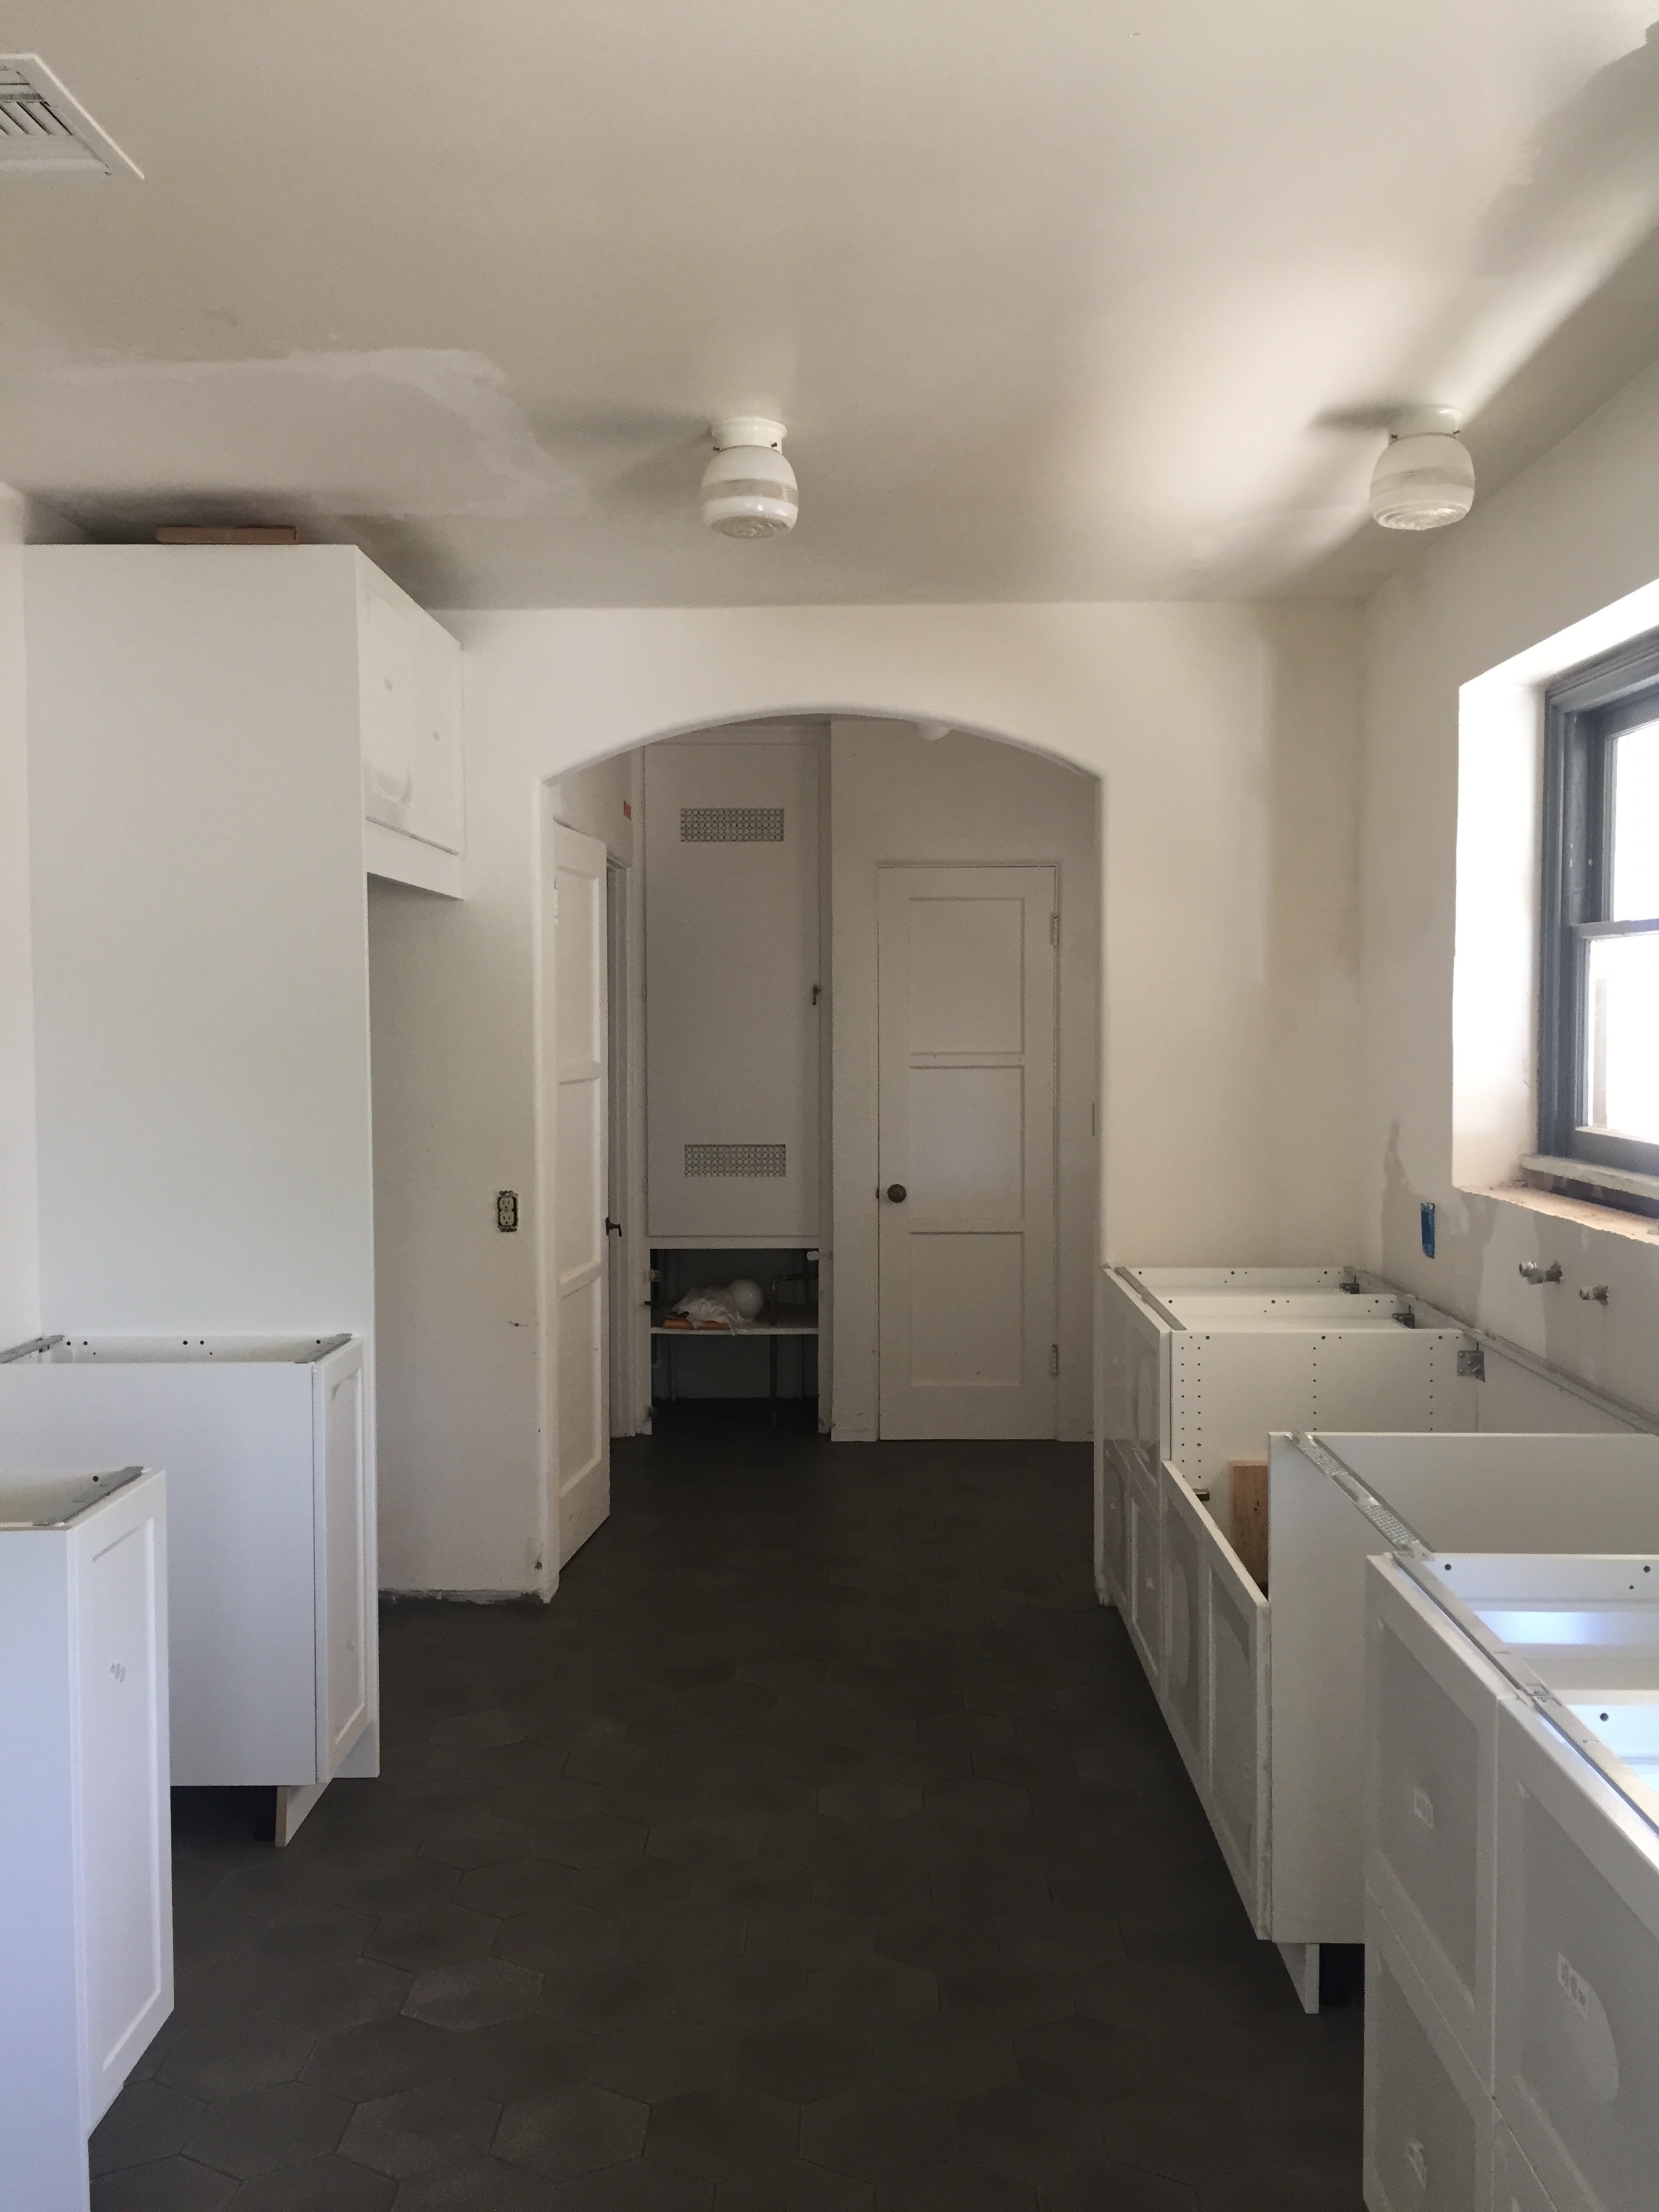
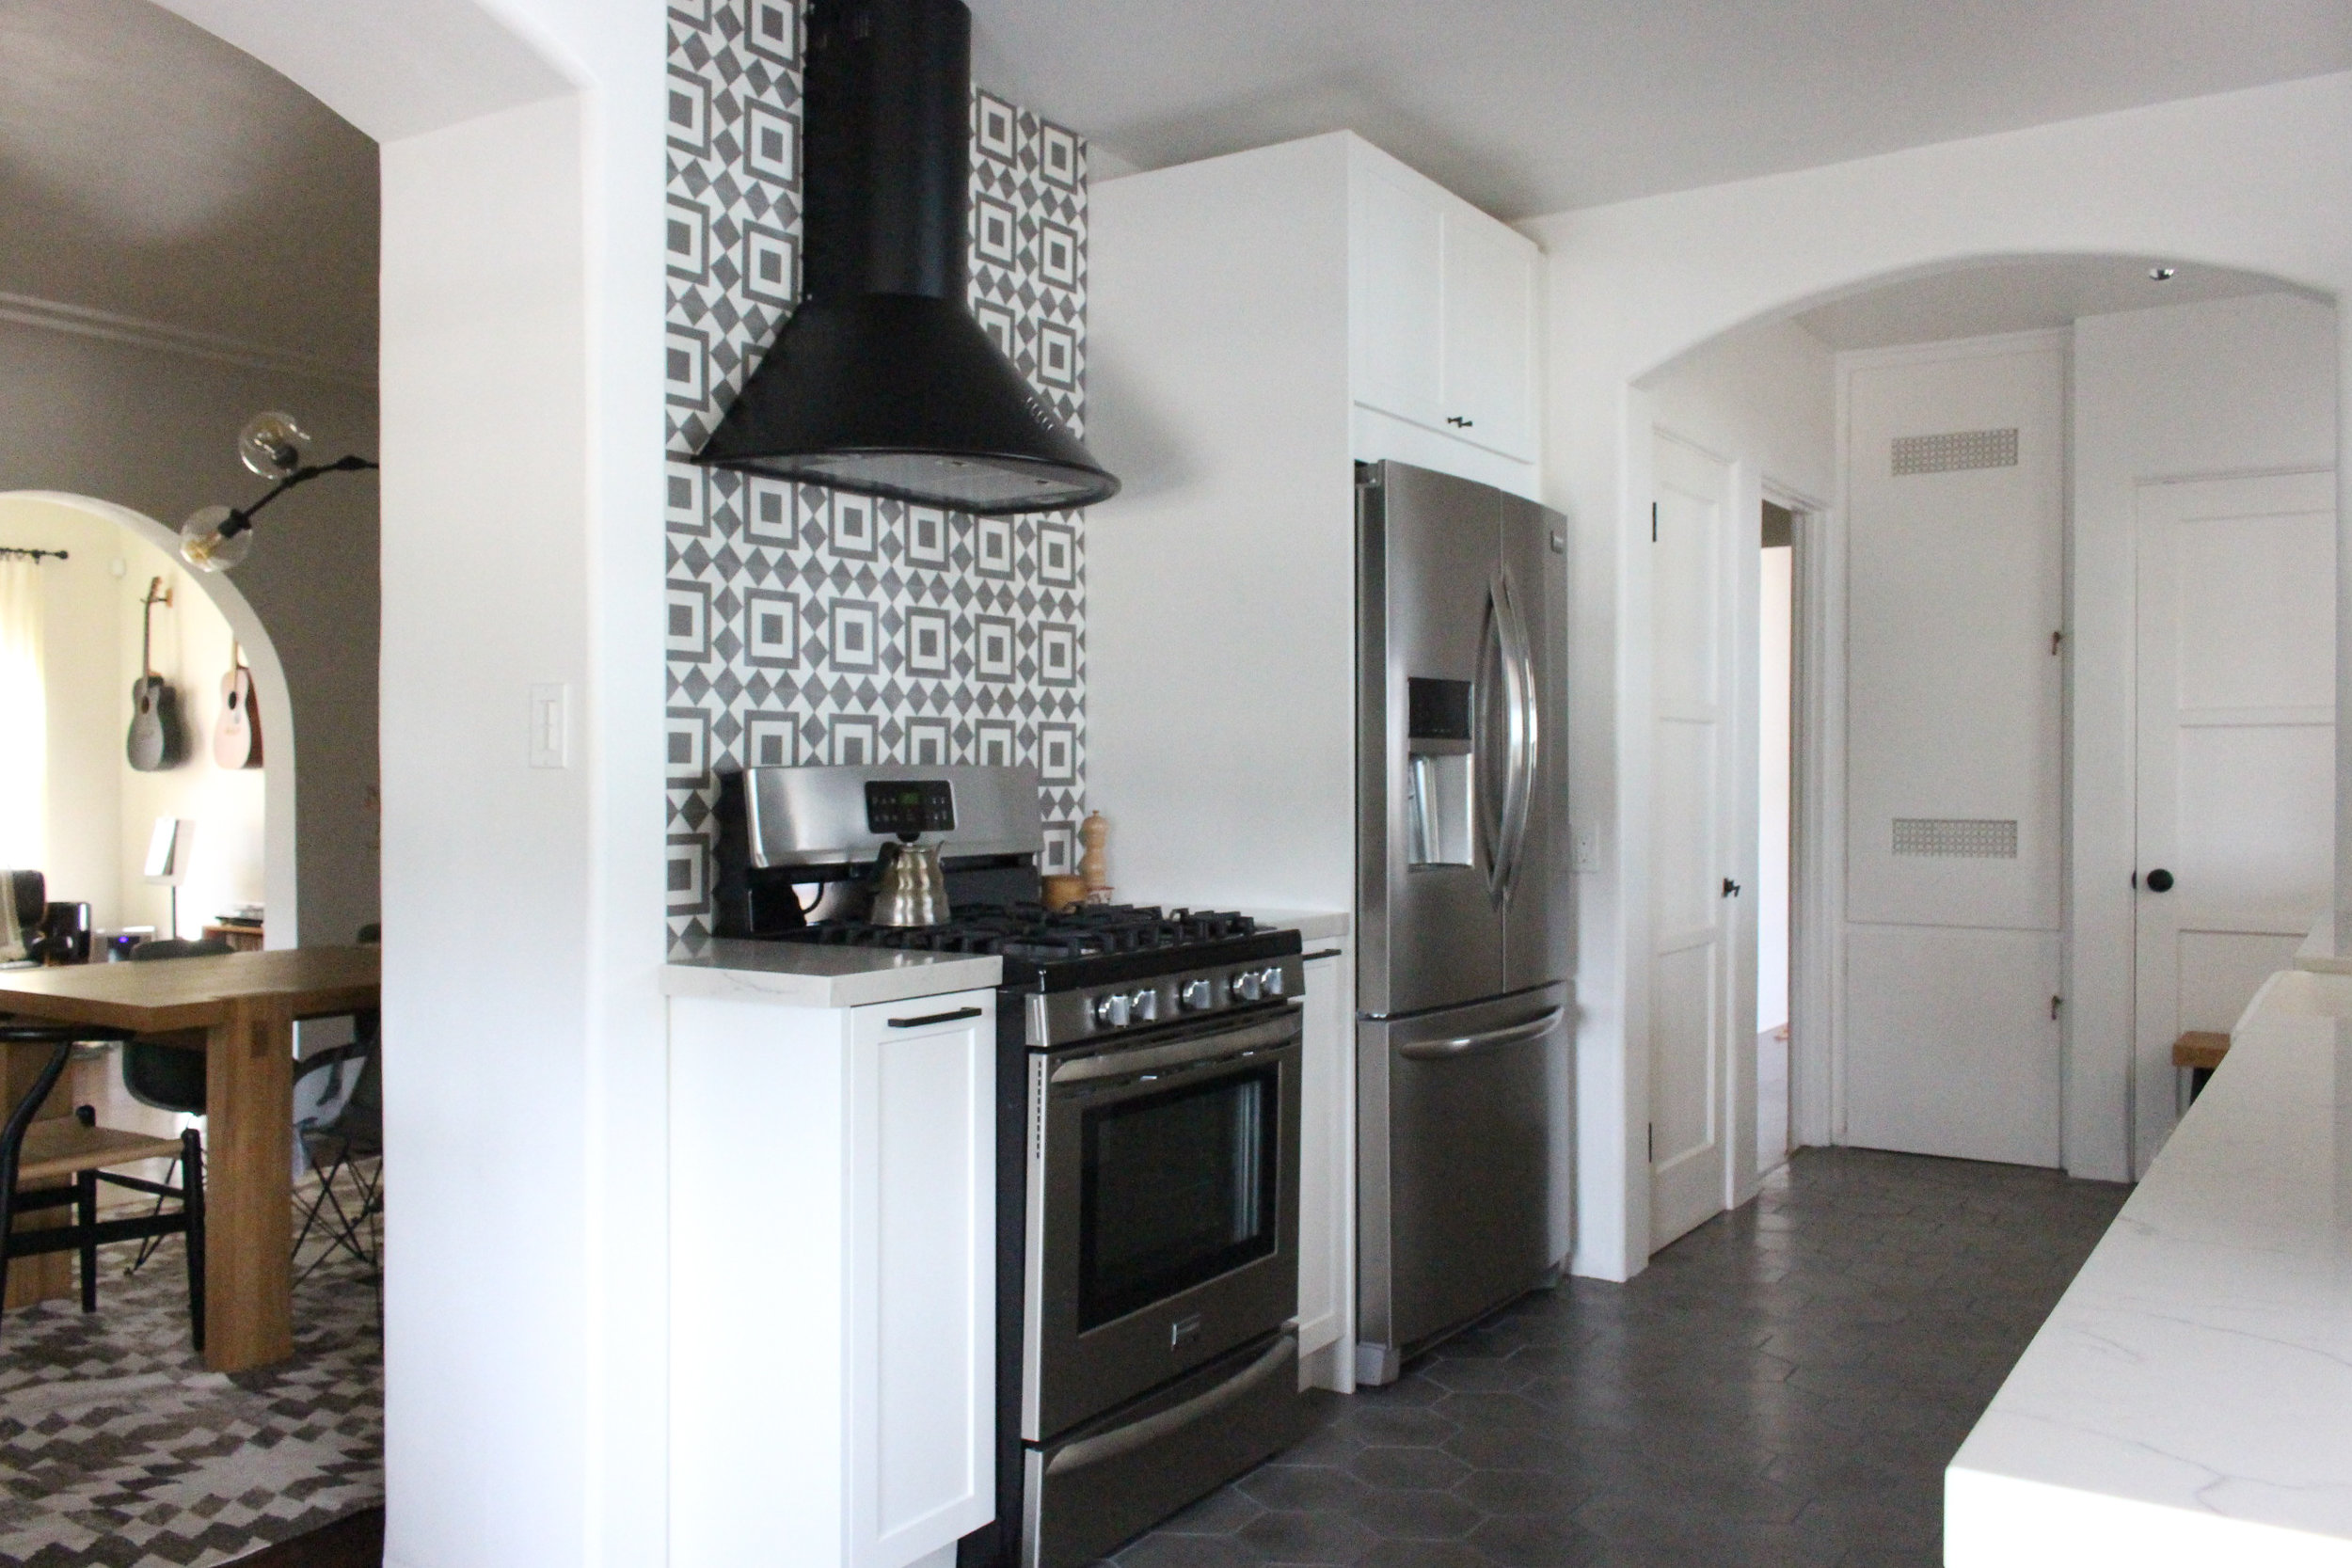
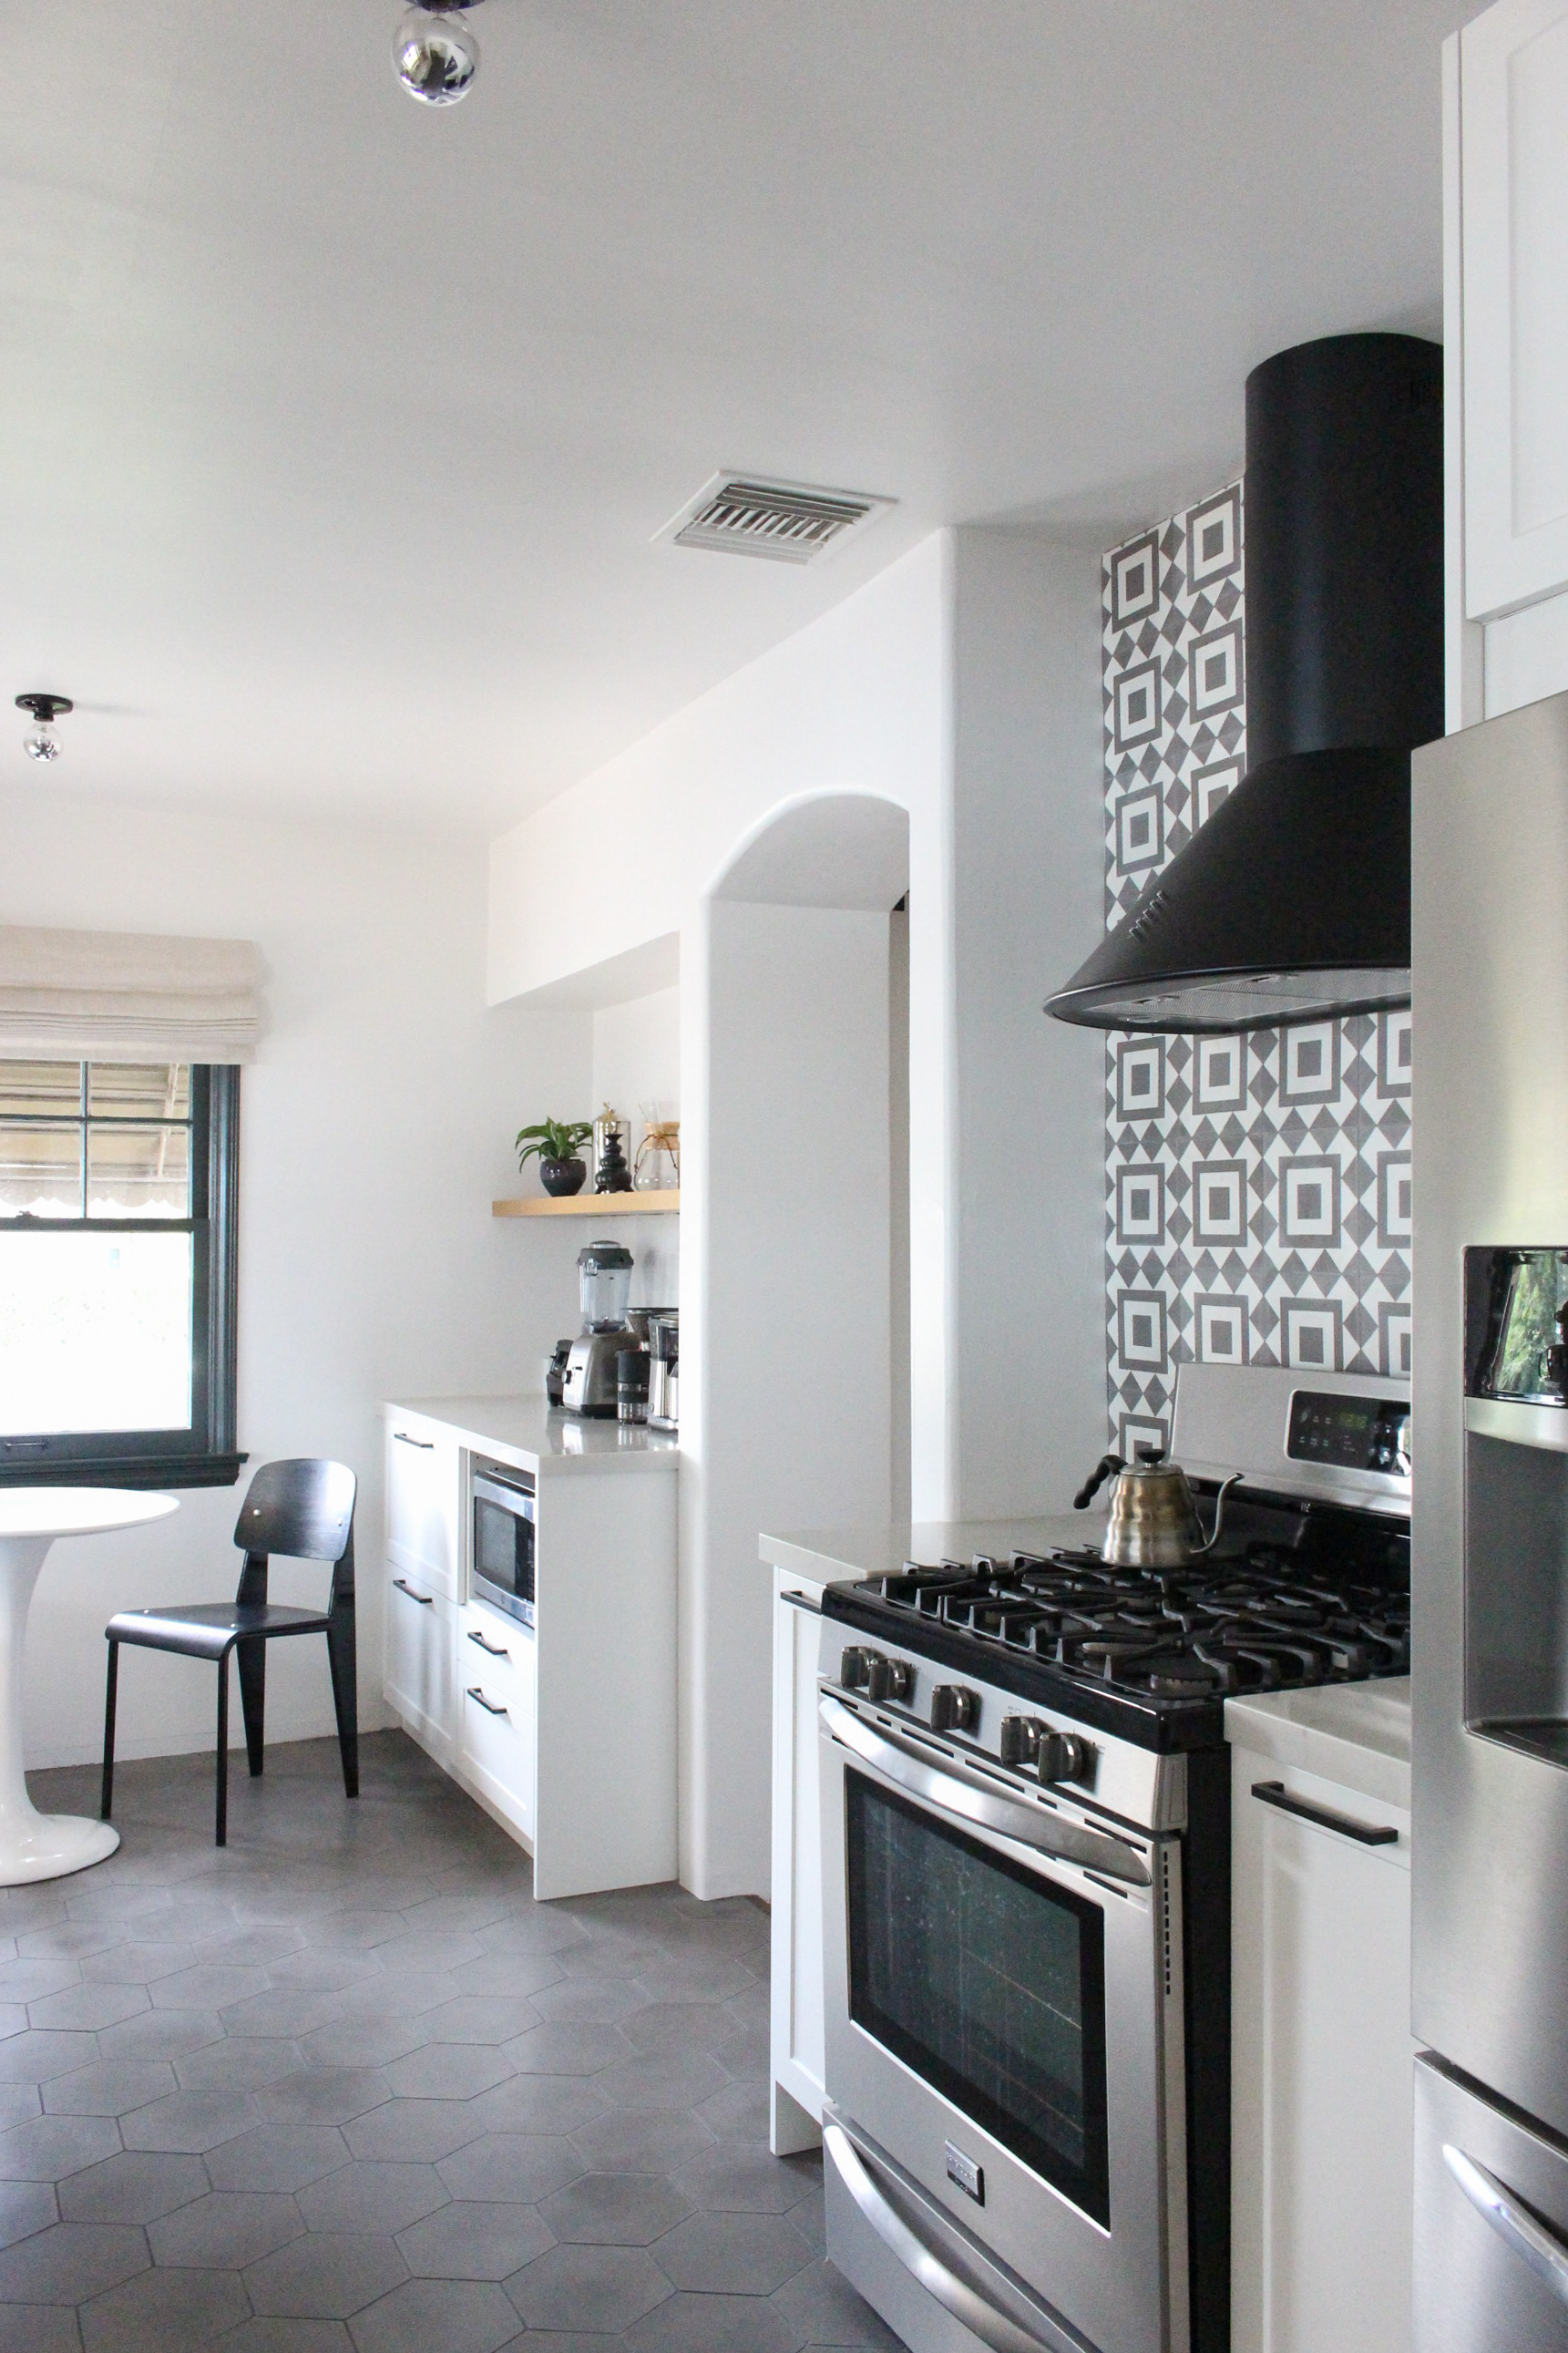
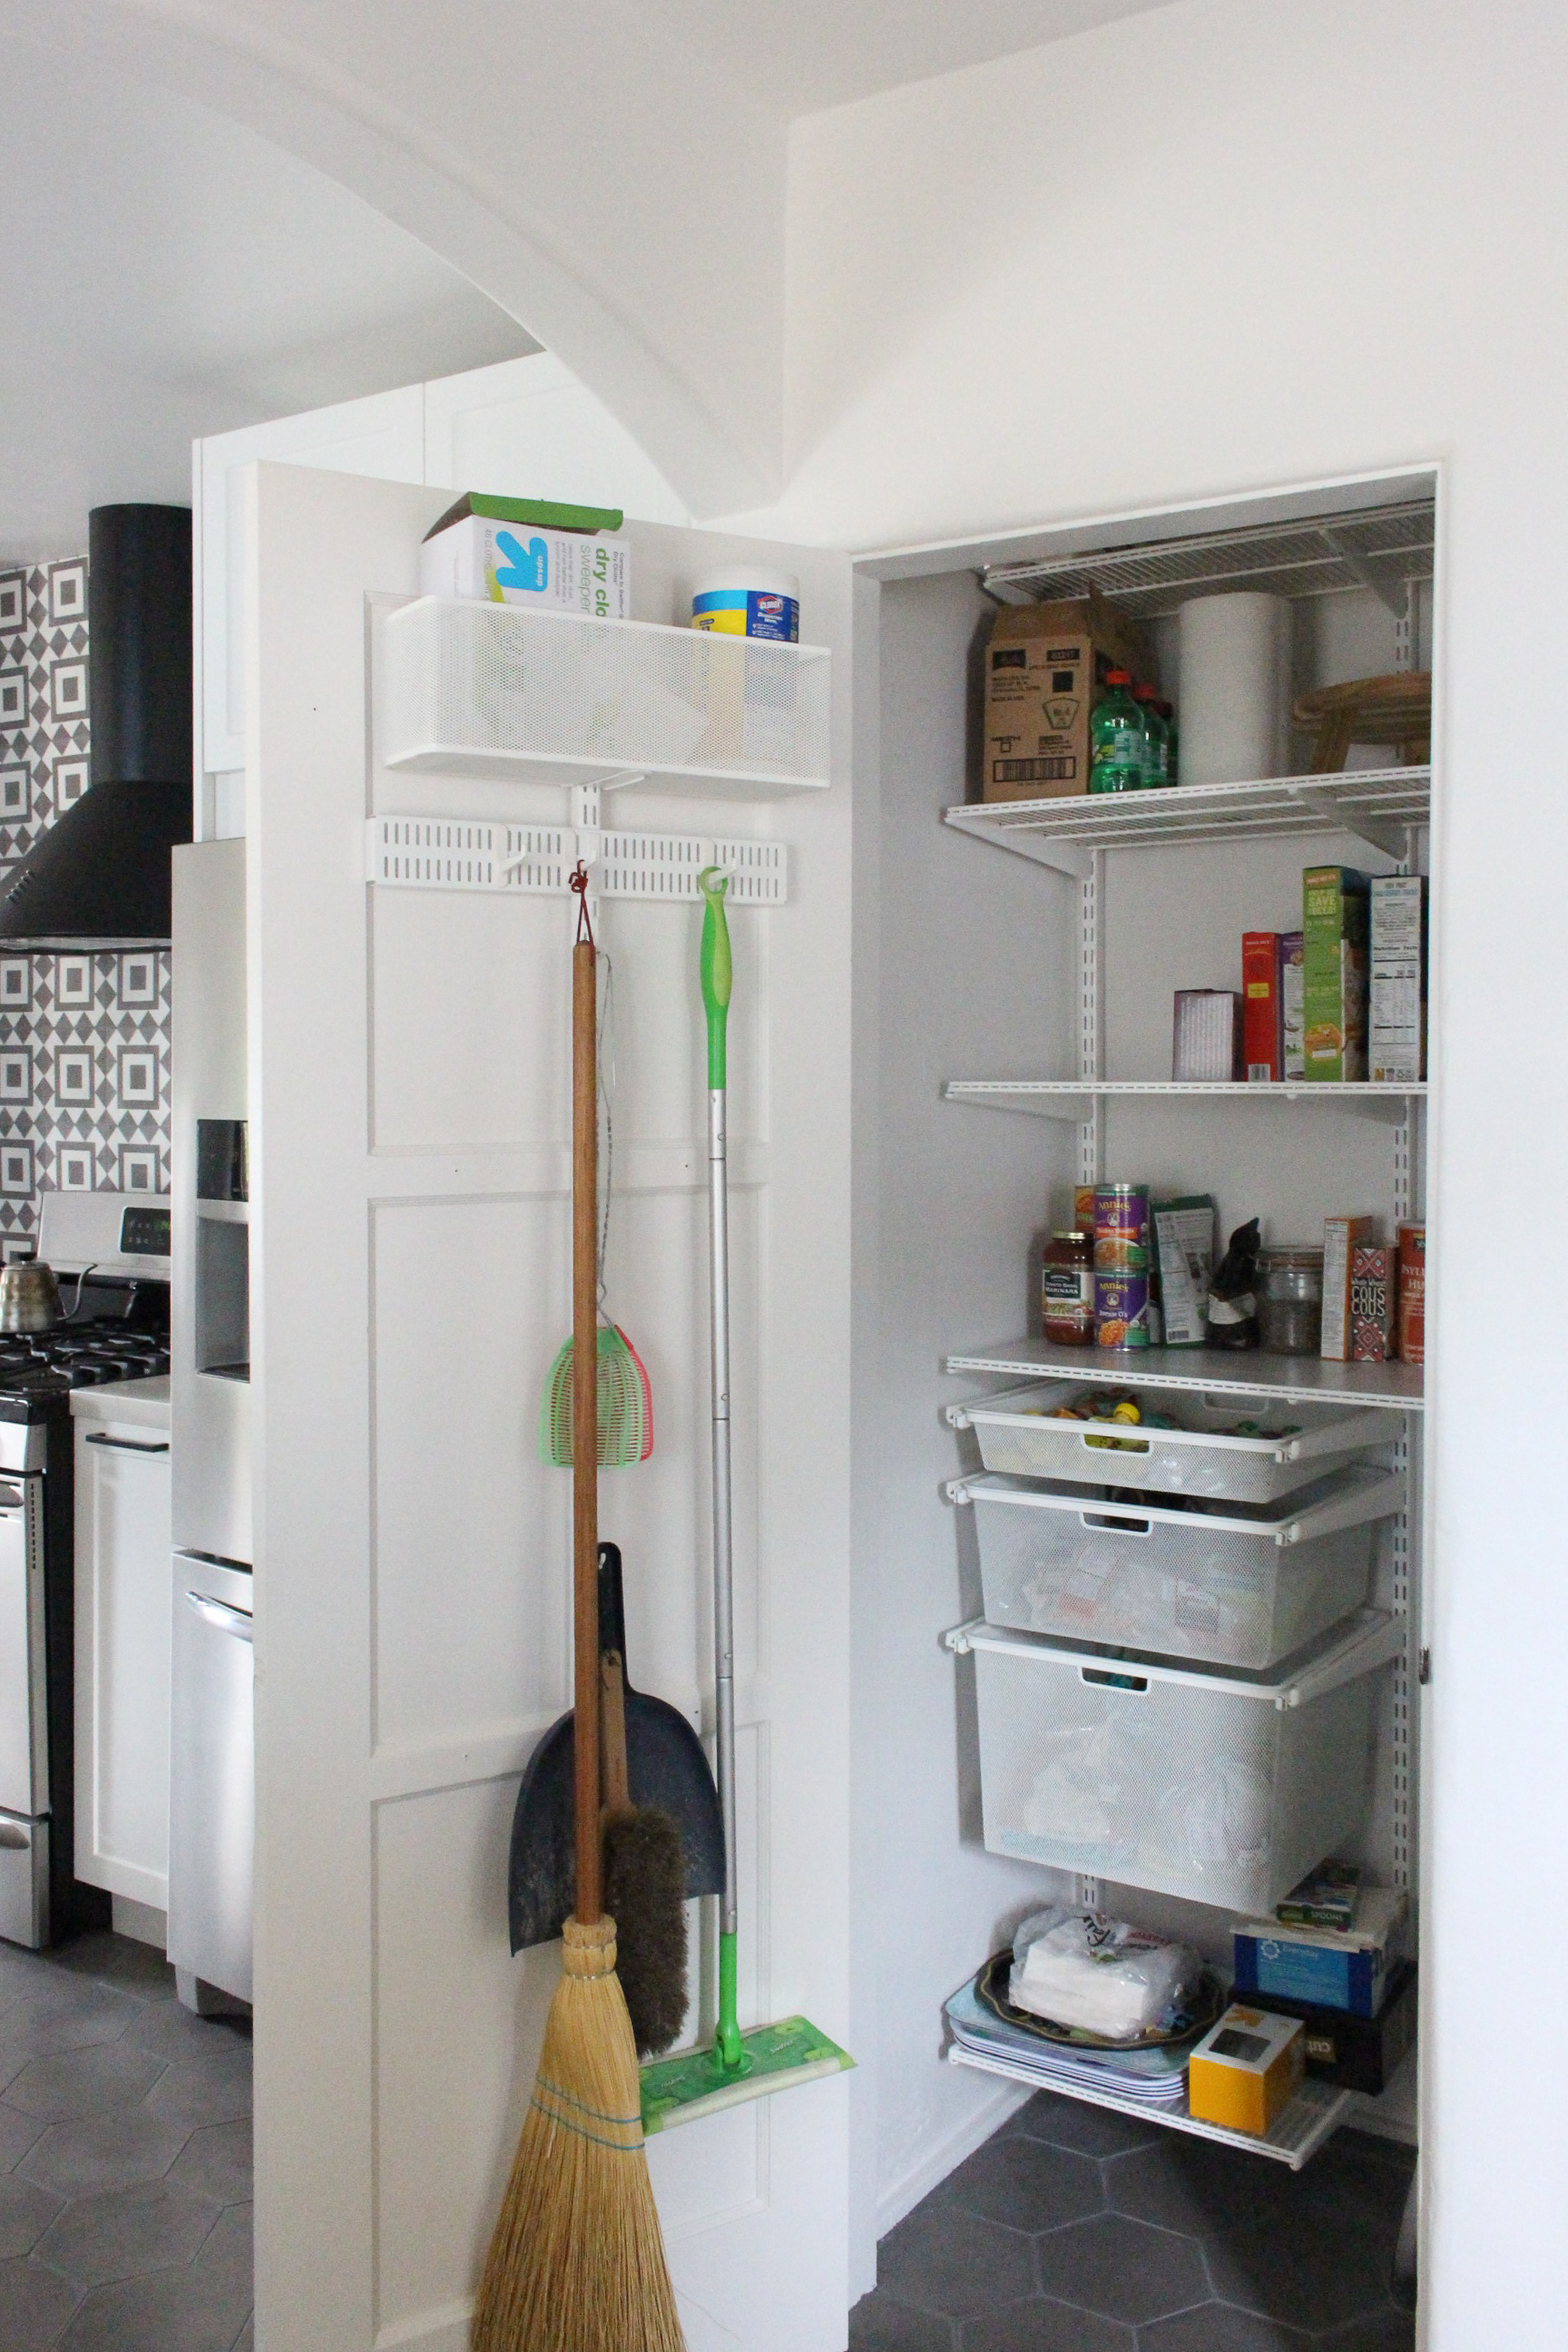
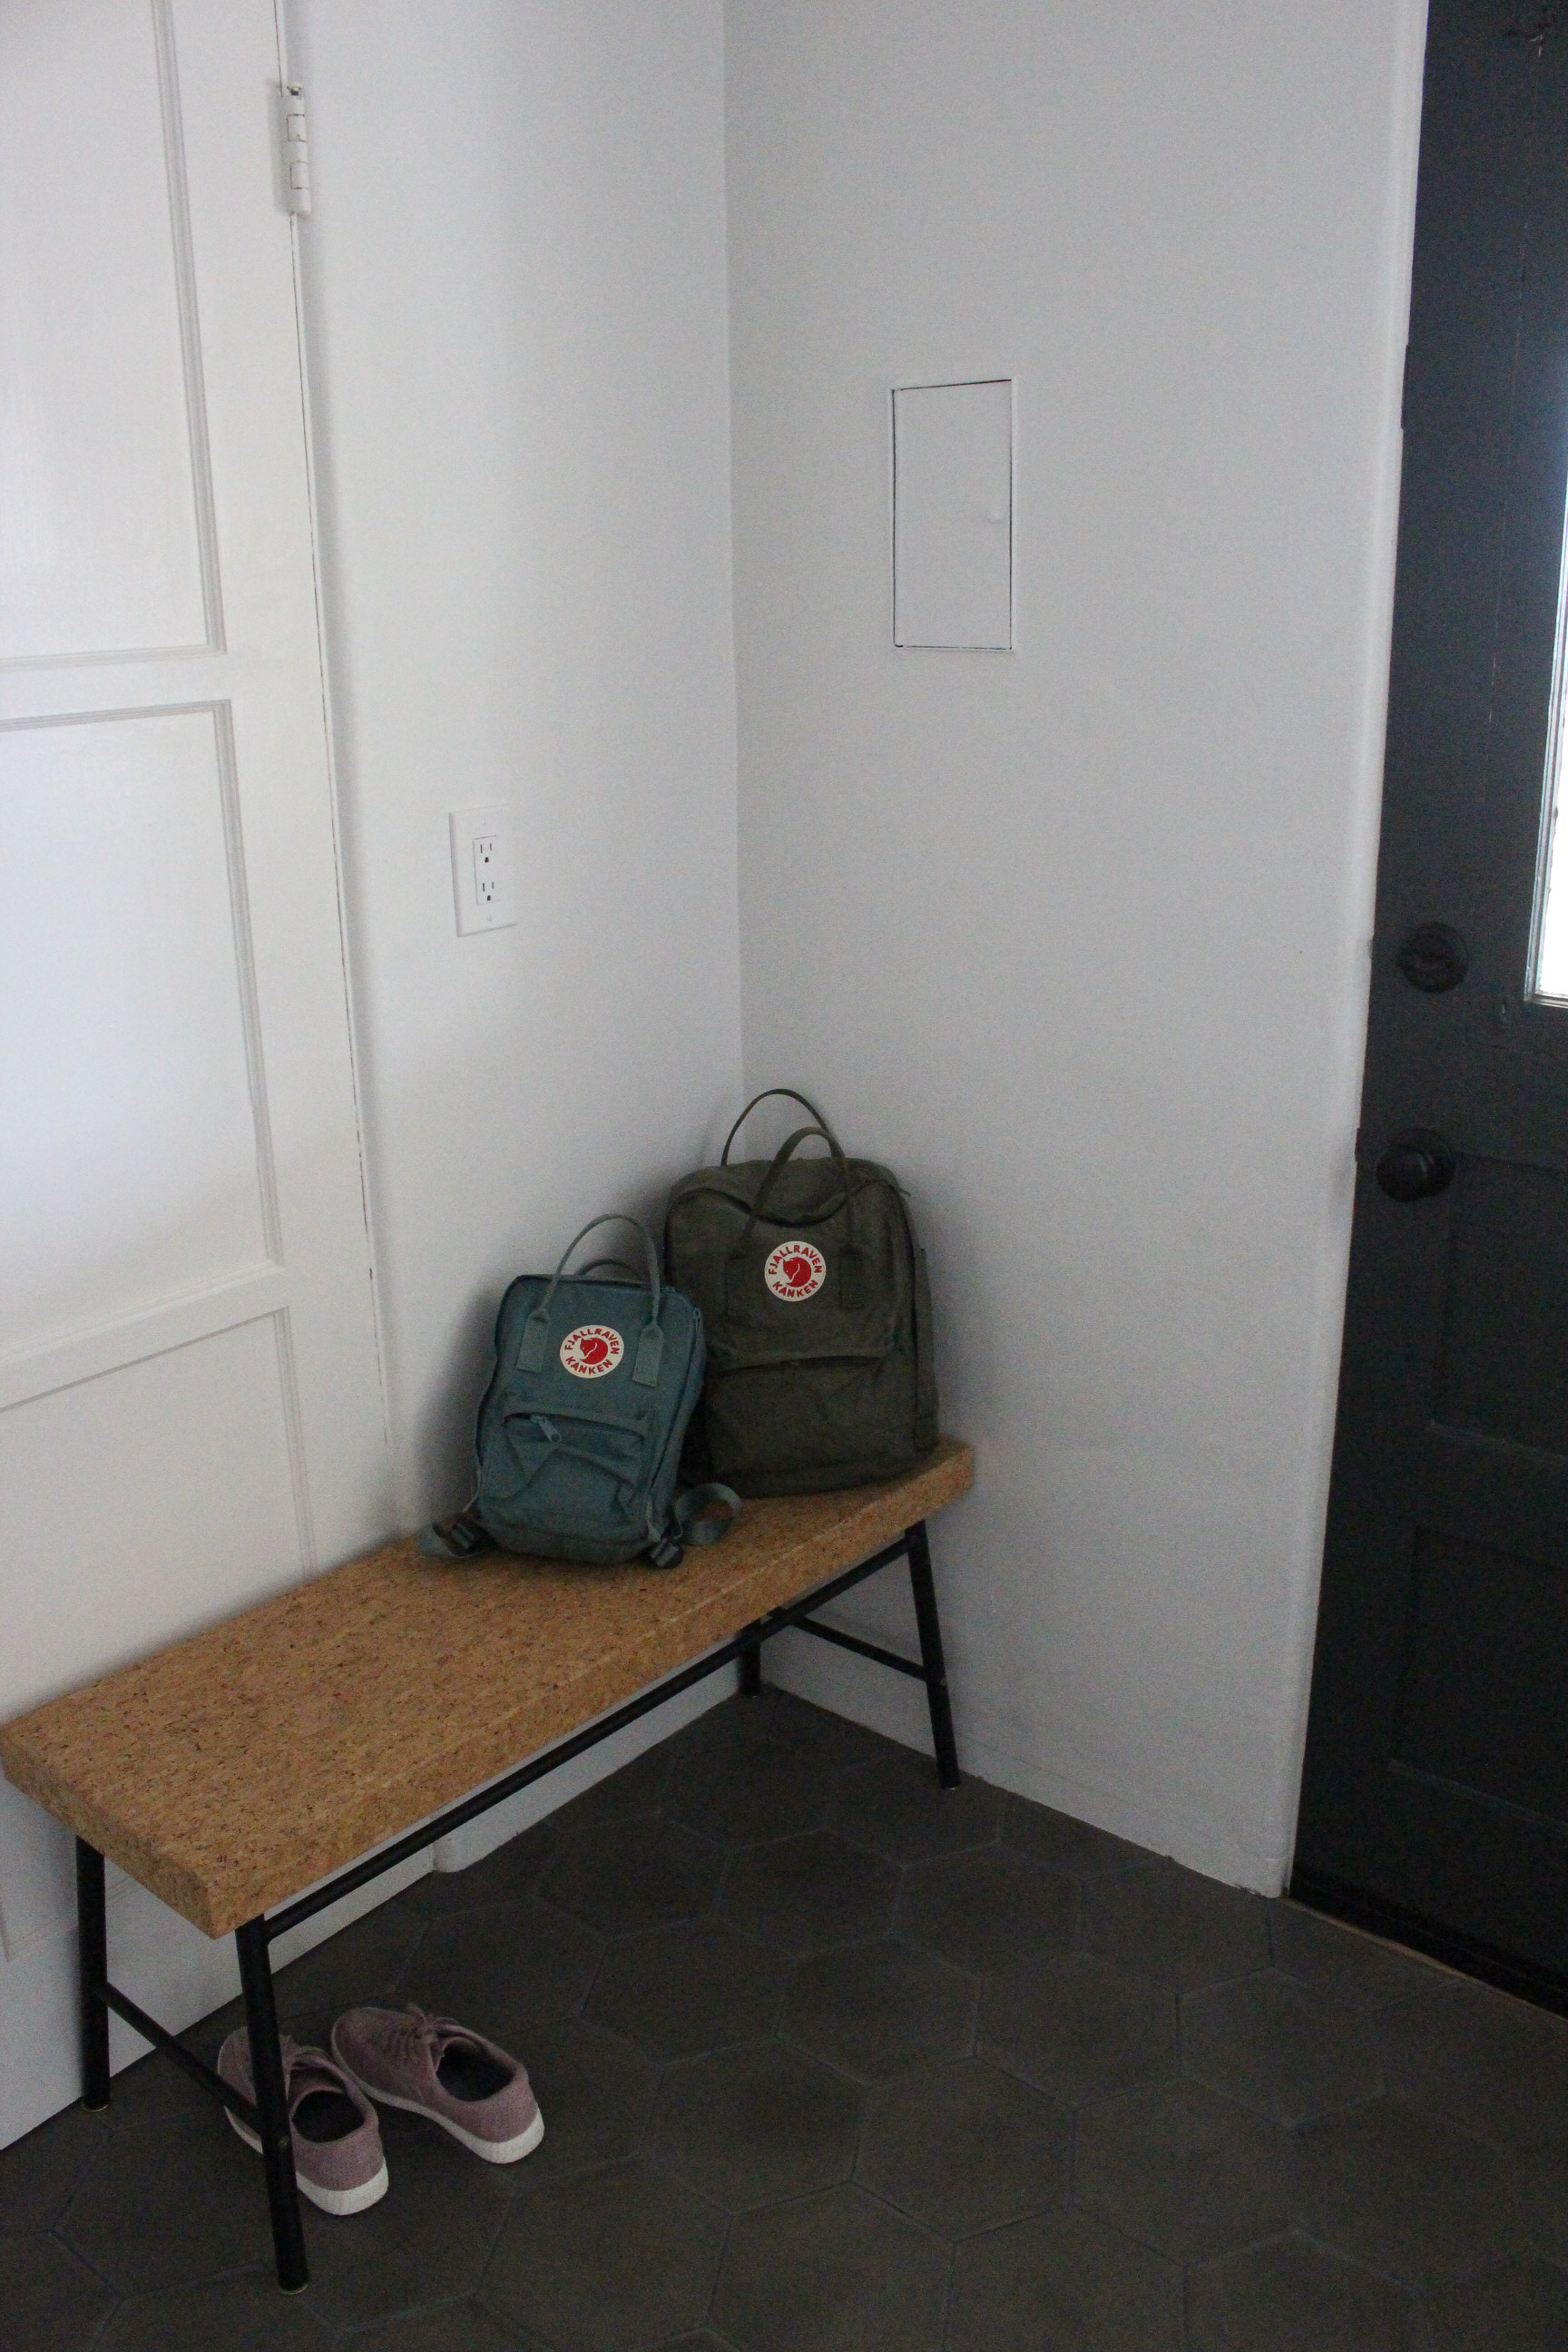
But the mudroom was always a head scratcher for us, it was too small to function on its own, and seemed to chop up the flow when entering from the hall or carport. So we decided to remove a portion of the wall that had a fold out ironing board in it and make the entrance into one large arch to connect with the arched entrance from the dining room. This allowed us to convert the broom closet into a pantry, which made much more sense functionally, especially since we were removing the upper cabinets.
Cabinets:
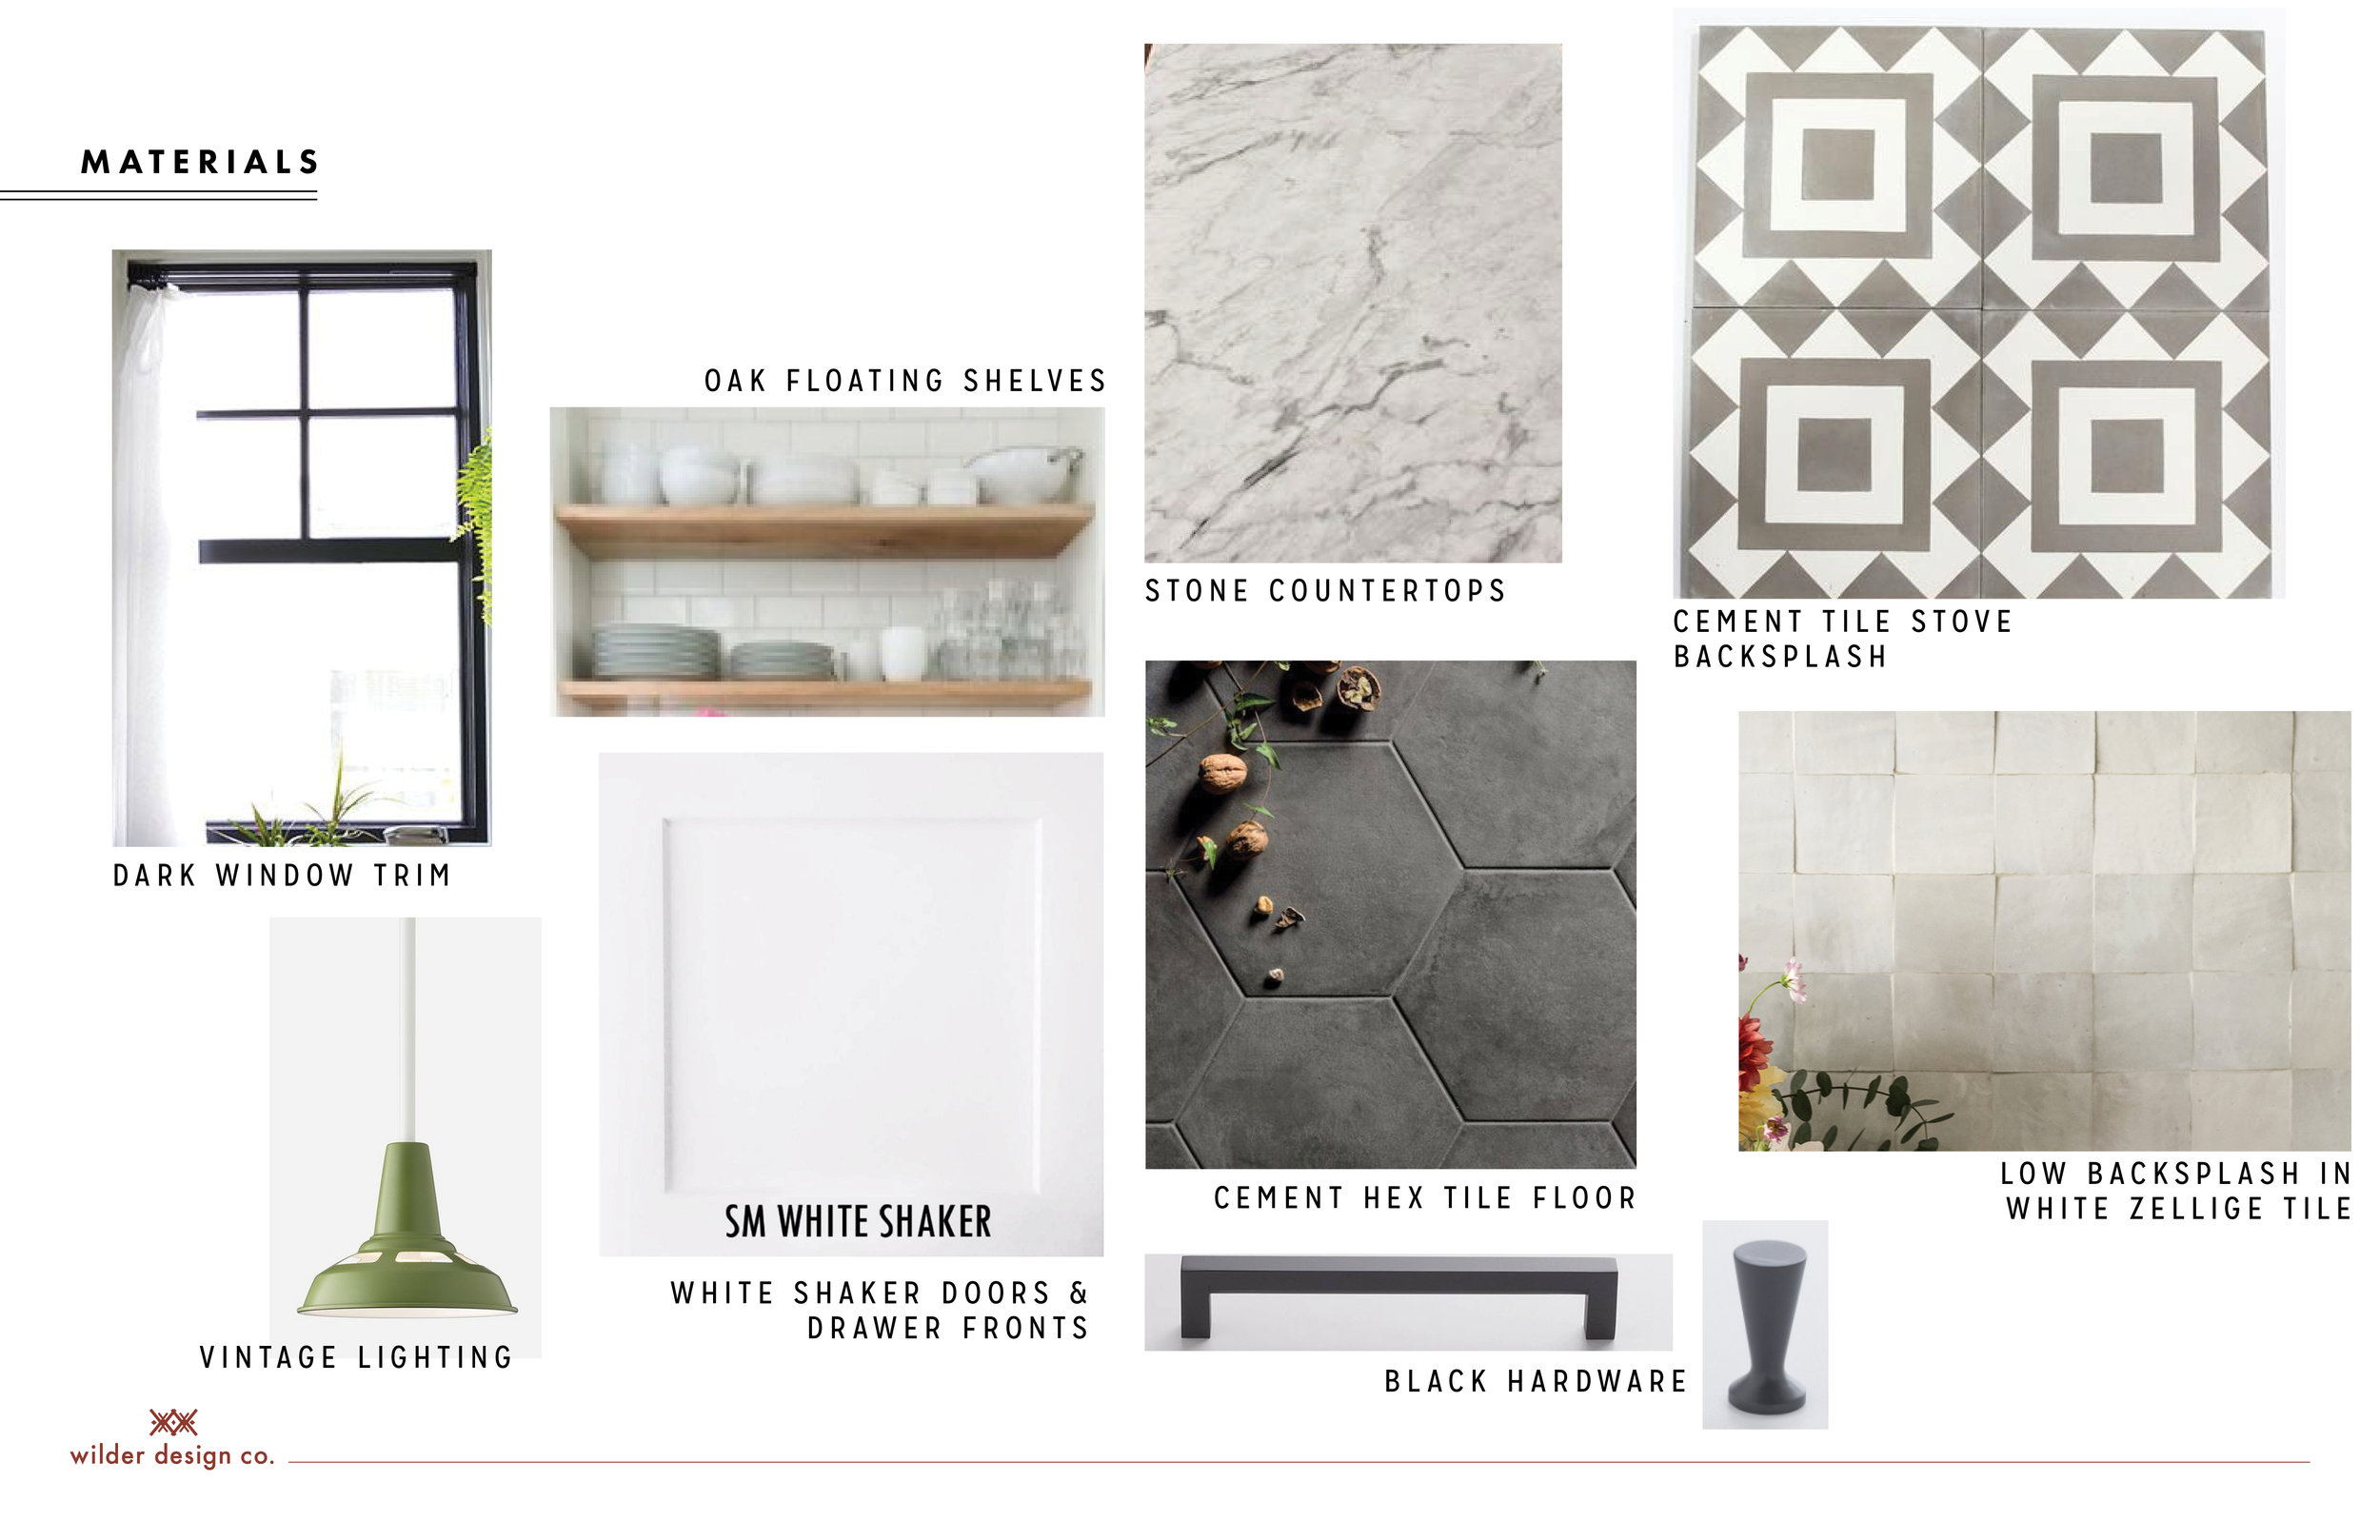
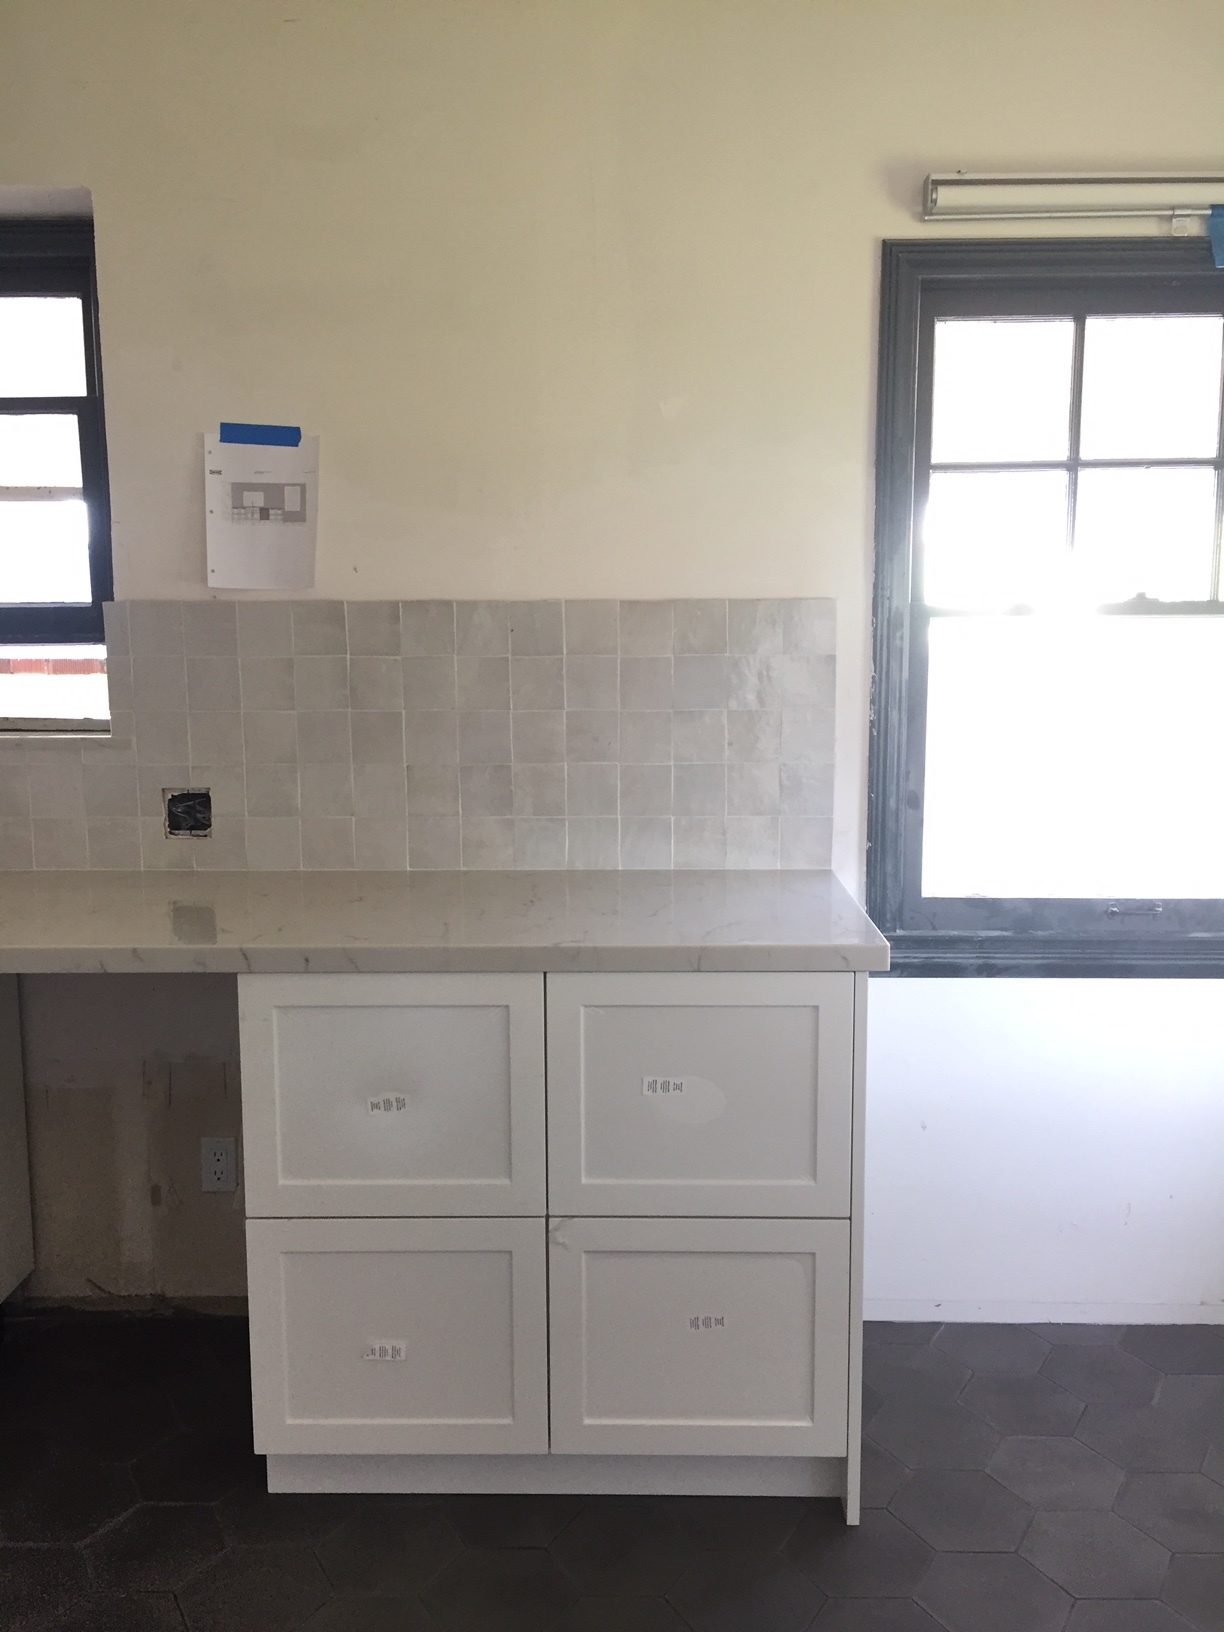
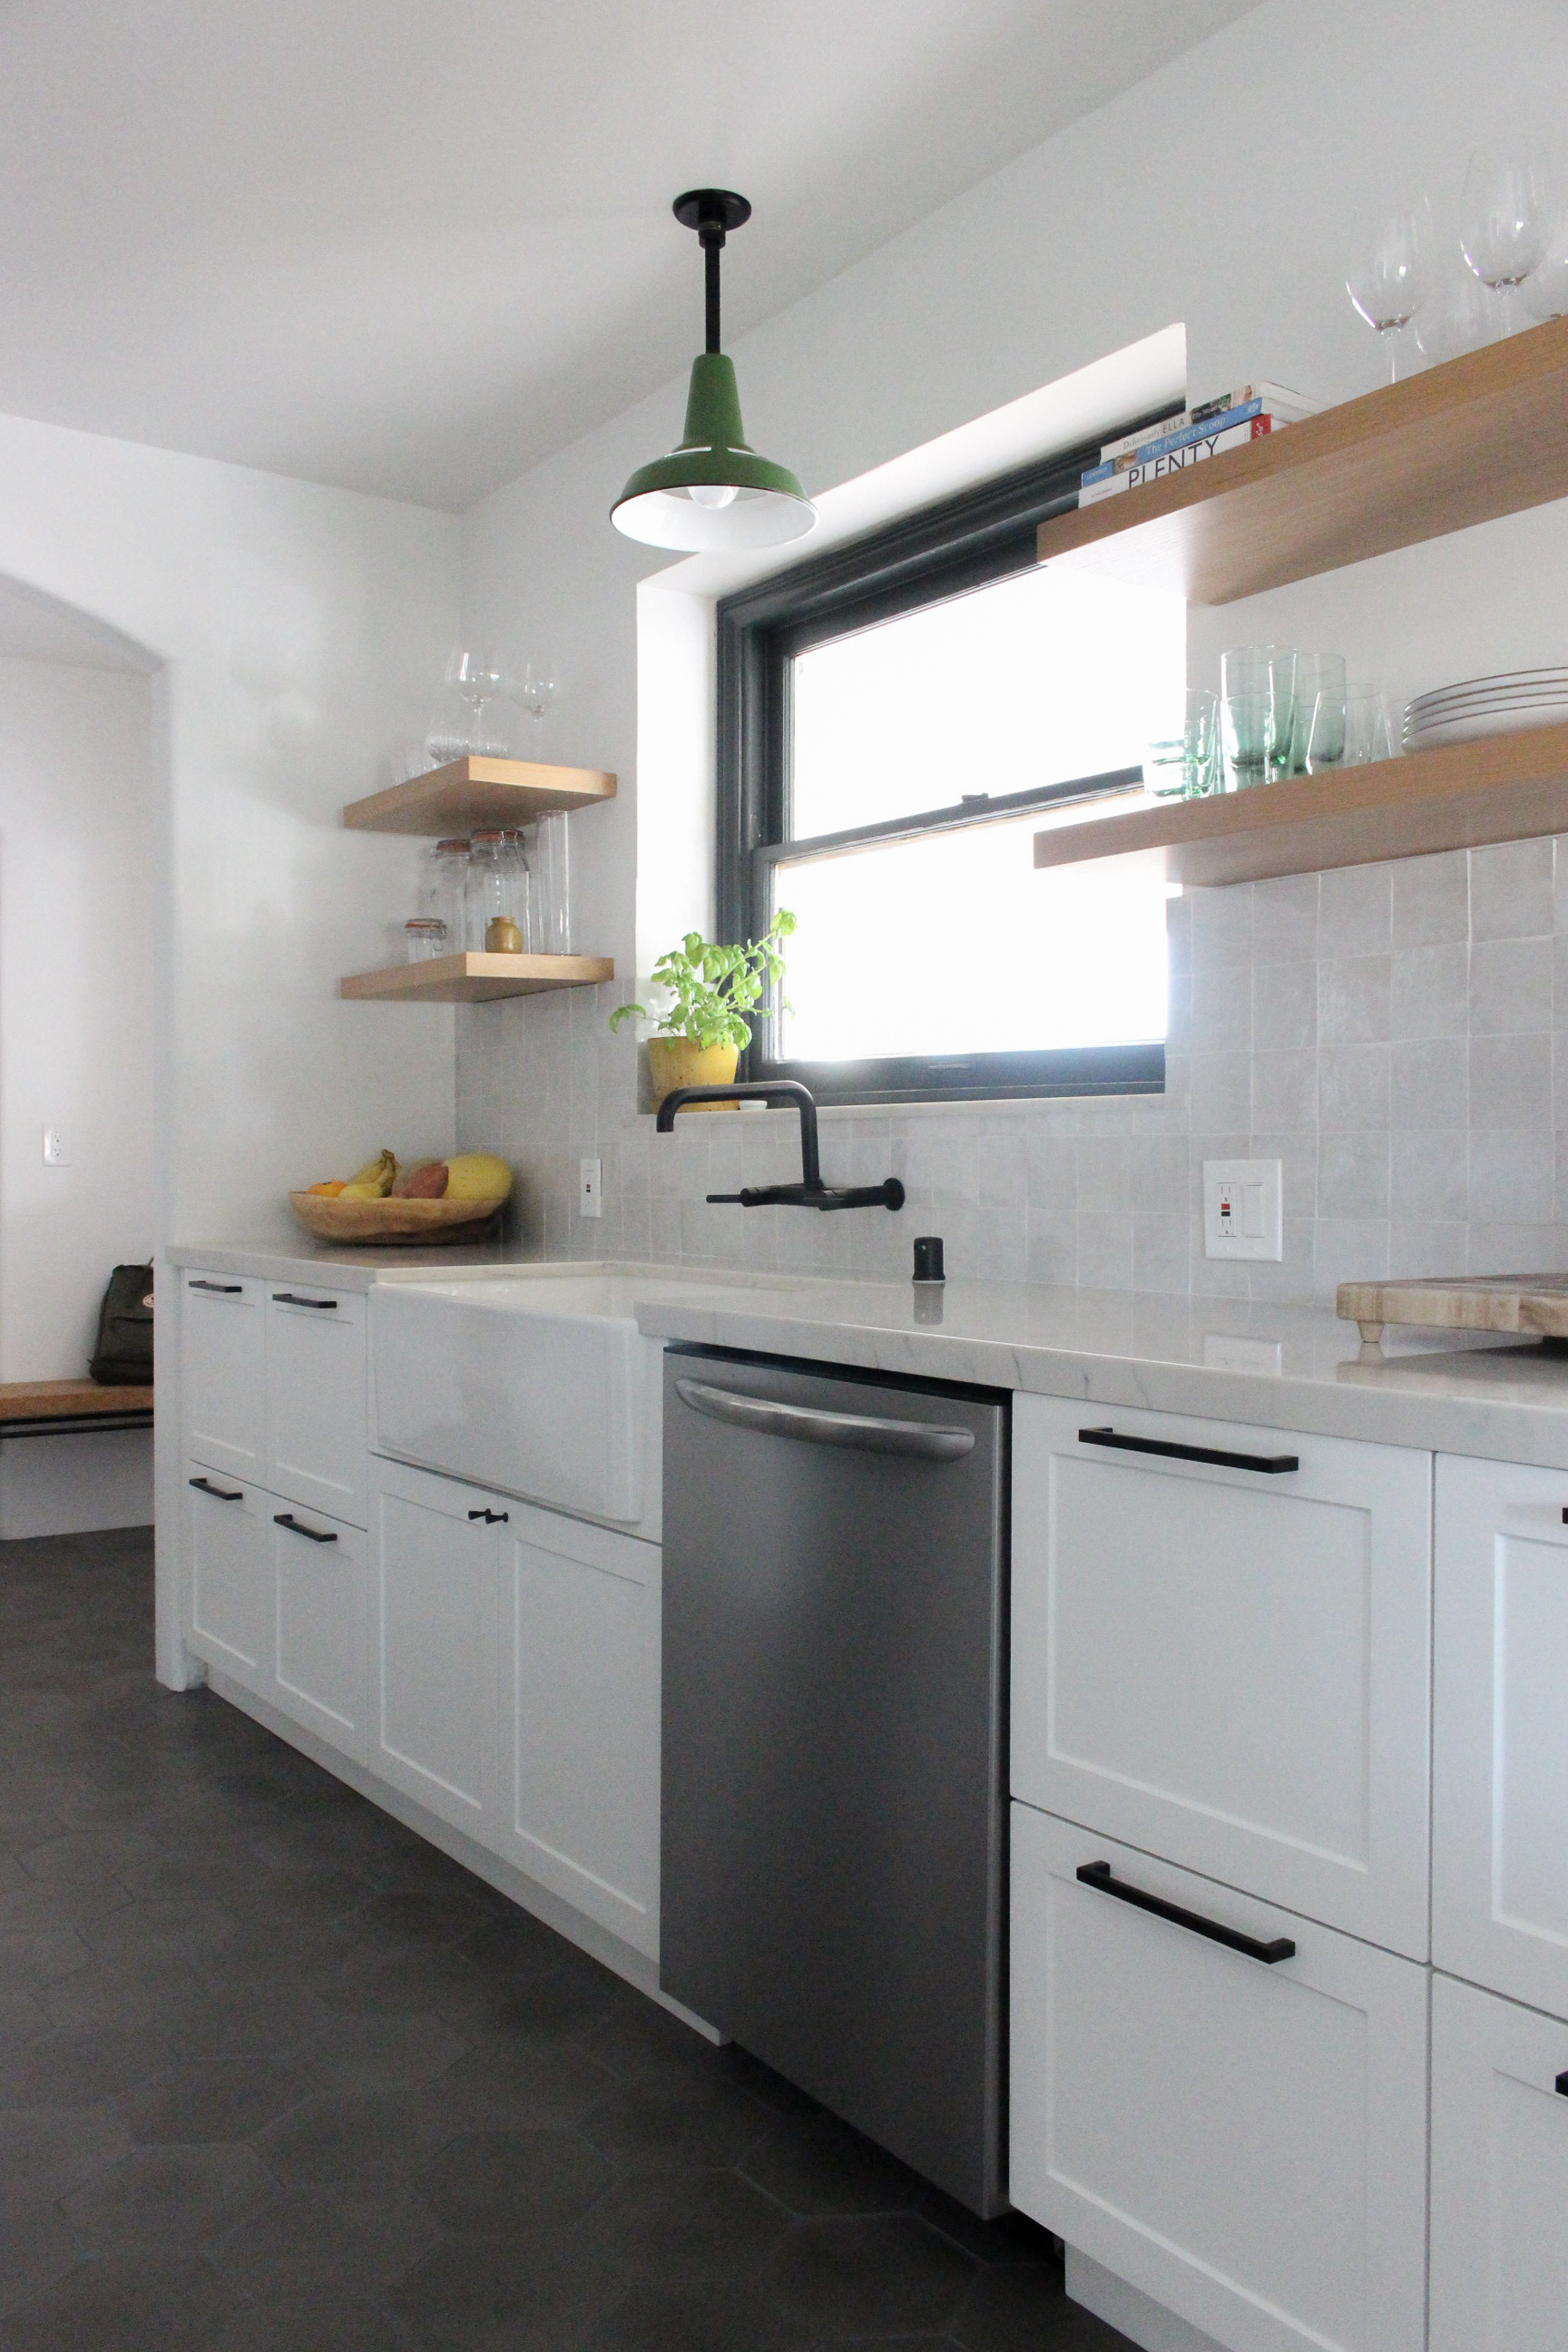
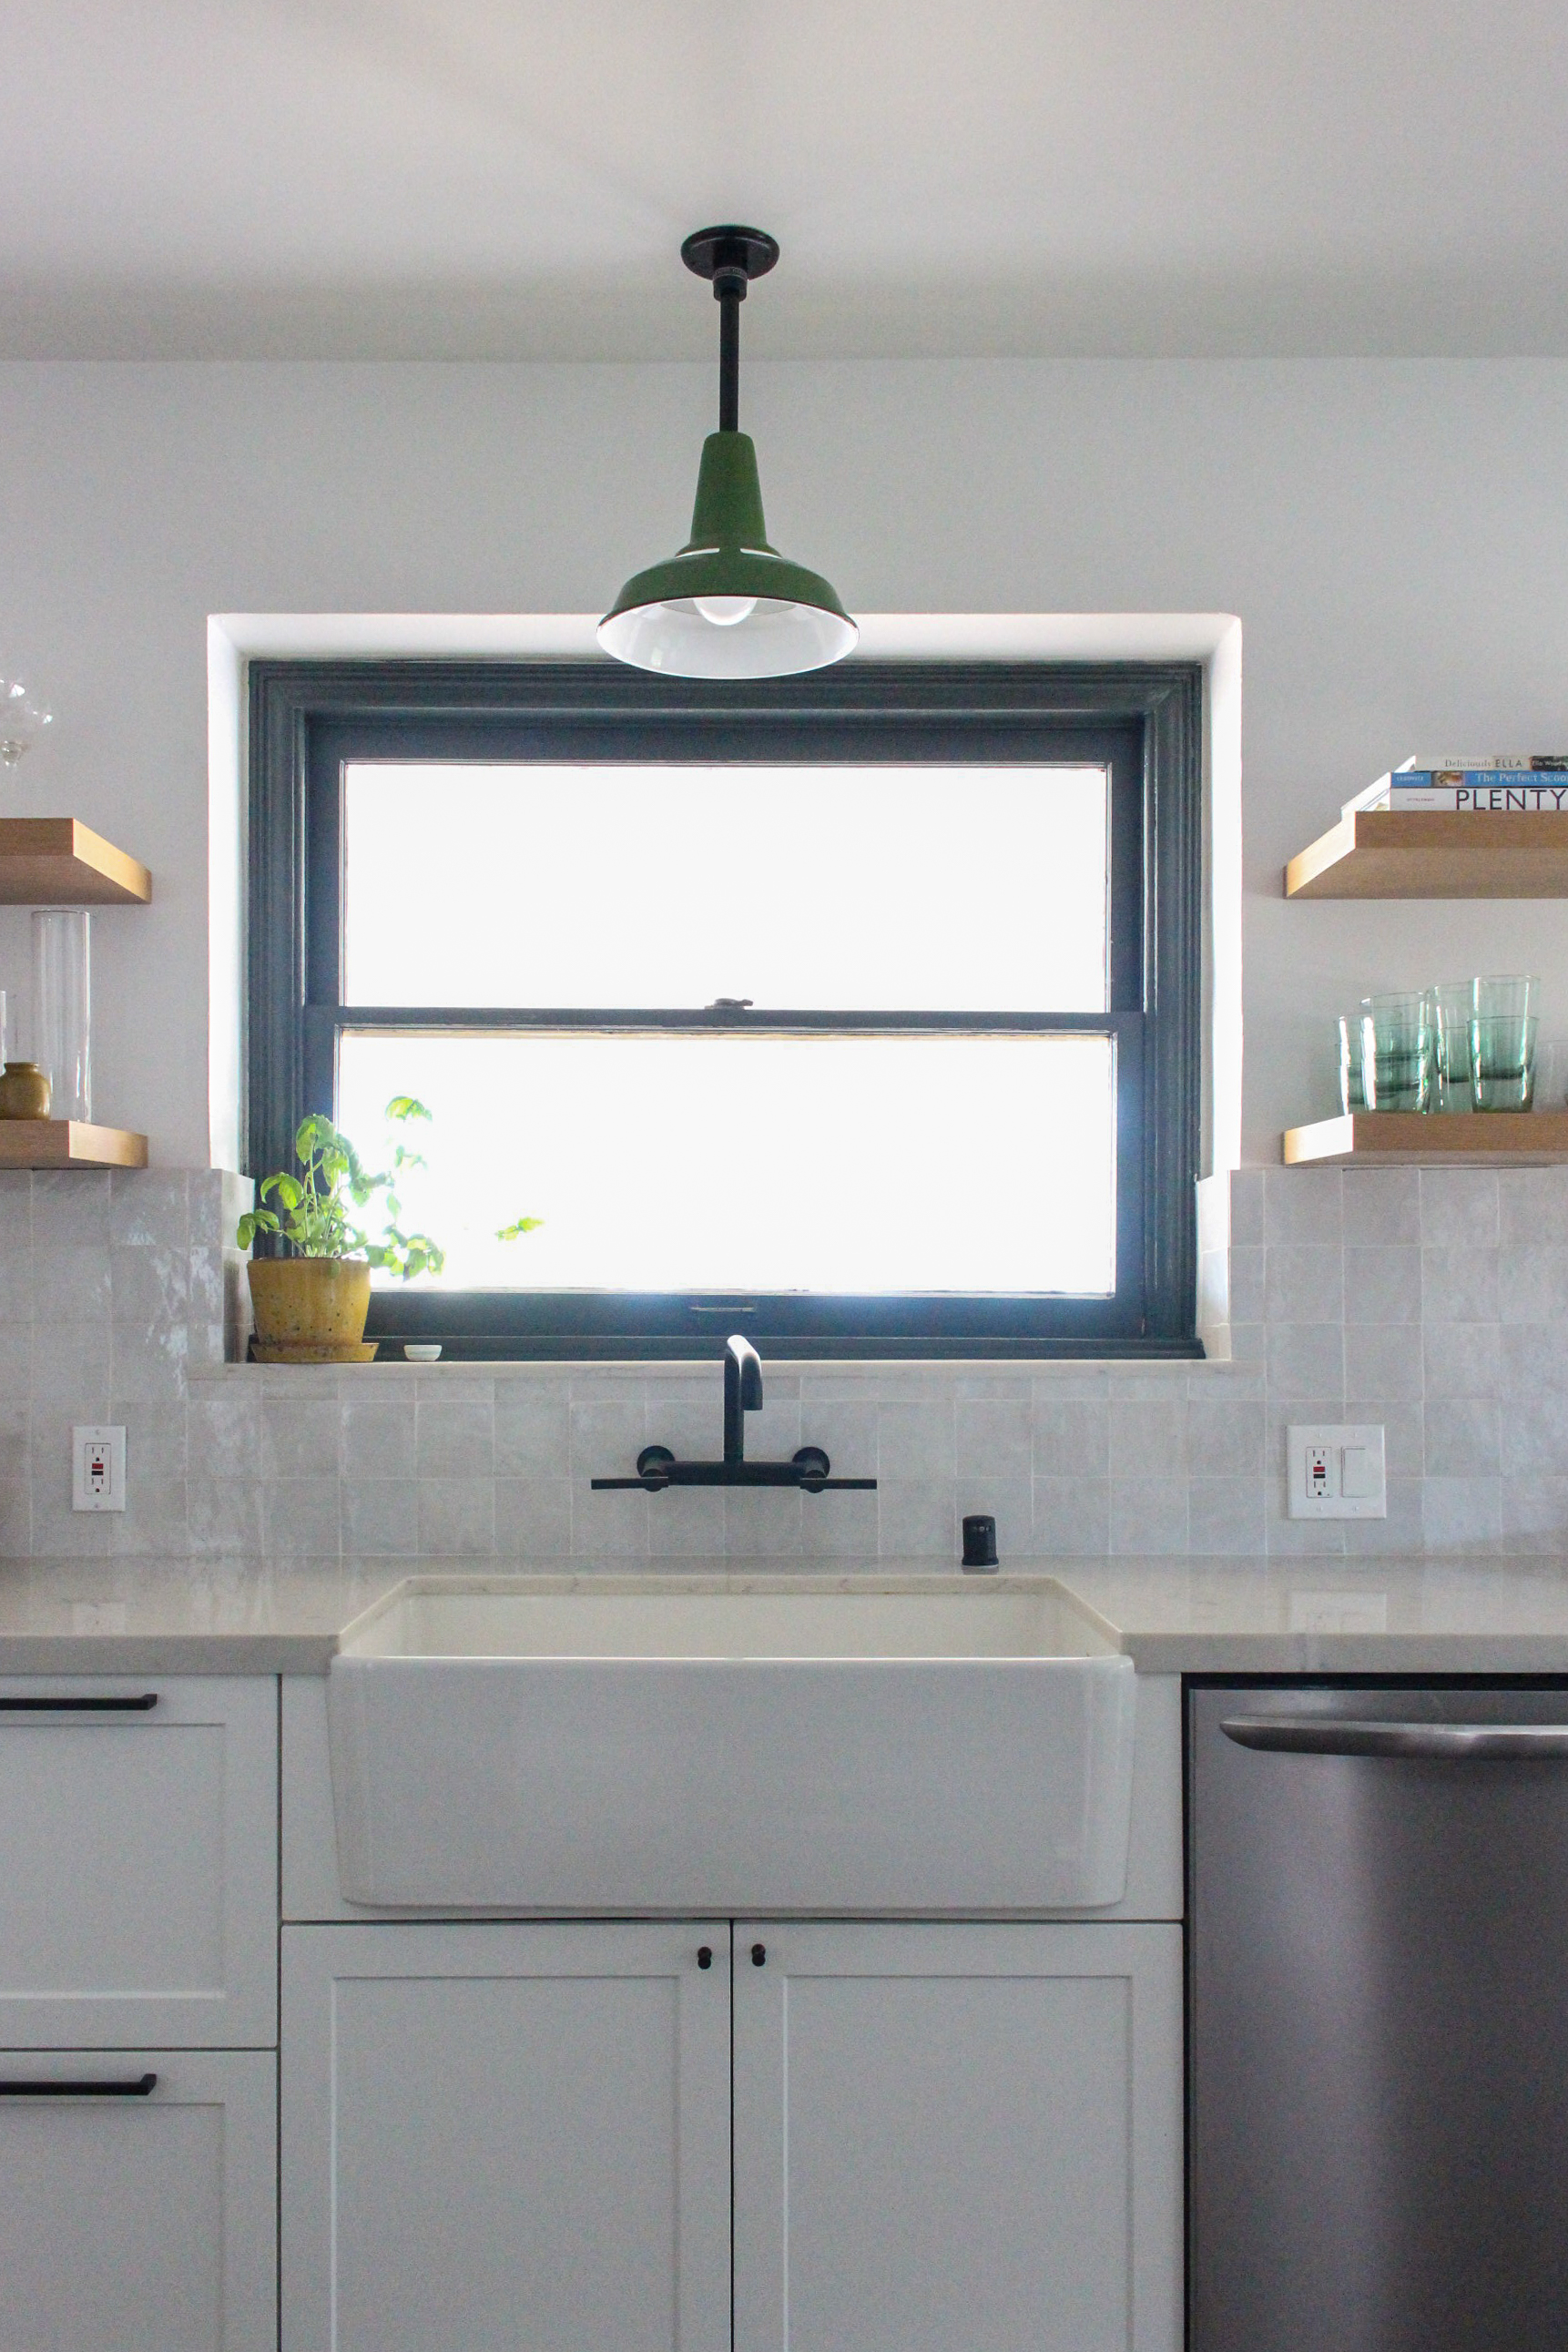
For the cabinets, we definitely wanted plenty of storage, functionality and durability, but didn’t want to break the bank. So after looking at a few options and getting some custom cabinetry quotes, we opted for a middle of the road approach using Ikea for the boxes and drawers, and Semihandmade for the fronts and cover panels. I was able to visit the showroom and see samples in person which was great. They made the ordering process so easy and were always available to answer my endless questions. For the color and style we went a few different directions which included going either black, green or flat panel but after much thought we decided to stick to white shaker, which was consistent with some of the existing built ins in the house. We also have some black hardware accents and wanted to create some consistency there as well. To counter the traditional feel of the shaker fronts we went with a clean, modern drawer pull and a slightly midcentury style knob.
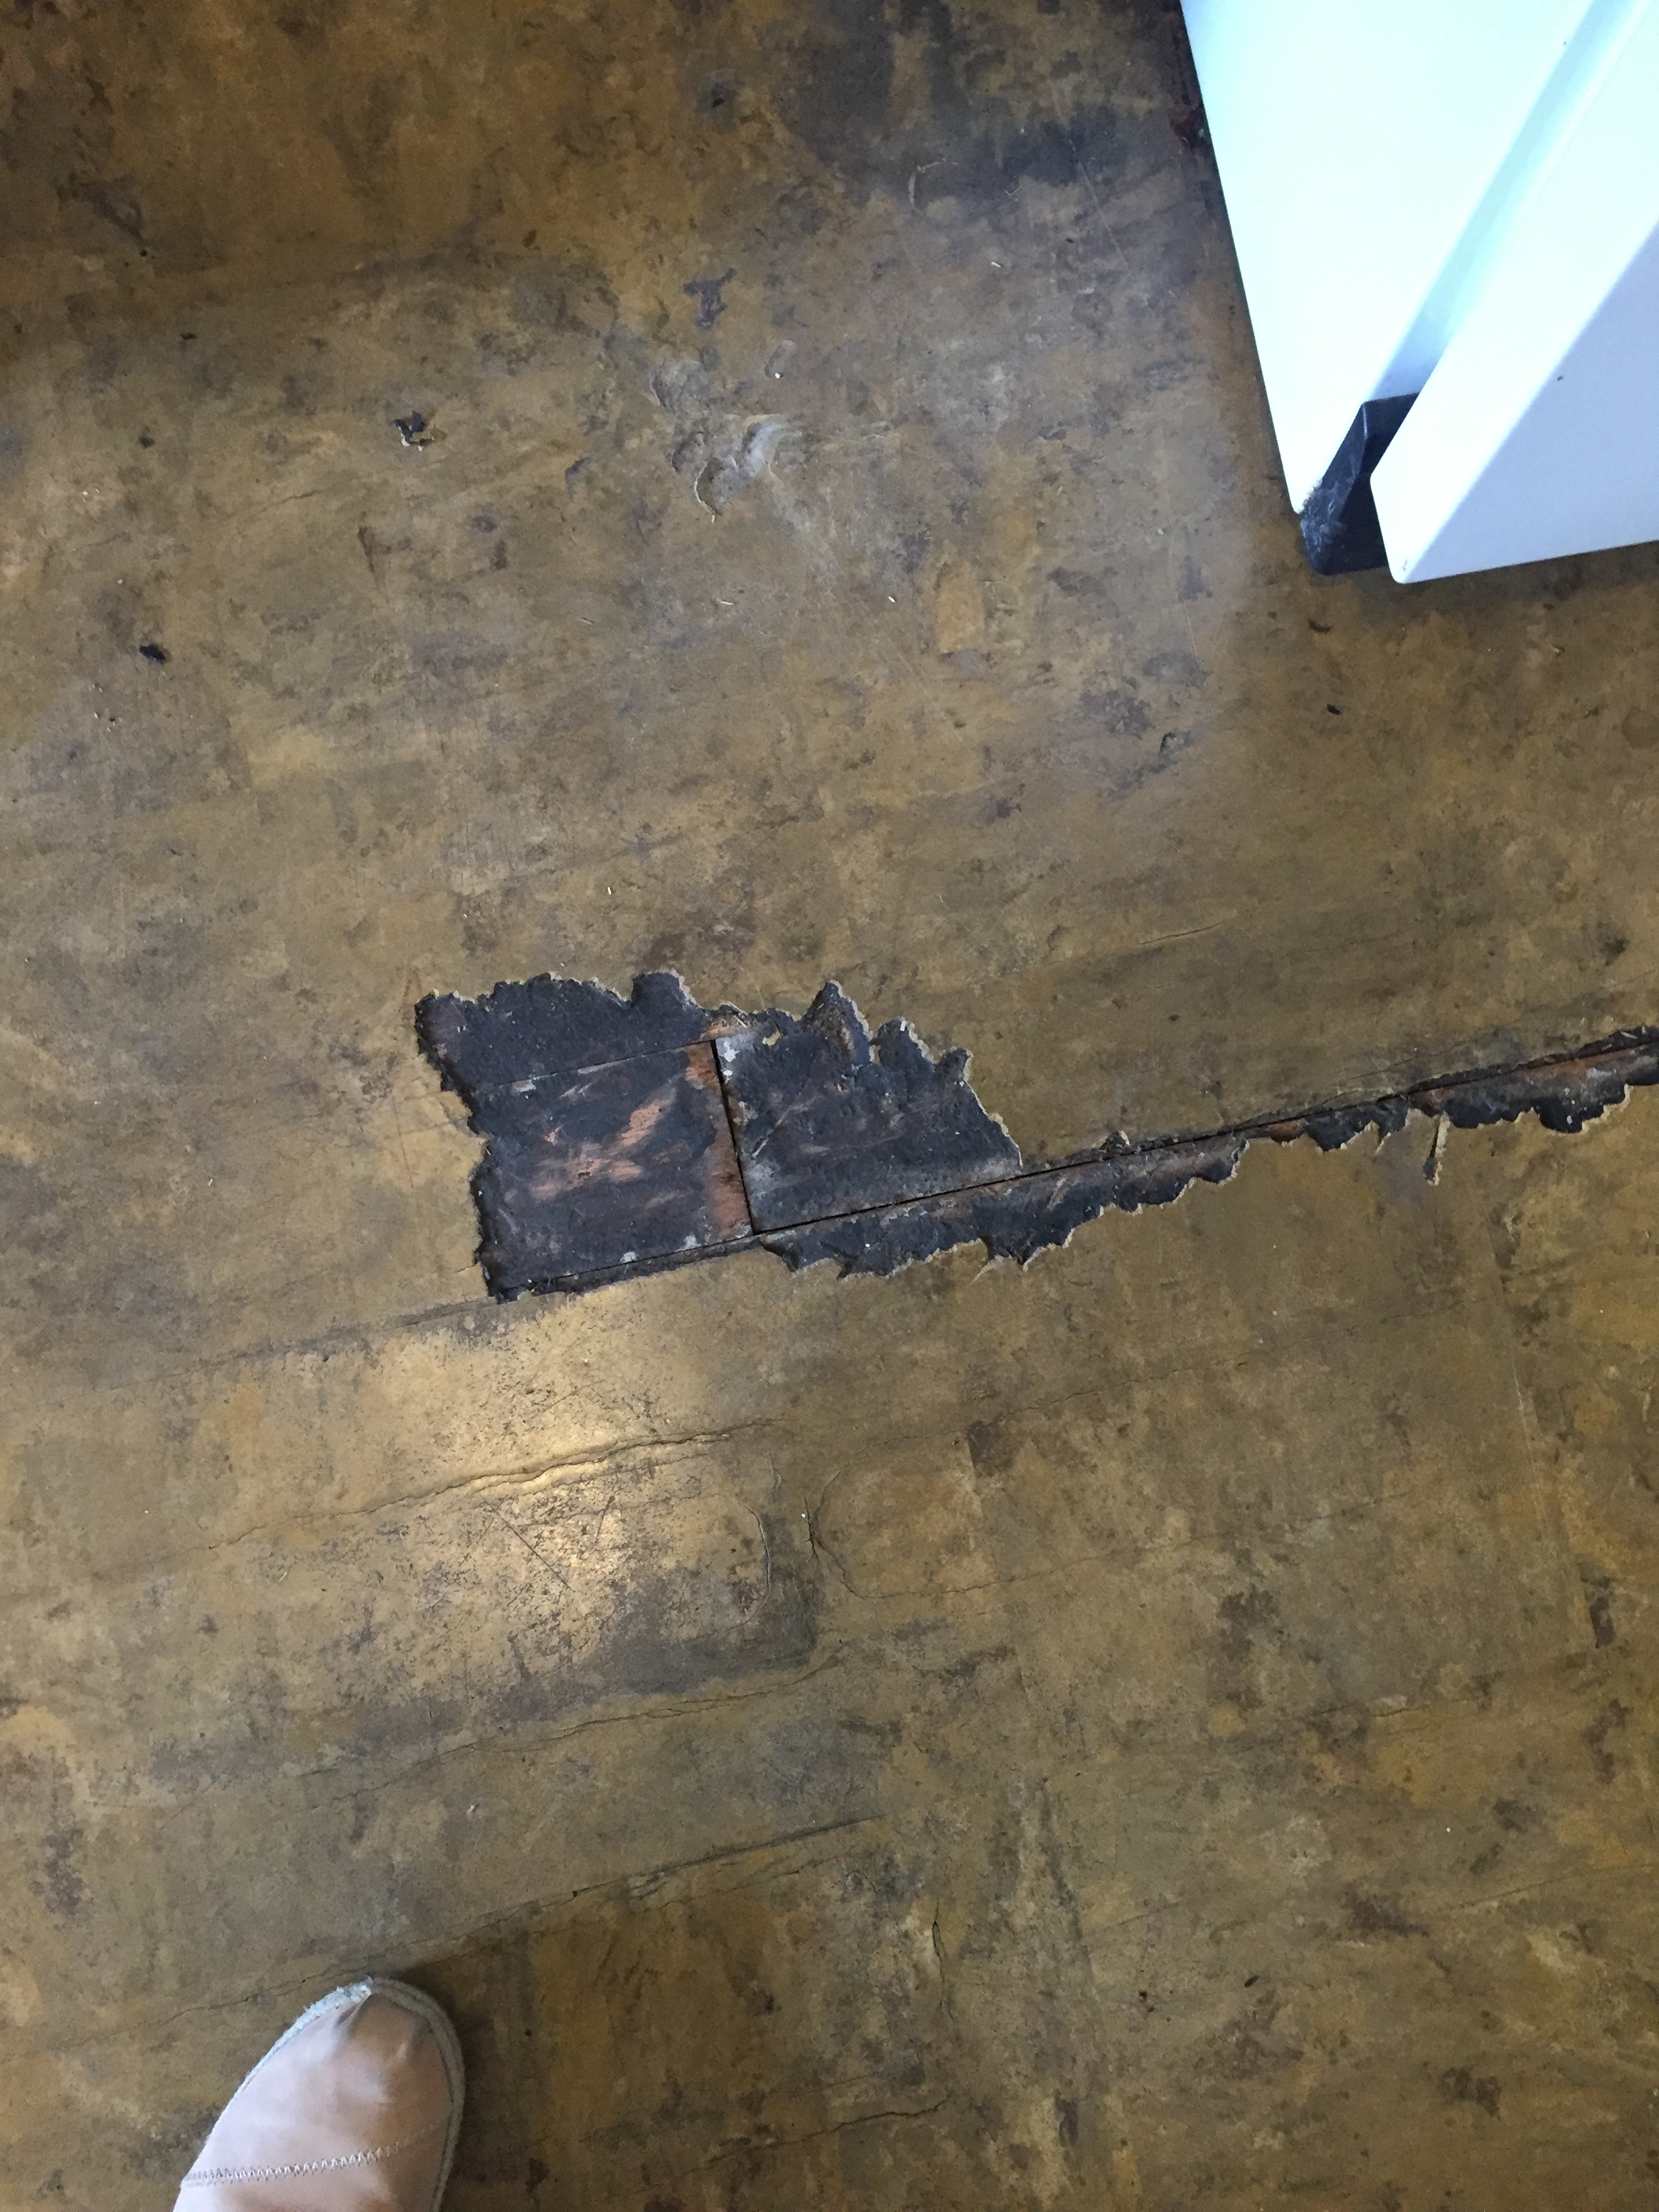
Flooring:
Flooring was one of the primary reasons we needed to renovate the kitchen in the first place (second to the cabinets which were falling apart). The old linoleum flooring was chipped, creaking and discolored - aka barf color. There was certainly no saving it, so we wanted to do something that was durable and was a good transition with the dark wood floors in the rest of the house. After deciding on white cabinets we knew we wanted to go dark with the flooring for contrast, but not black. We landed on a dark grey cement tile in a hexagon pattern, which is a nice nod to our deco inspiration and the tile we used behind the stove.
Backsplash:
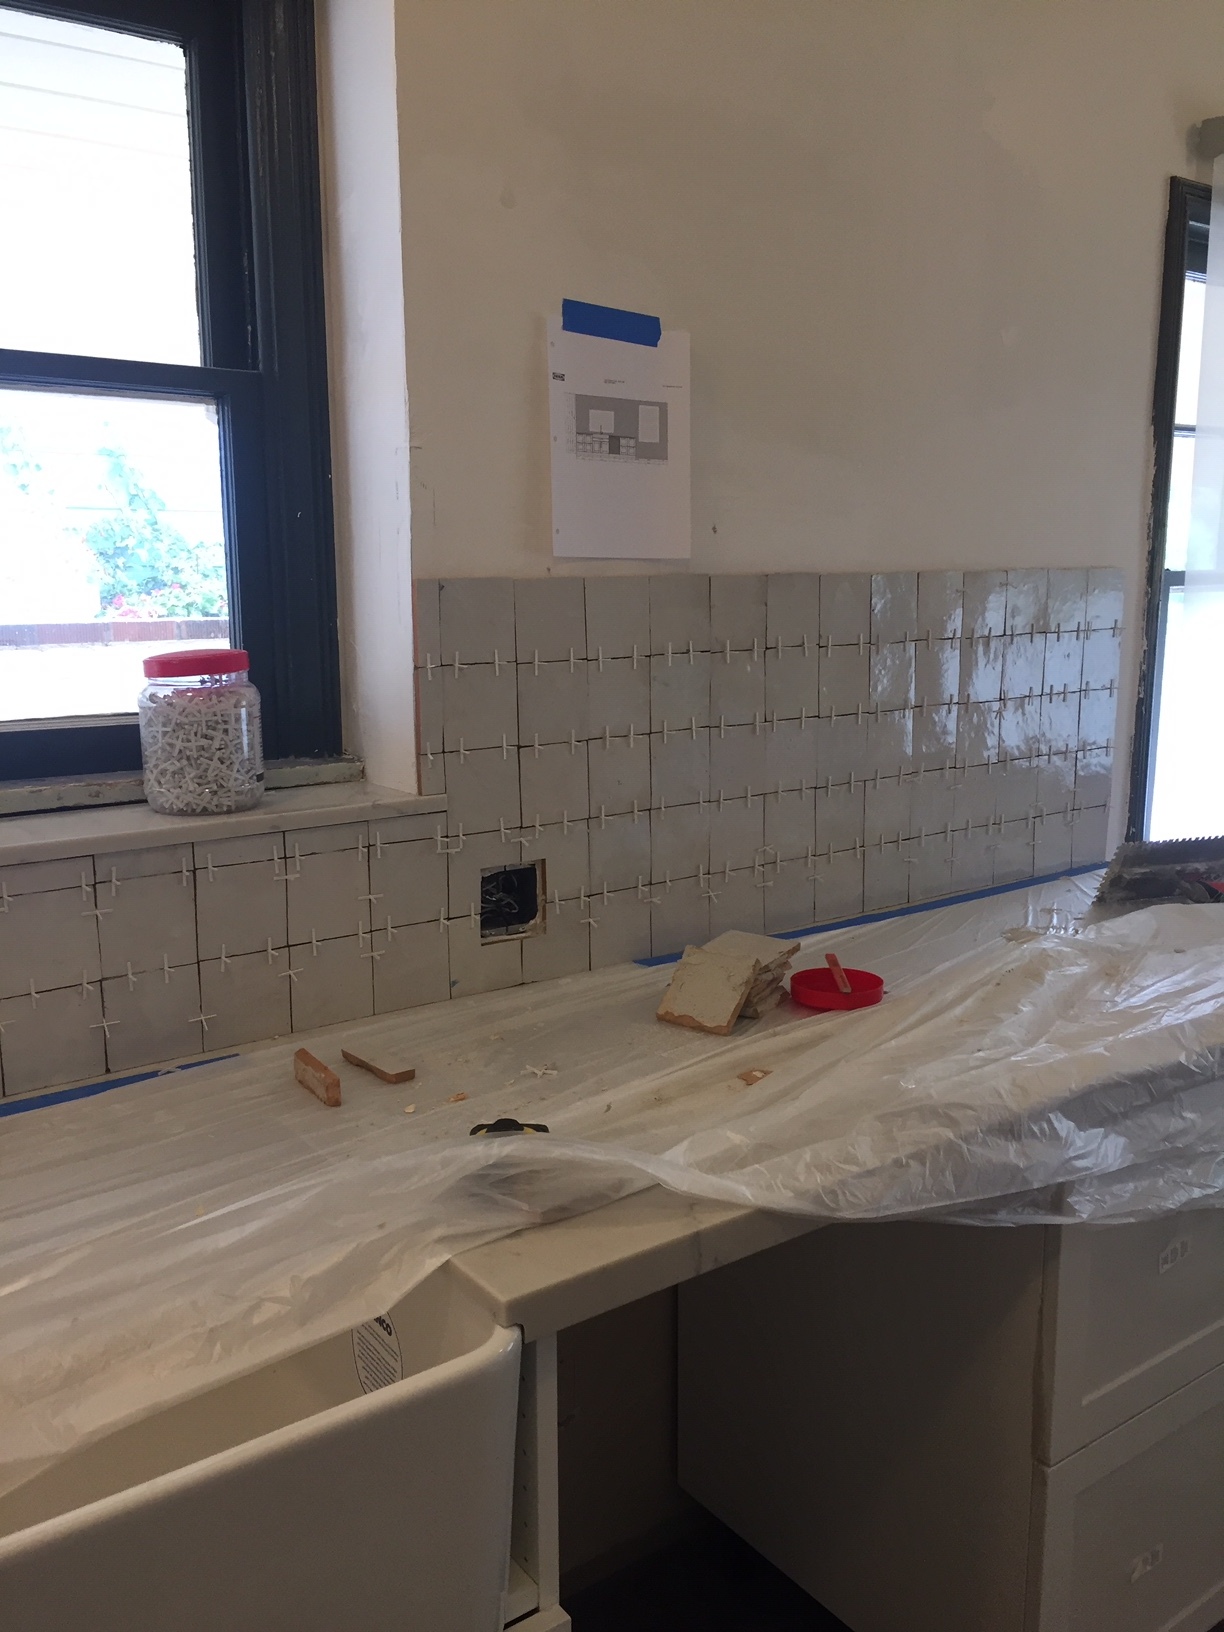
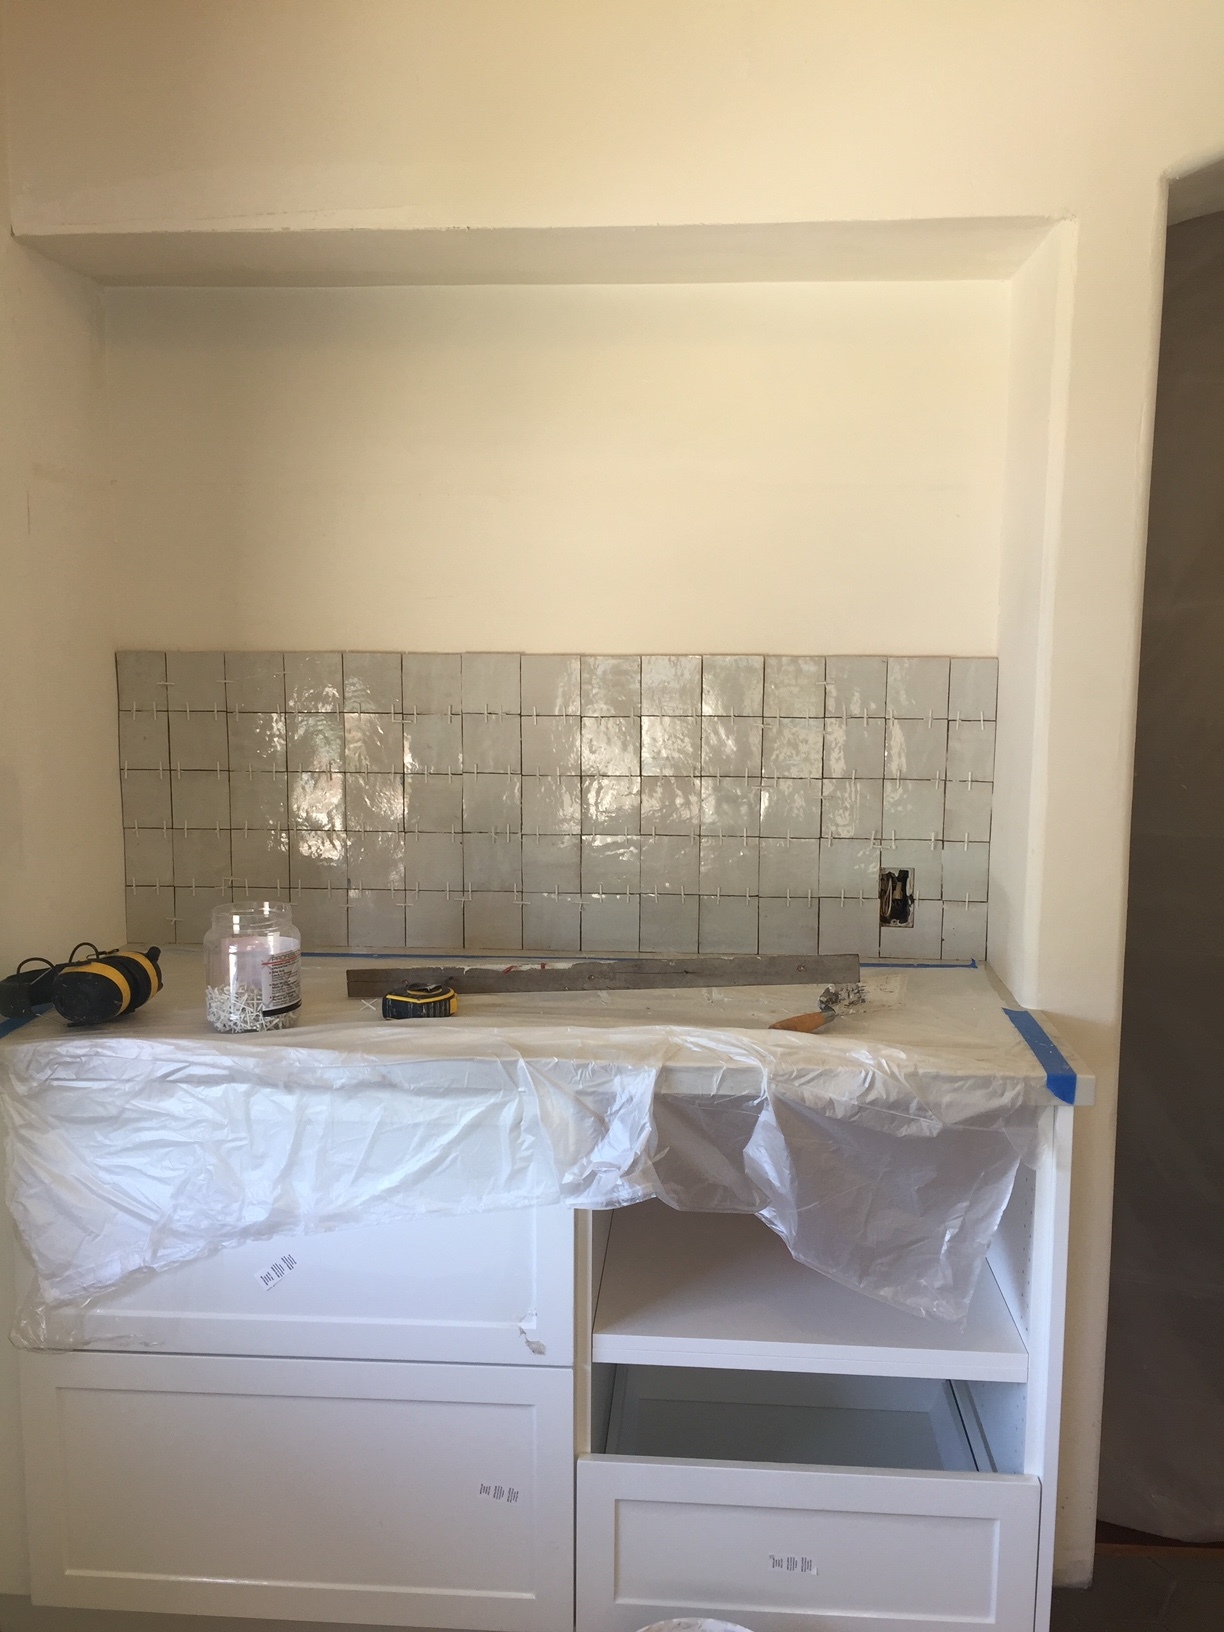
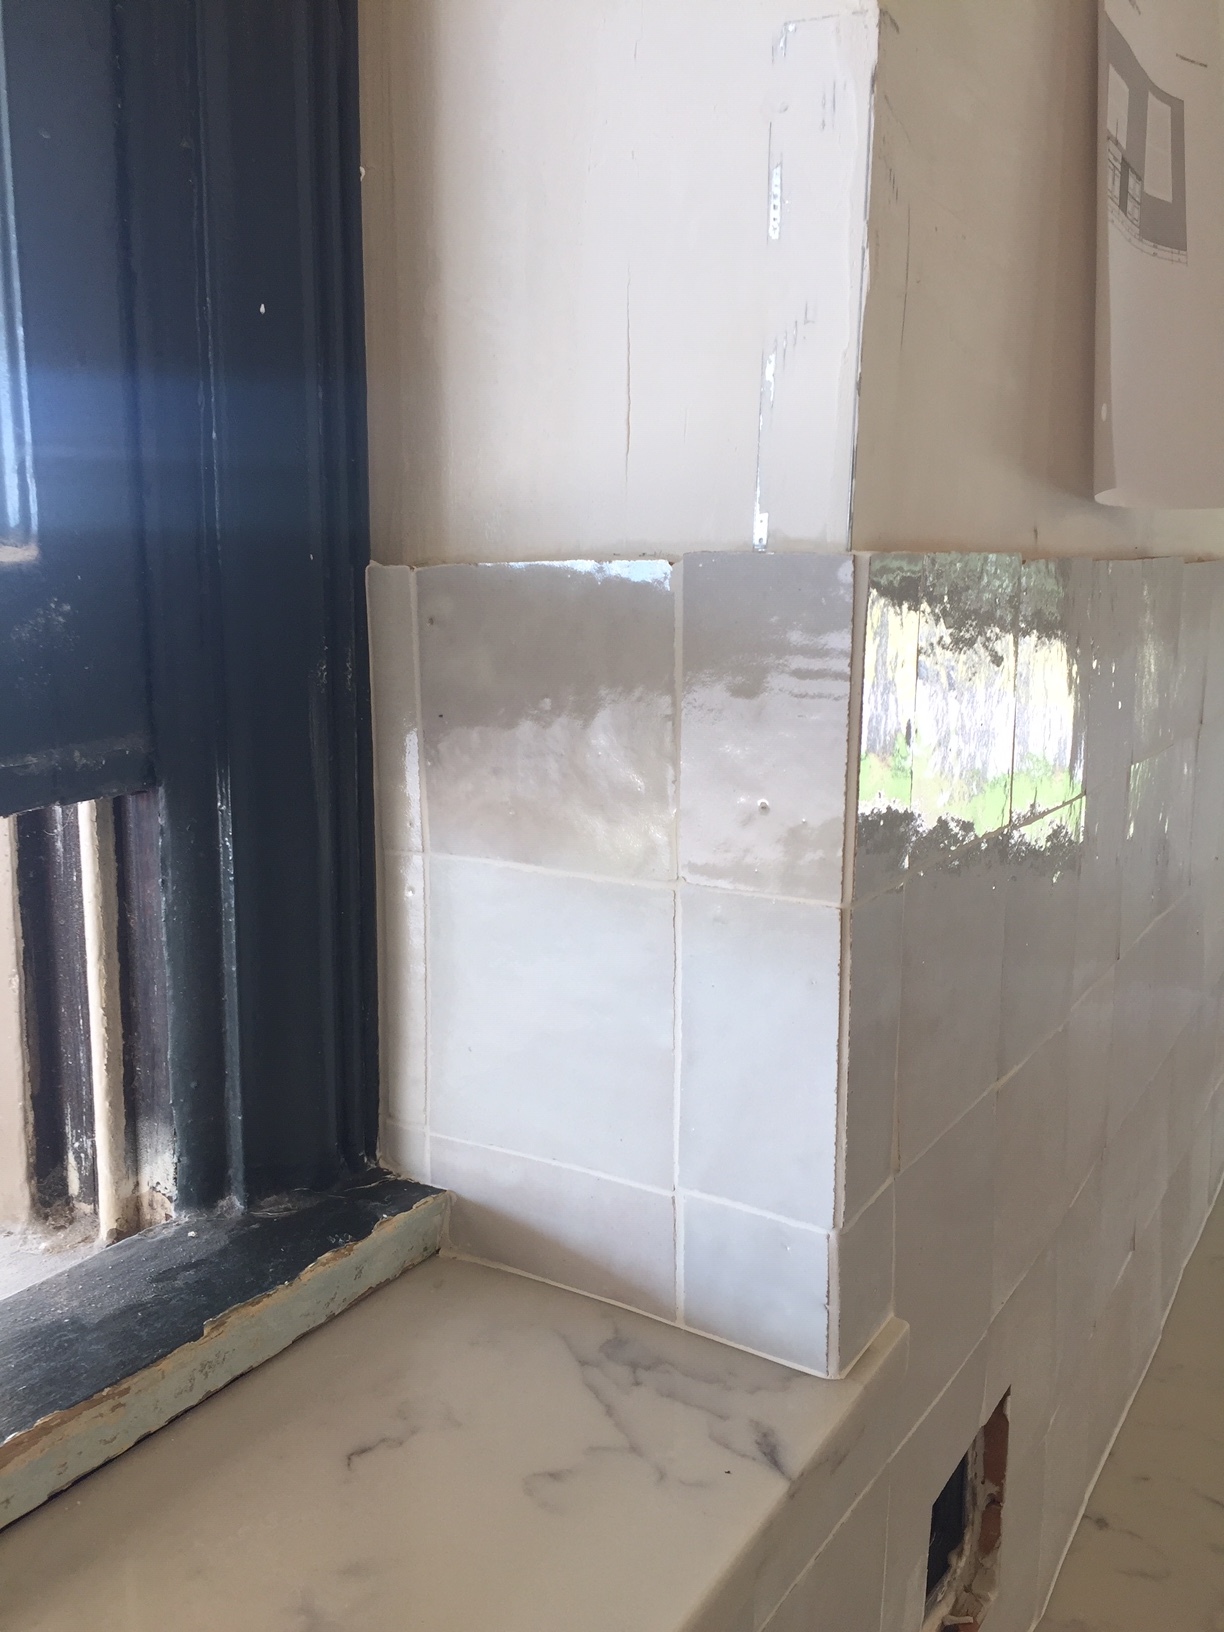
We decided to go neutral with the backsplash - and with the kitchen in general, since kitchens can get pretty cluttered and we wanted to have a calm backdrop for all the visual noise. Multi colored sippies anyone? We didn’t want to go the subway route, or even a geometric pattern or shaped tile. We wanted something that was imperfect and added to the romance that the spanish vibes in the house give off. So after discovering zellige tile we knew we had a winner. We fell in love with the beautiful iridescent, irregular surface and the raw edges perfectly tied into our perfectly imperfect plaster walls. With all the white we needed a bold focal point so behind the stove we went with a graphic moroccan cement tile which would play off the dark floor and the black accents in the kitchen.
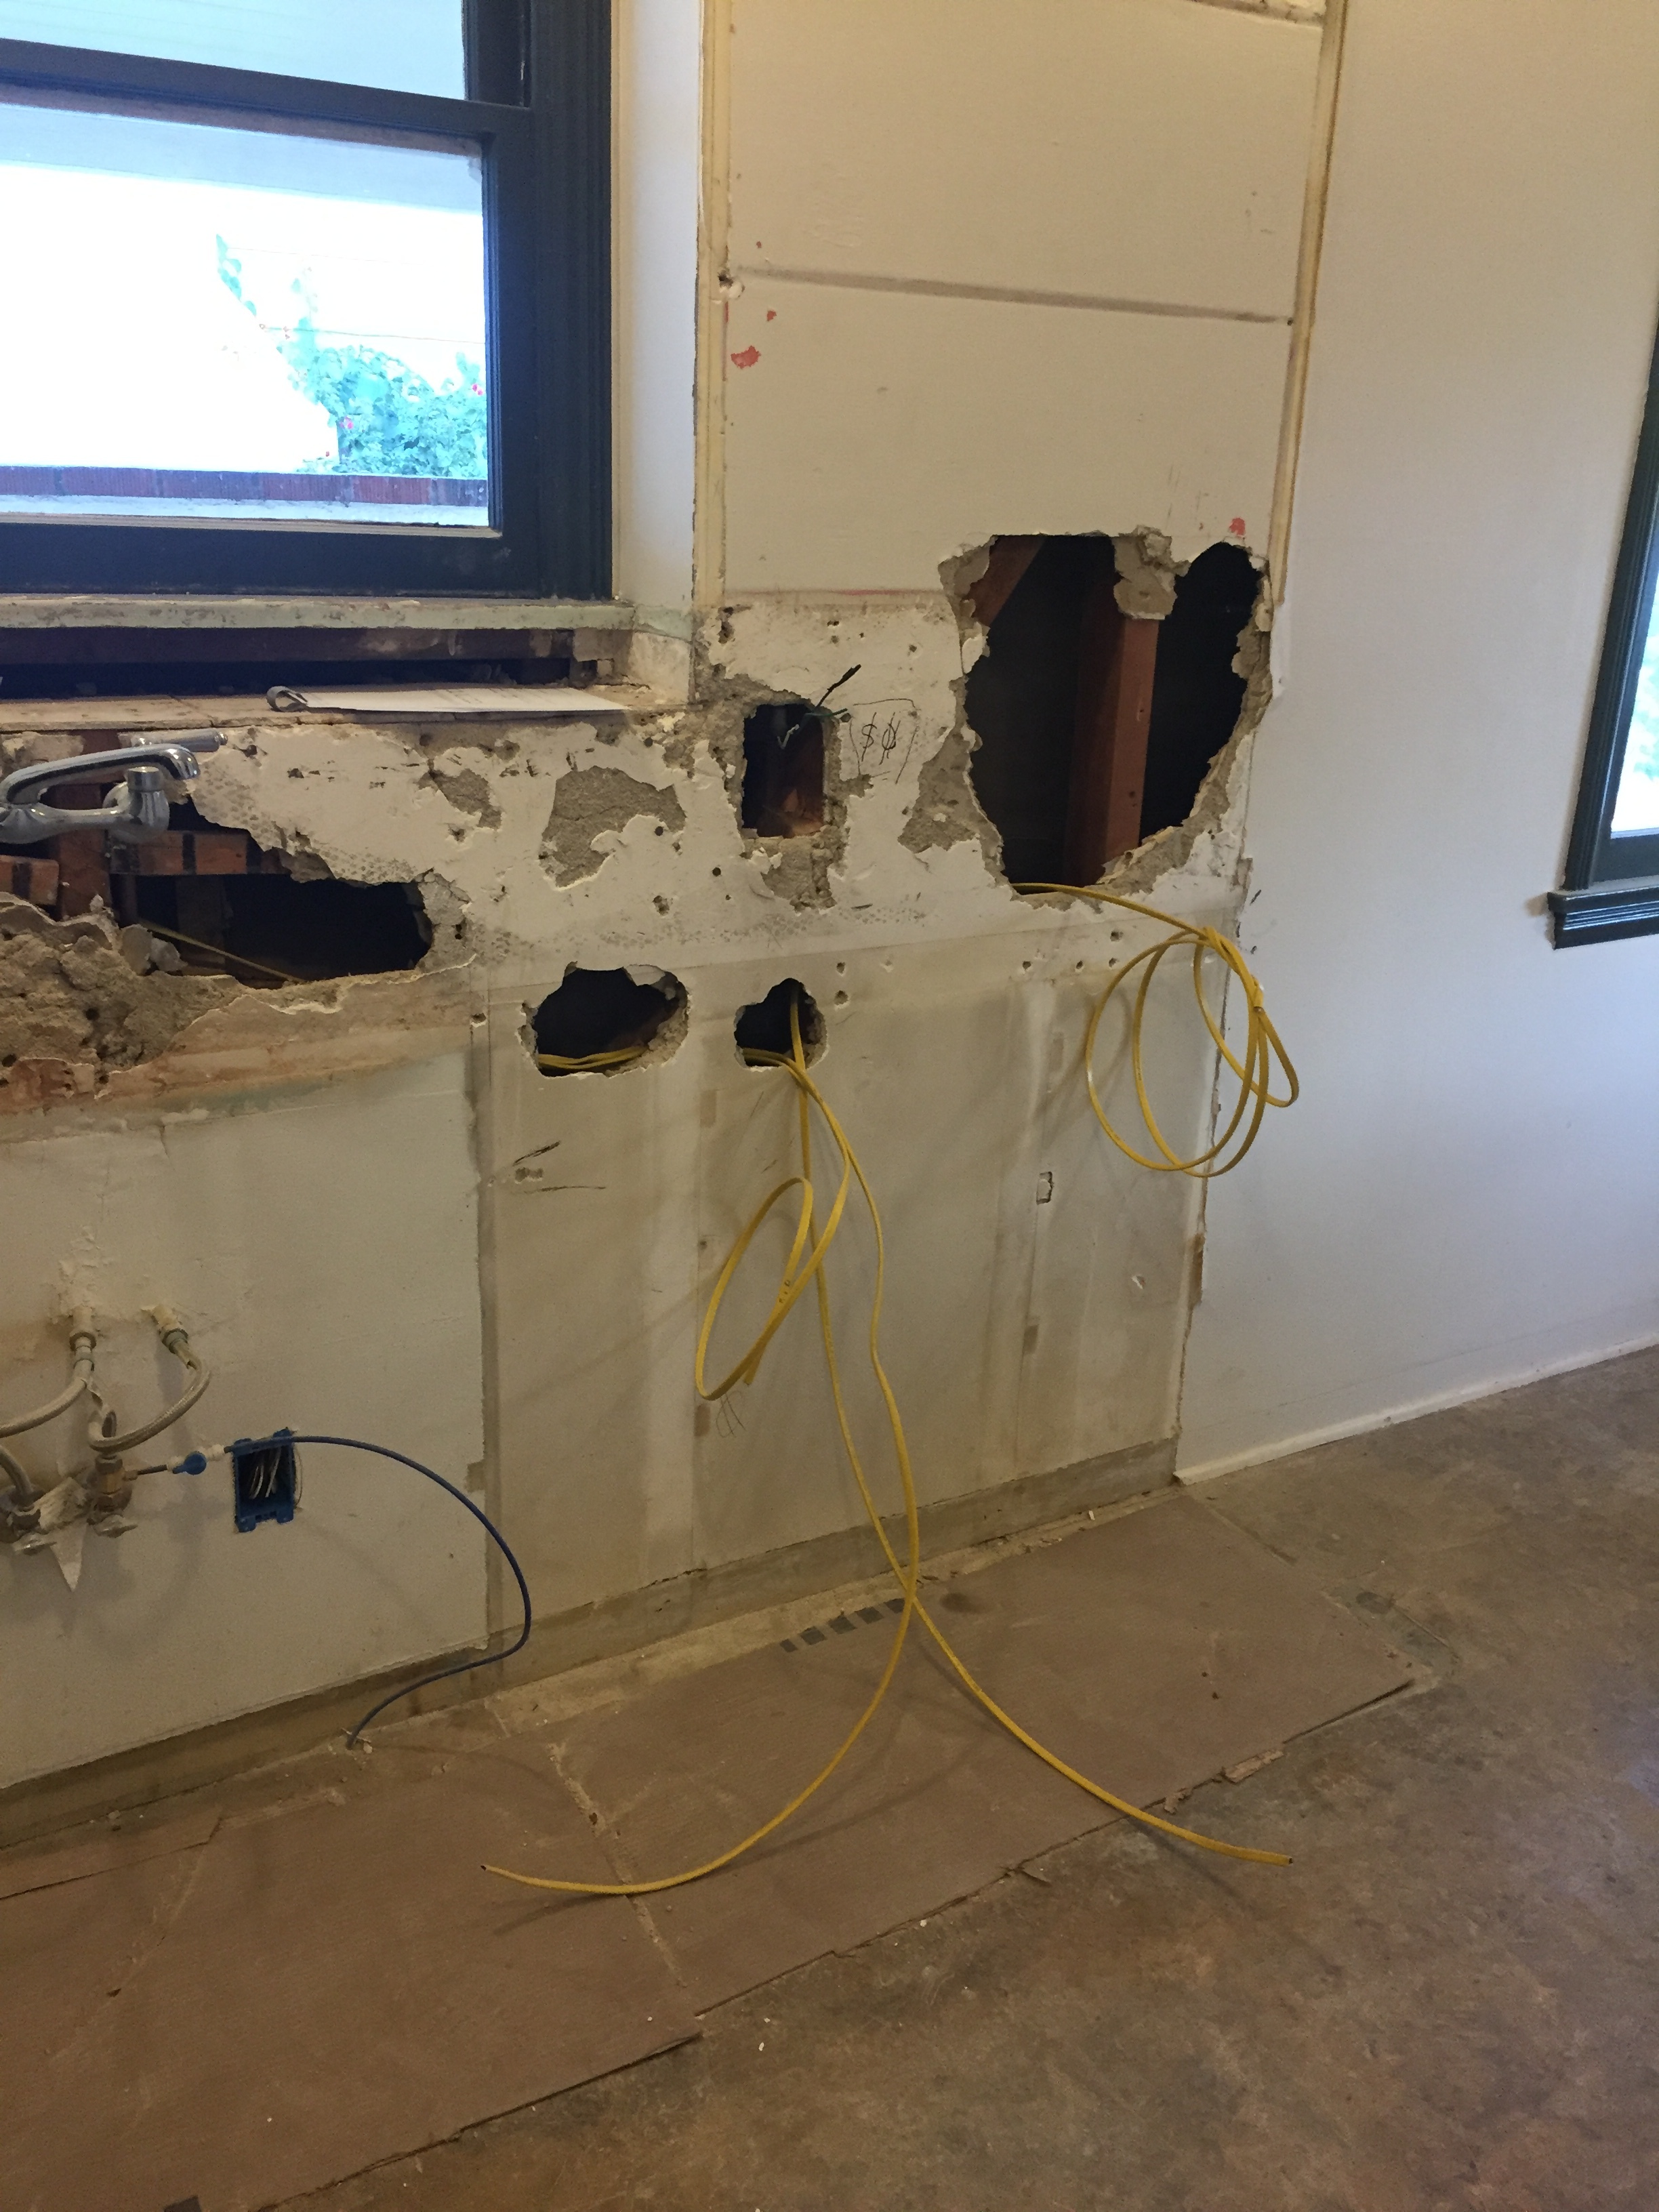
After getting a few quotes from contractors we opted to take the job on ourselves and I’m happy to say our sanity and marriage survived! It was actually a great decision since were able to keep a close eye on everything and ensure the integrity of the design stayed on track. I’ll spare you guys the tedium of the 6 week construction details (most of which was spent waiting for the faucet and light to arrive) and skip right to the progress pics.
Progress Photos:

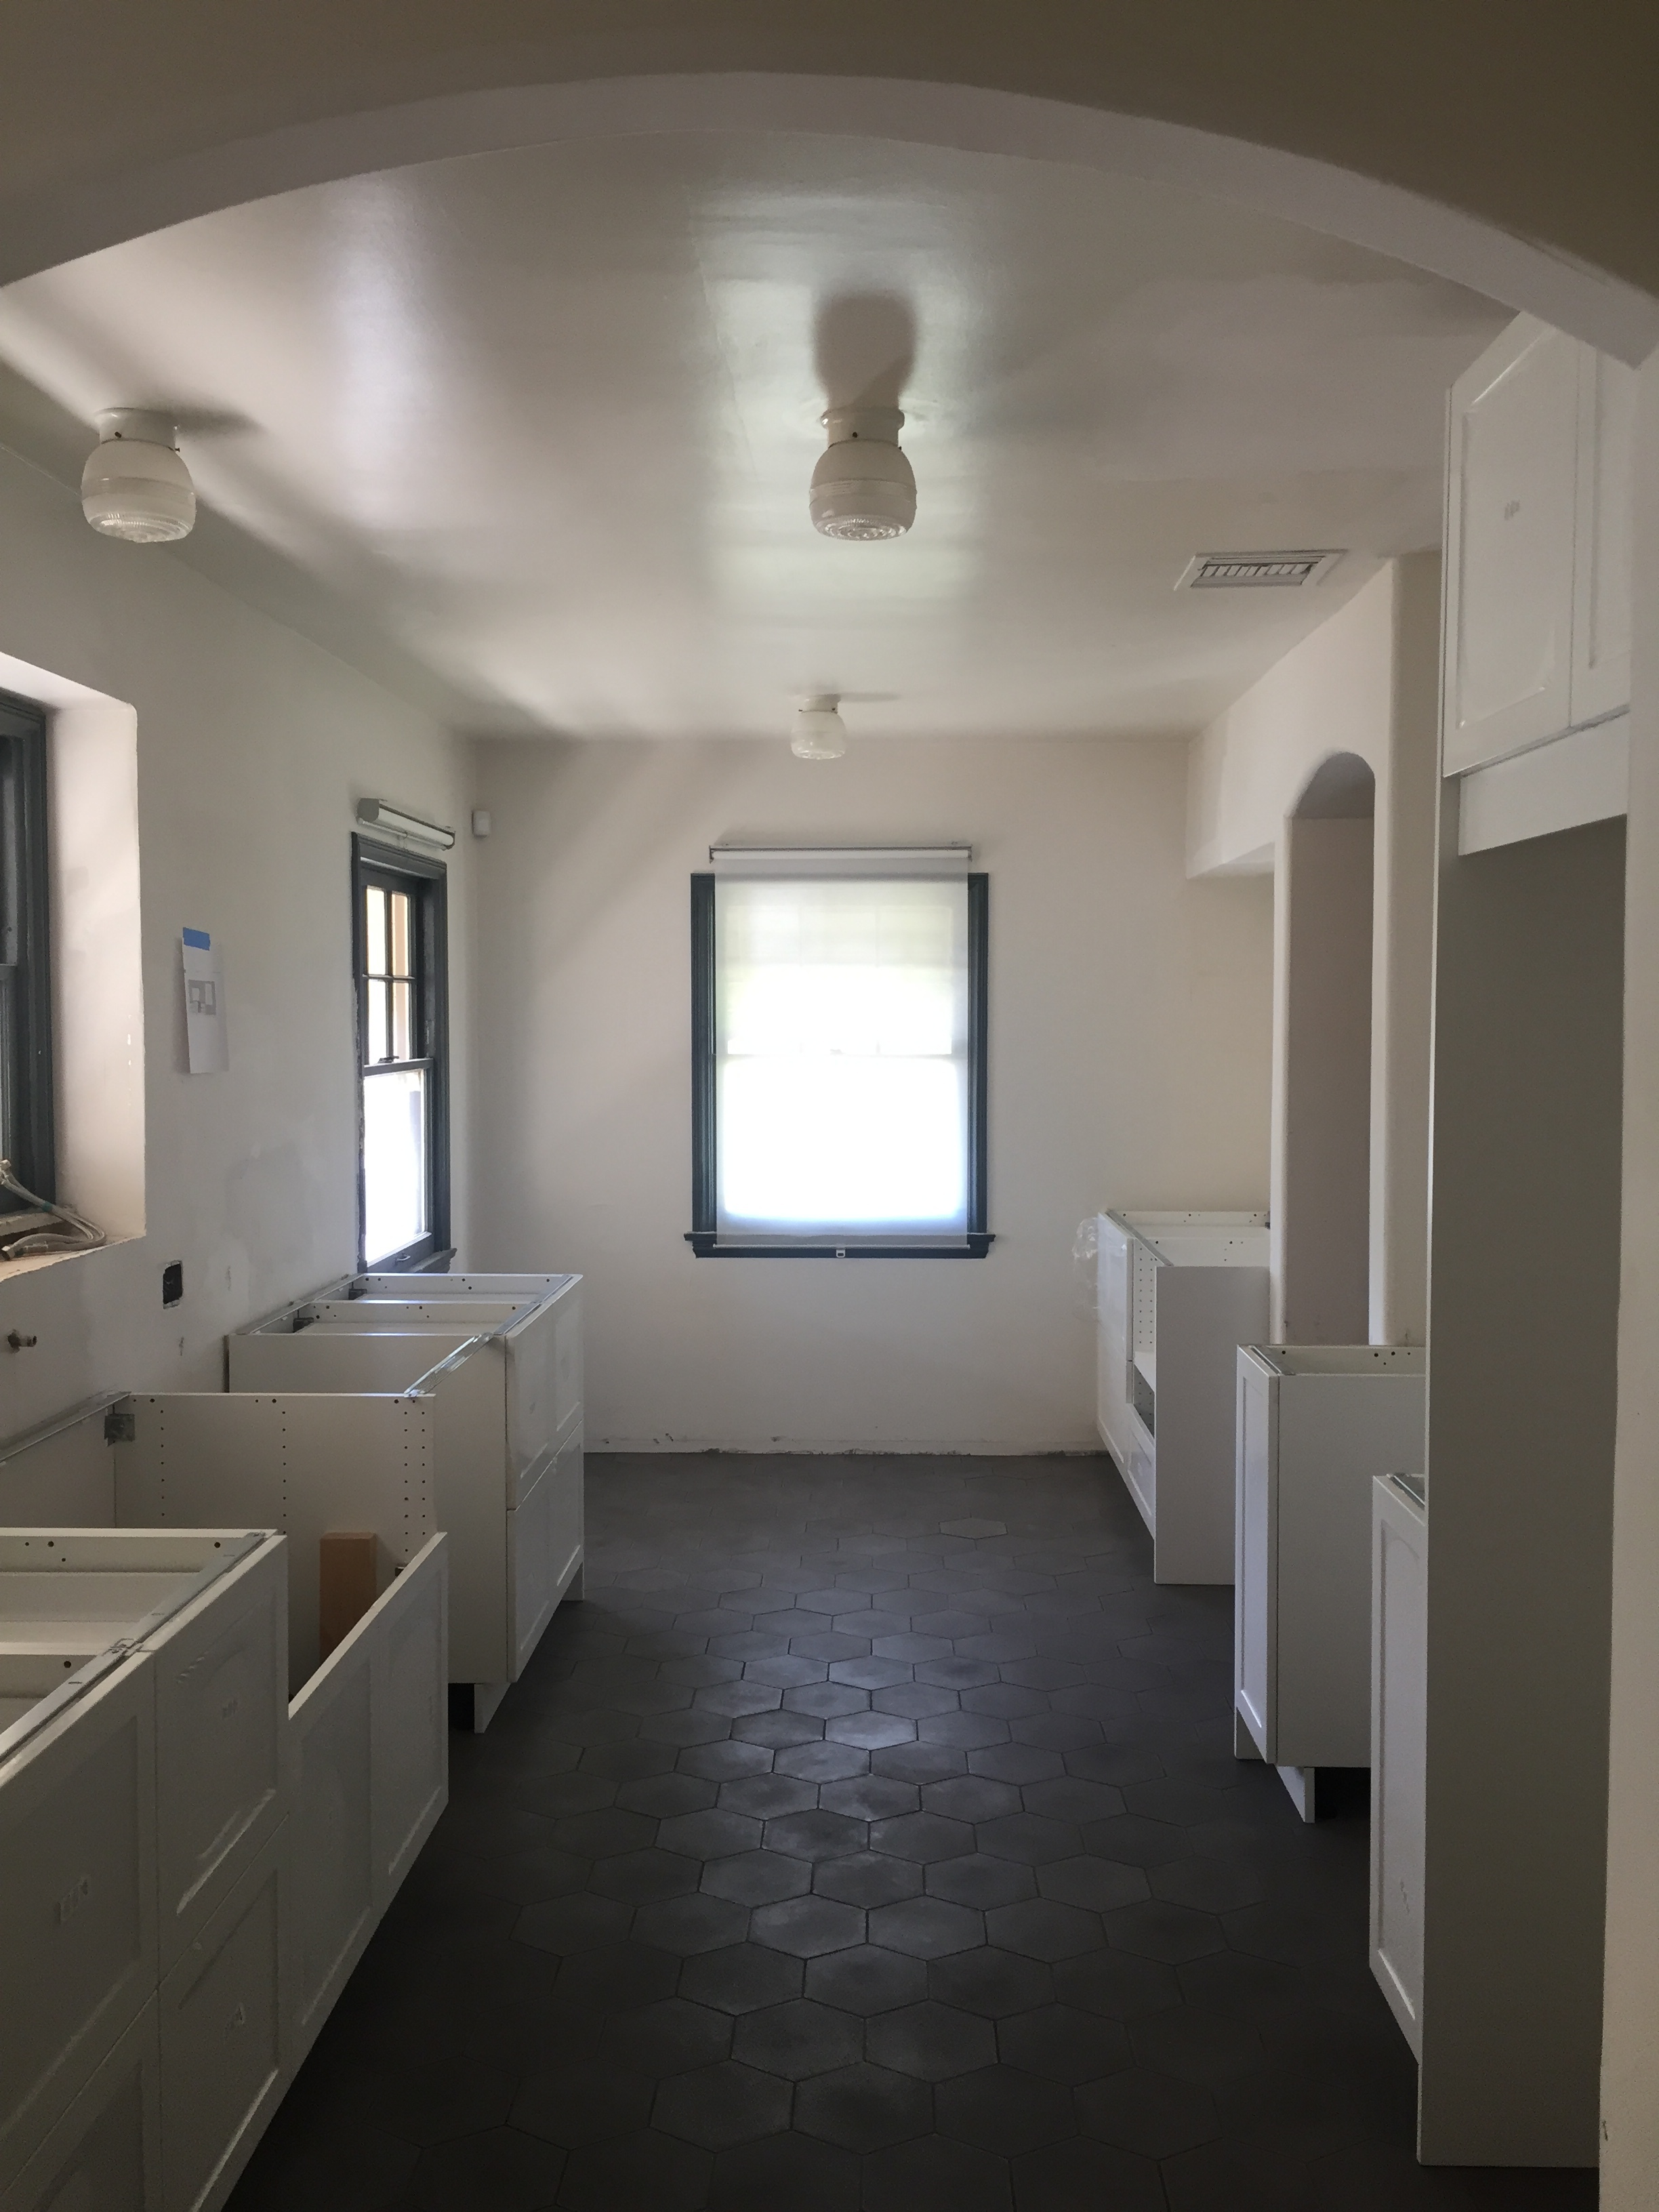

After all that hard work, we had a few other loose ends to take care of, like mounting the shelves, ordering window treatments and installing the Elfa system in the pantry. So here’s how it turned out! I hesitate to say its finished because we’re always #housetweaking so in my mind its always a work in progress.
After:

Hope you enjoyed reliving our kitchen reno journey! Now I’m itching to do another one - anyone game? xo -jojo